Directions for Use
90
Operation Manual
2.5.2 Turning the power switch on
See also : "2.3.1 Turning the power switch on" P.54
2.5.3 Openingng the image formulating window of Image Creator
See also : "4 Directions for Use of Image Creator" P.110
2.5.4 Setting the Exposure Mode
Setting the Exposure mode using the control panel
See also : "From the control panel:" P.56
Setting the Exposure mode using the image formulating window of Image Creator
See also : "From the Image Creator :" P.59
2.5.5 Seating and positioning the patient
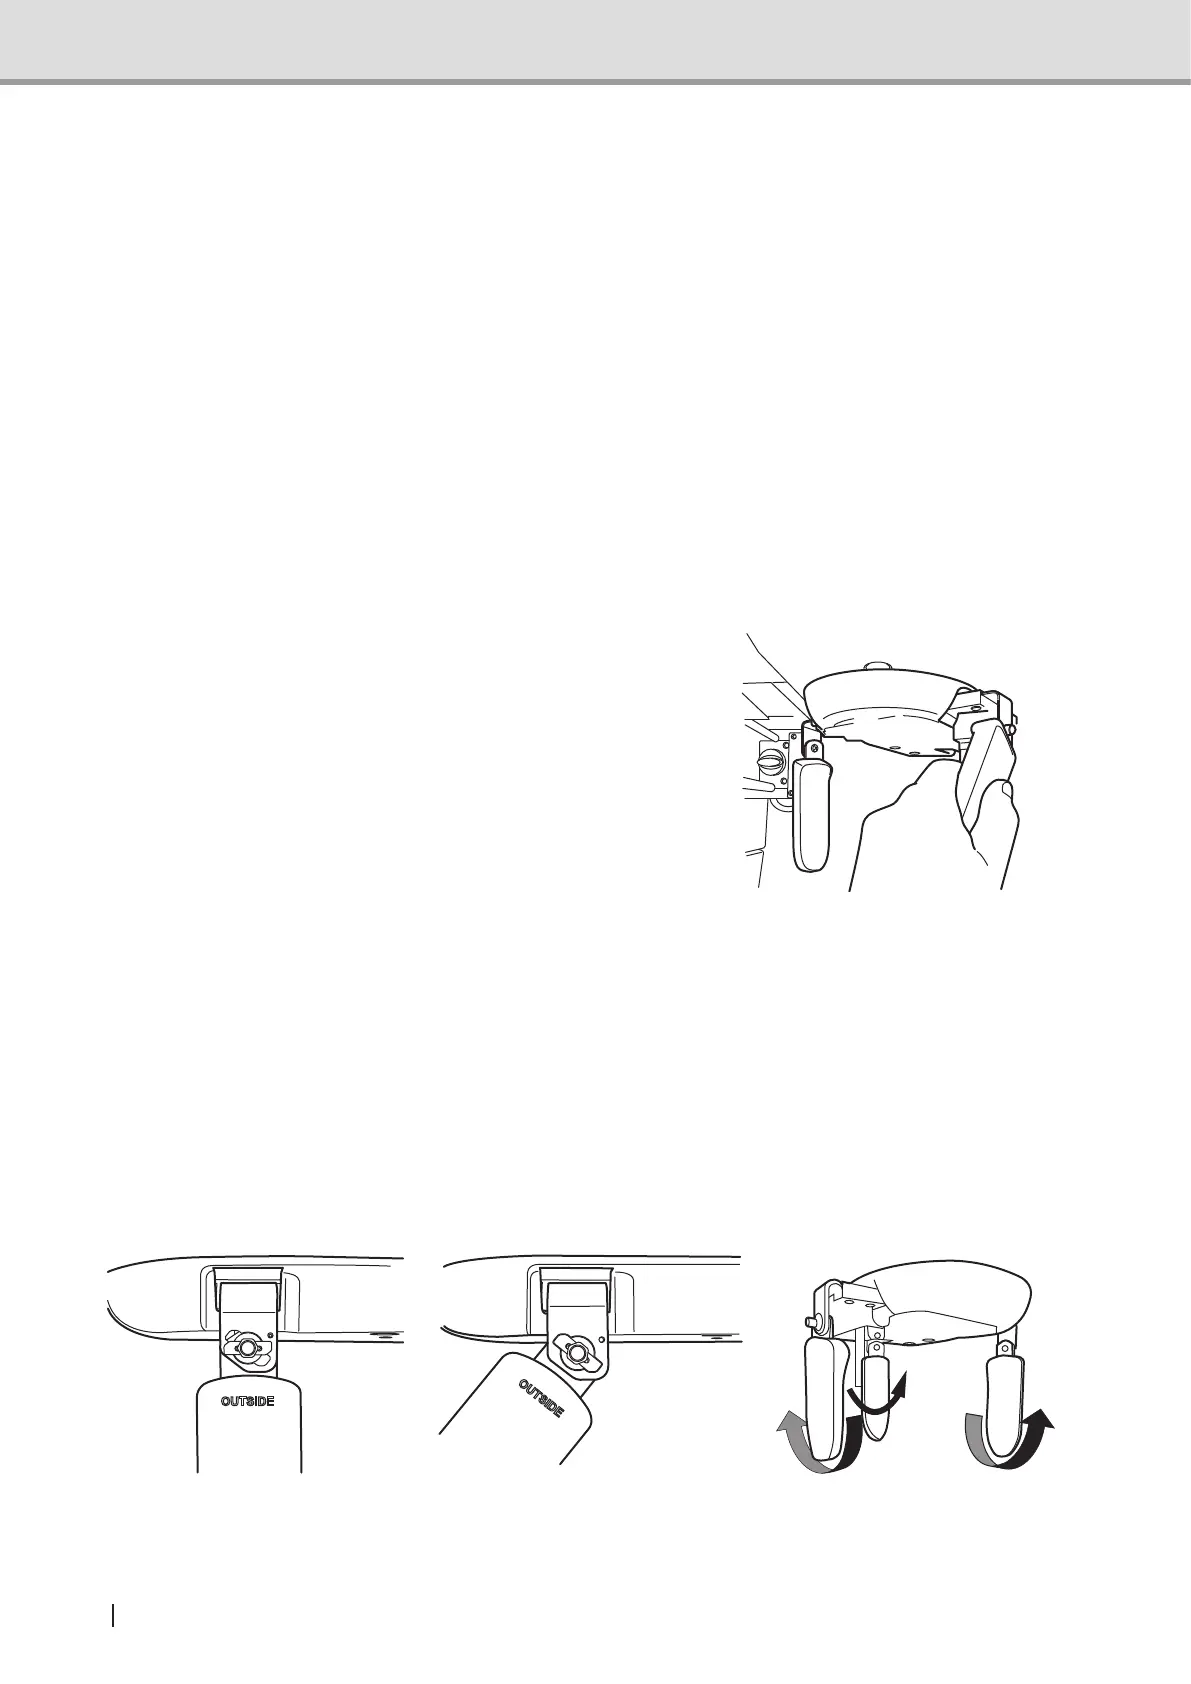
2.5.5.1 Removing the head support
Removing the forehead support and Lateral head support from the head support unit.
How to remove and attach the head support
1. How to remove
Rotate the forehead support and the Lateral head support to the removing position. Refer to
thegurefortherotationdirection.
Forehead support: Rotate to the right and pull to the inner side.
• Right Lateral head support: Rotate to the front and pull to the inner side.
• Left Lateral head support: Rotate to the back and pull to the inner side.
2. How to attach
To attach, simply reverse the removal procedure.
Tilt forehead support and lateral head support toward the removing position. Insert them into
theholesfrominsideandrotatethemtothexingposition.
xedpositioning removing position removing direction