Agilent 4155C/4156C User’s Guide Vol.1, Edition 11 3-11
Connecting to Network
Using Network
Using Remote Printer
The following example prints a measurement result graph by using a remote printer.
1. Press the Graph/List key to display the GRAPH/LIST: GRAPHICS screen.
2. If you print the result graph, press the Plot/Print key. The GRAPH PLOT dialog
box appears.
If you print the screen image, press the green key and Plot/Print key. The
SCREEN DUMP dialog box appears.
3. Complete the dialog box. See Figure 3-4 for the example setup.
Note that the DESTINATION field must be PRINTER/PLOTTER for printing.
4. Press the PR/PL SETUP softkey to display the PRINT/PLOT SETUP screen.
5. Complete the PRINT/PLOT SETUP screen. See Figure 3-6 for the example
setup.
Select one of the softkeys in the DESTINATION field to specify a remote
printer. Do not select the GPIB softkey or PARALLEL softkey that specify a
printer connected to the 4155C/4156C directly.
6. Select the EXIT softkey to close the PRINT/PLOT SETUP screen.
7. Select the PRINT PLOT softkey to start printing. The hardcopy will be almost
the same as in Figure 3-7.
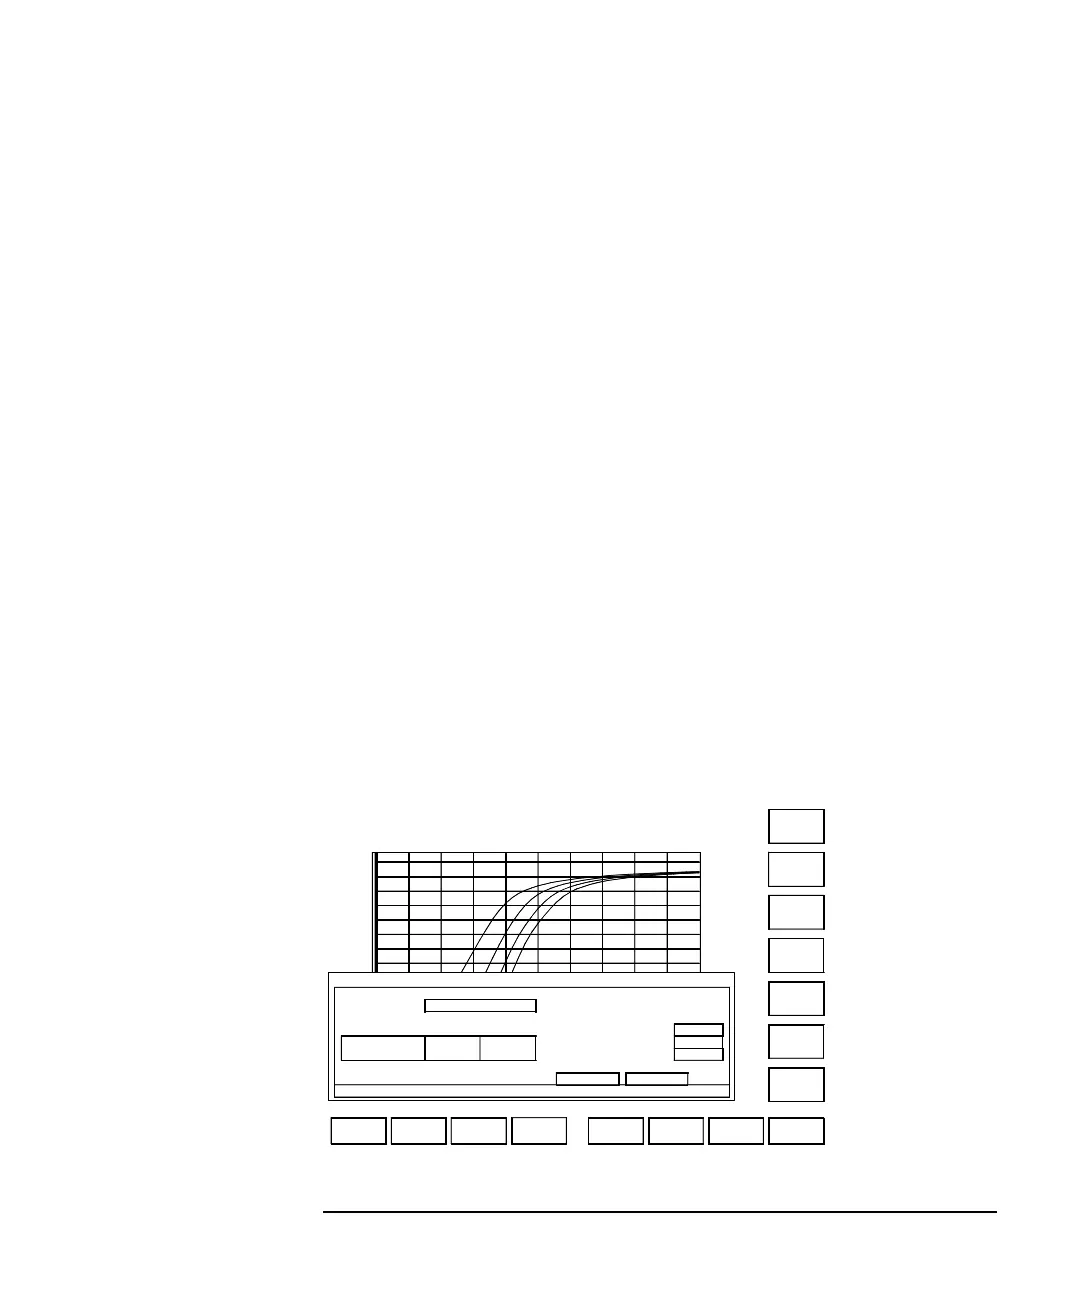
Figure 3-4 Printing Result Graph
GRAPH/LIST: GRAPHICS MEDIUM
S
PR/PL
SETUP
PRINT
PLOT
EXIT
PRINTER
PLOTTER
FILE
(A)
100.m
Id
decade
PRINTER/PLOTTER
GRAPH PLOT
*DESTINATION PRINTER/PLOTTER
*OUTPUT REGION *GRAPH TRACE ONLY NO
UPPER LEFT X 10 % Y 0 % *PRINT SETUP DATA YES
LOWER RIGHT X 90 % Y 100 % POSITION BOTTOM
*LANGUAGE *RESOLUTION
*PRINT/PLOT COMMENT HR PCL 100 DPI
 Loading...