Chapter 3 Installing the Software and Connecting Components
Connecting the Sensors
Getting Started Guide 3-11
3
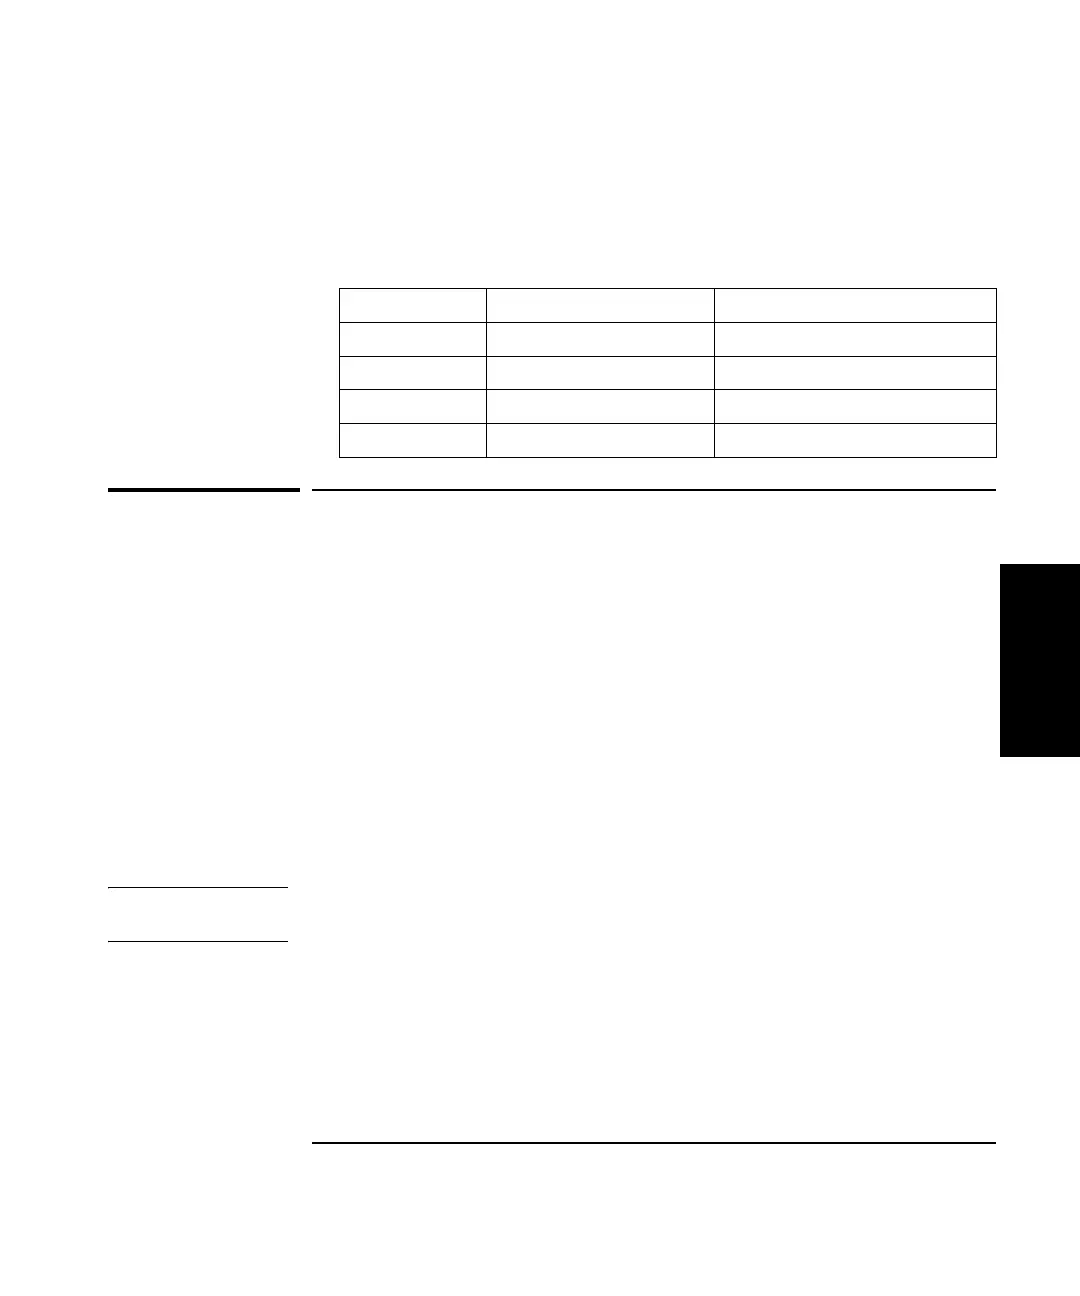
Communication LEDs
The LEDs on the E1735A Axis Module and the E1736A Sensor Hub (see
Figure 3-4) indicate the following conditions:
Connecting the Sensors
This section explains how to connect the air and material temperature
sensors to your PC through ports on the USB Sensor Hub.
Before connecting a sensor, perform the following inspection:
• Examine the component’s cable for kinks, cuts, or breaks.
• Check for metal chips embedded in the cable.
• Check the connectors for loose or damaged pins.
• Look for evidence of oil or coolant on the cable or in the connectors.
If any of these conditions exist, clean or replace the cable as needed.
NOTE
Be aware that the sensors contain magnets to enable them to be easily
attached to steel surfaces.
The E1738A Air Sensor must be connected to port #4 of the Sensor Hub;
any additional air sensors, if used, may be connected to any other open
port on the hub. Any E1737A Material Sensor(s) should be connected to
the Hub starting with port #1. Otherwise the procedure for connecting all
of the sensors to hub are identical.
LED indicator On Off
COM device driver is working driver not installed
H.S. USB 2.0 connection USB 1.1 connection or lower
RDY power on power off
R/ W reading or writing idle
 Loading...


