Artec Leo
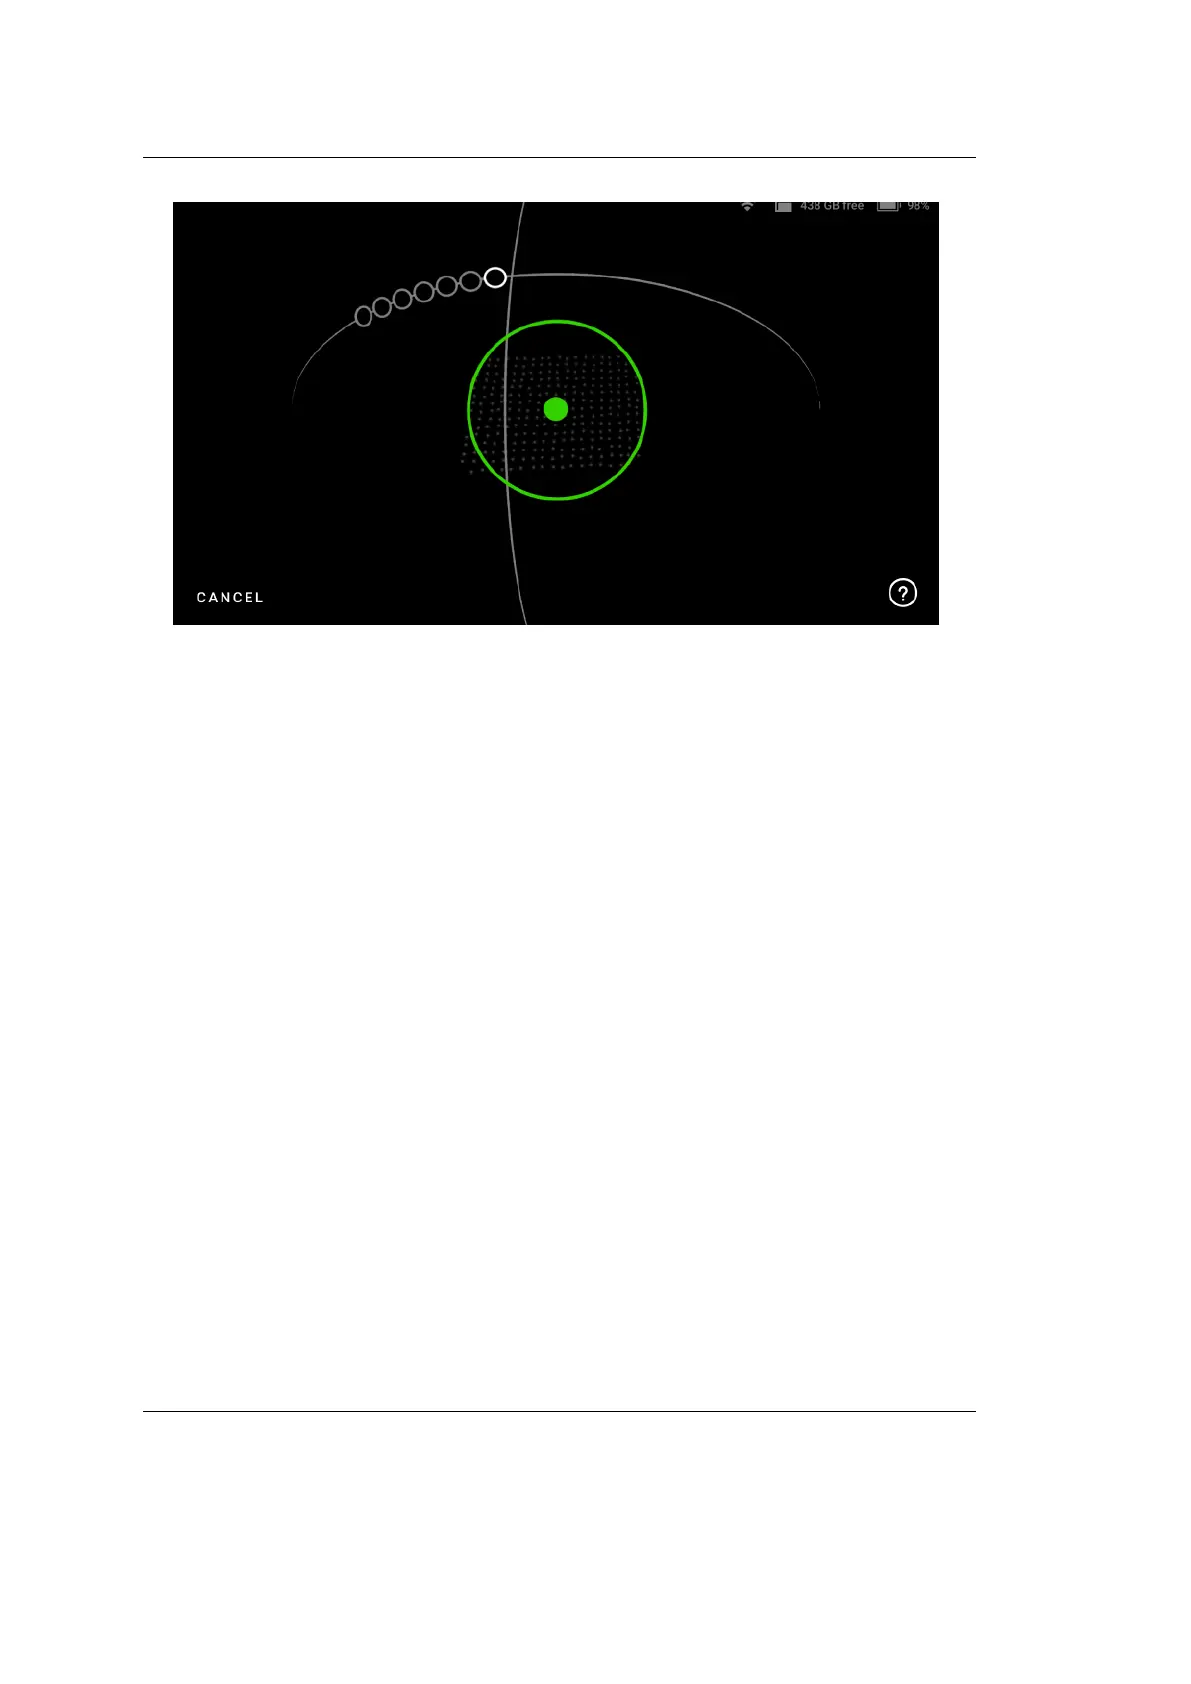
Figure 41: Green dot represents center of the Calibration board.
7. Now slowly move the green dot to the rst circle on the arc, and glide Leo
following the trajectory, from one circle to another such that the green dot
overlaps each circle.
8. As you move along the arc trajectory, the circles will turn green, indicating
that the data has been captured. Scan until all the circles turn green.
9. Similarly, scan the board following all the subsequently displayed arc trajec-
tories on Leo.
10. Lastly, you need to hold Leo over the Calibration board, and move it per-
pendicularly forward and backward, along the z-axis (See Figure ??).
11. Scan in this manner, until all the white circles turn green.
12. Maintain the recommended distance between the ‘calibration board’ and
scanner at all times. If the scanner is too far from the board, Leo will
display an error on the scanning screen Figure ??.
Step 4: Result
1. After capturing data from all three positions, Leo will proceeds to calculation
and processes the calibration.
2. Leo will display the recalibration result. Click on Done, and you have suc-
cessfully recalibrated your Leo.
5.1. Leo Recalibration 71