AS64 series AC servo drive Communication
-265-
8.5.9 Using the oscilloscope
You can enable the oscilloscope by clicking the oscilloscope button on the toolbar or choosing Tool >
Oscilloscope from the menu bar.
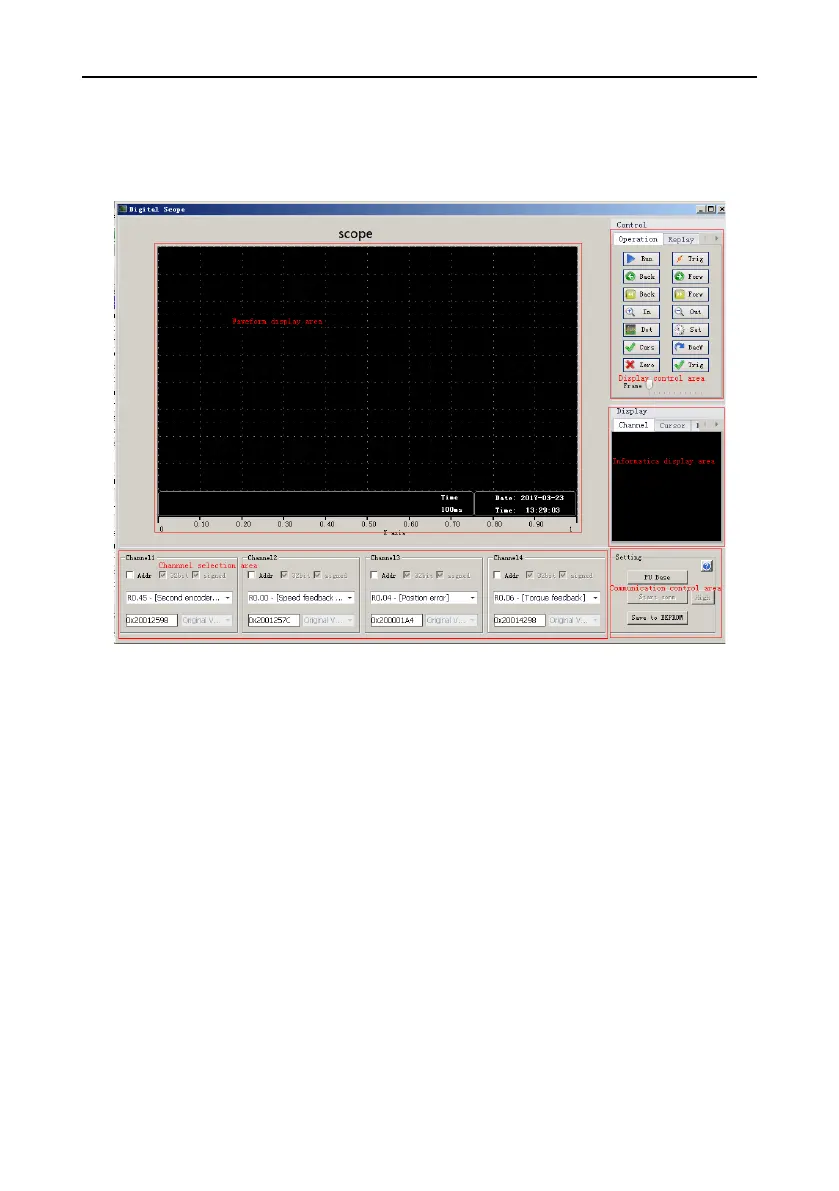
Oscilloscope interface
The oscilloscope interface consists of:
⚫ Waveform display area: enables you to draw waveforms and auxiliary display elements, such as
cursor and gain information.
⚫ Channel selection area: enables you to select the content to be monitored through a channel,
supporting selection by parameter function code or variable internal address.
⚫ Display control area
- Operation tab: enables you to start and stop the drawing of waveforms, forward, reverse,
zoom in, and zoom out the oscilloscope, control the cursor, and display trigger thresholds.
- Playback tab: enables you to start, stop, forward, and reverse the playback and select
positions in waveform file restore mode.
- File operation tab: enables you to save and restore .csv waveform files and save images.
⚫ Communication control area: enables you to start and stop oscilloscope communication, save
channel parameters, set trigger modes, and access help.
⚫ Information display area: enables you to view the names of content that is being monitored through
a channel, and control the display and hiding of measurement results.