20
Connections to Workstation 2
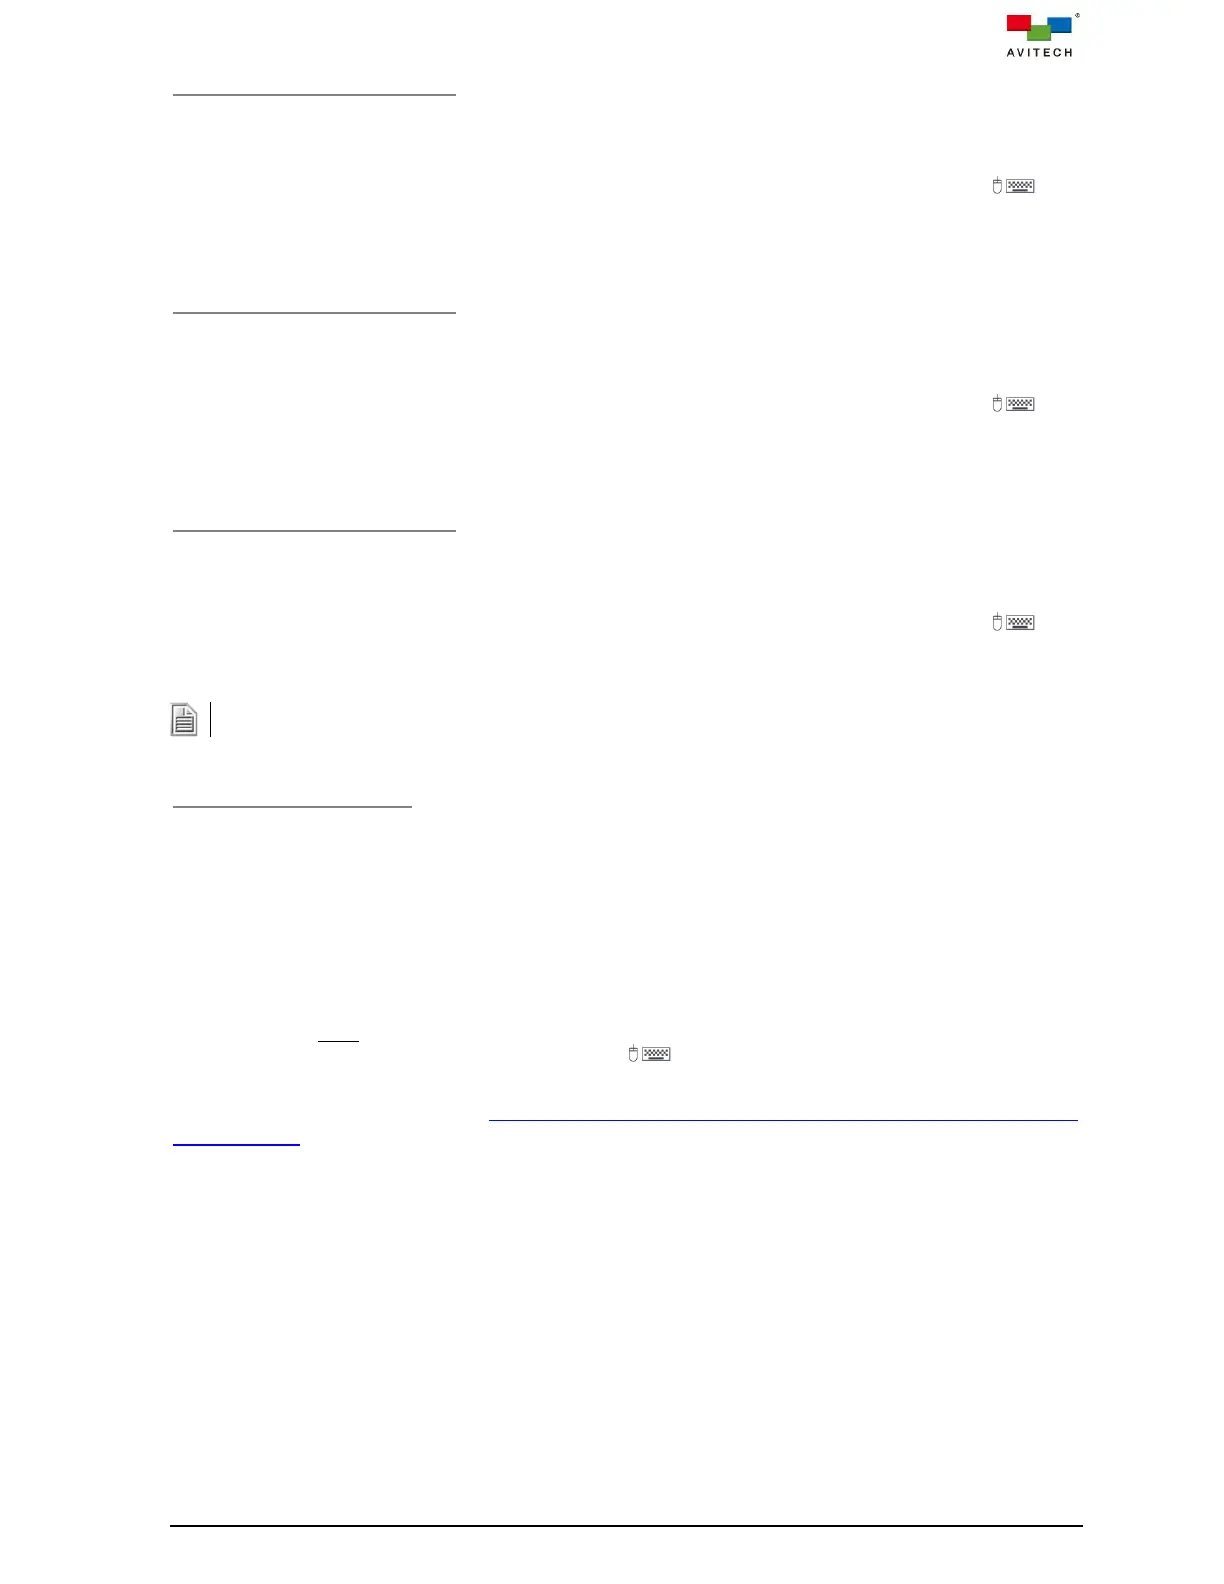
Step 1. Connect the port marked HDMI OUT 3 on the front panel of Sequoia 4K60 to the monitor using
the appropriate signal cable.
Step 2. Connect a short USB extension cable or a USB hub to the USB Type-A port marked 3 on
the front panel of Sequoia 4K60 for connection to a set of wireless keyboard/mouse; they will be
used to control the Workstation 2 and the four computer sources.
Connections to Workstation 3
Step 1. Connect the port marked HDMI OUT 4 on the front panel of Sequoia 4K60 to the monitor using
the appropriate signal cable.
Step 2. Connect a short USB extension cable or a USB hub to the USB Type-A port marked 4 on
the front panel of Sequoia 4K60 for connection to a set of wireless keyboard/mouse; they will be
used to control the Workstation 3 and the four computer sources.
Connections to Workstation 4
Step 1. Connect the port marked HDMI OUT 5 on the rear panel of Sequoia 4K60 to the monitor using
the appropriate signal cable.
Step 2. Connect a short USB extension cable or a USB hub to the USB Type-A port marked 5 on
the rear panel of Sequoia 4K60 for connection to a set of wireless keyboard/mouse; they will be
used to control the Workstation 4 and the four computer sources.
Non-standard keyboards that require manual installation of drivers are not supported.
Powering Up the Devices
Step 1. Connect power to/and boot-up the four source computers.
Step 2. Connect power to the monitors and turn on the monitors.
Step 3. Connect the power adapter to the DC 12V/5A power in jack on the Sequoia 4K60, and press the
power switch so that the Sequoia 4K60 is turned on.
Step 4. The Avitech logo will appear briefly on the monitor, and after approximately 60 seconds the four
windows (each containing an image from one of the connected computers) will appear, along
with the Host cursor that can be controlled directly through the mouse connected to your
Sequoia 4K60's USB Type-A ports marked .
For basic operation, please refer to section (3.4) “Basic Operation for Workstations (Quad + 4 Singles)
Configuration” for more details.