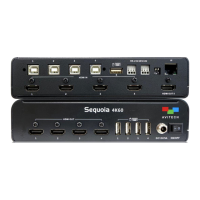
78
Step 2. Use a standard CAT-5e/6 Ethernet cable to connect the control computer’s RJ-45 port and the
wireless router. Or turn on the Wi-Fi connection of your notebook or handheld touch device and
make sure to select the correct Wi-Fi network (The Wi-Fi name should be the name of the
wireless router connected with Sequoia 4K60).
Powering Up the Devices
Step 1. Connect power to/and boot-up the four video source devices.
Step 2. Connect power to the monitors and turn on the monitors.
Step 3. Connect the power adapter to the DC 12V/5A power in jack on the Sequoia 4K60, and press the
power switch so that the Sequoia 4K60 is turned on.
Step 4. The Avitech logo will appear briefly on the monitor, and after approximately 60 seconds the four
windows (each containing an image from one of the connected sources) will appear.
5.2 Video Wall Configuration and Management
1. The layout / preset files of Video wall are saved in the Sequoia 4K60.
2. The keyboard/mouse function is not support when the Sequoia 4K60 is configured to Video wall display
mode.
Before connecting the controlling computer to the Sequoia 4K60, the IP address of the controlling
computer needs to be changed to a static IP, and its subnet mask must be set to a similar range as the
Sequoia 4K60 (“192.168.0.5” – factory default IP address). Or, the IP address of the Sequoia 4K60 can
be changed to a similar range as the controlling computer.
To start using the controlling computer to manage the video wall of Sequoia 4K60, perform the following
steps:
Step 1. Use the computer’s web browser and type “192.168.0.5” in the web browser URL bar (or
replace the numbers with the current IP address of your Sequoia 4K60), the web browser-based
GUI will appear and the Sequoia 4K60 is ready for operation in video switching/routing,
modifying video wall layout or system setting.
Or use the notebook or handheld touch device’s web browser, once the Wi-Fi connection is
made, then type “192.168.0.5” in the web browser URL bar (or replace the numbers with the
current IP address of your Sequoia 4K60), the web browser-based GUI will appear and the
Sequoia 4K60 is ready for operation in video switching/routing, modifying video wall layout or
system setting.
The IP address of the controlling computer (with Ethernet connection to Sequoia 4K60) must be in the
same network mask as the Sequoia 4K60. If you use a notebook or handheld touch device, please turn on
the Wi-Fi connection of your controlling device, search and select to connect the Wi-Fi network (password
may be required) that the Sequoia 4K60 is connected to.
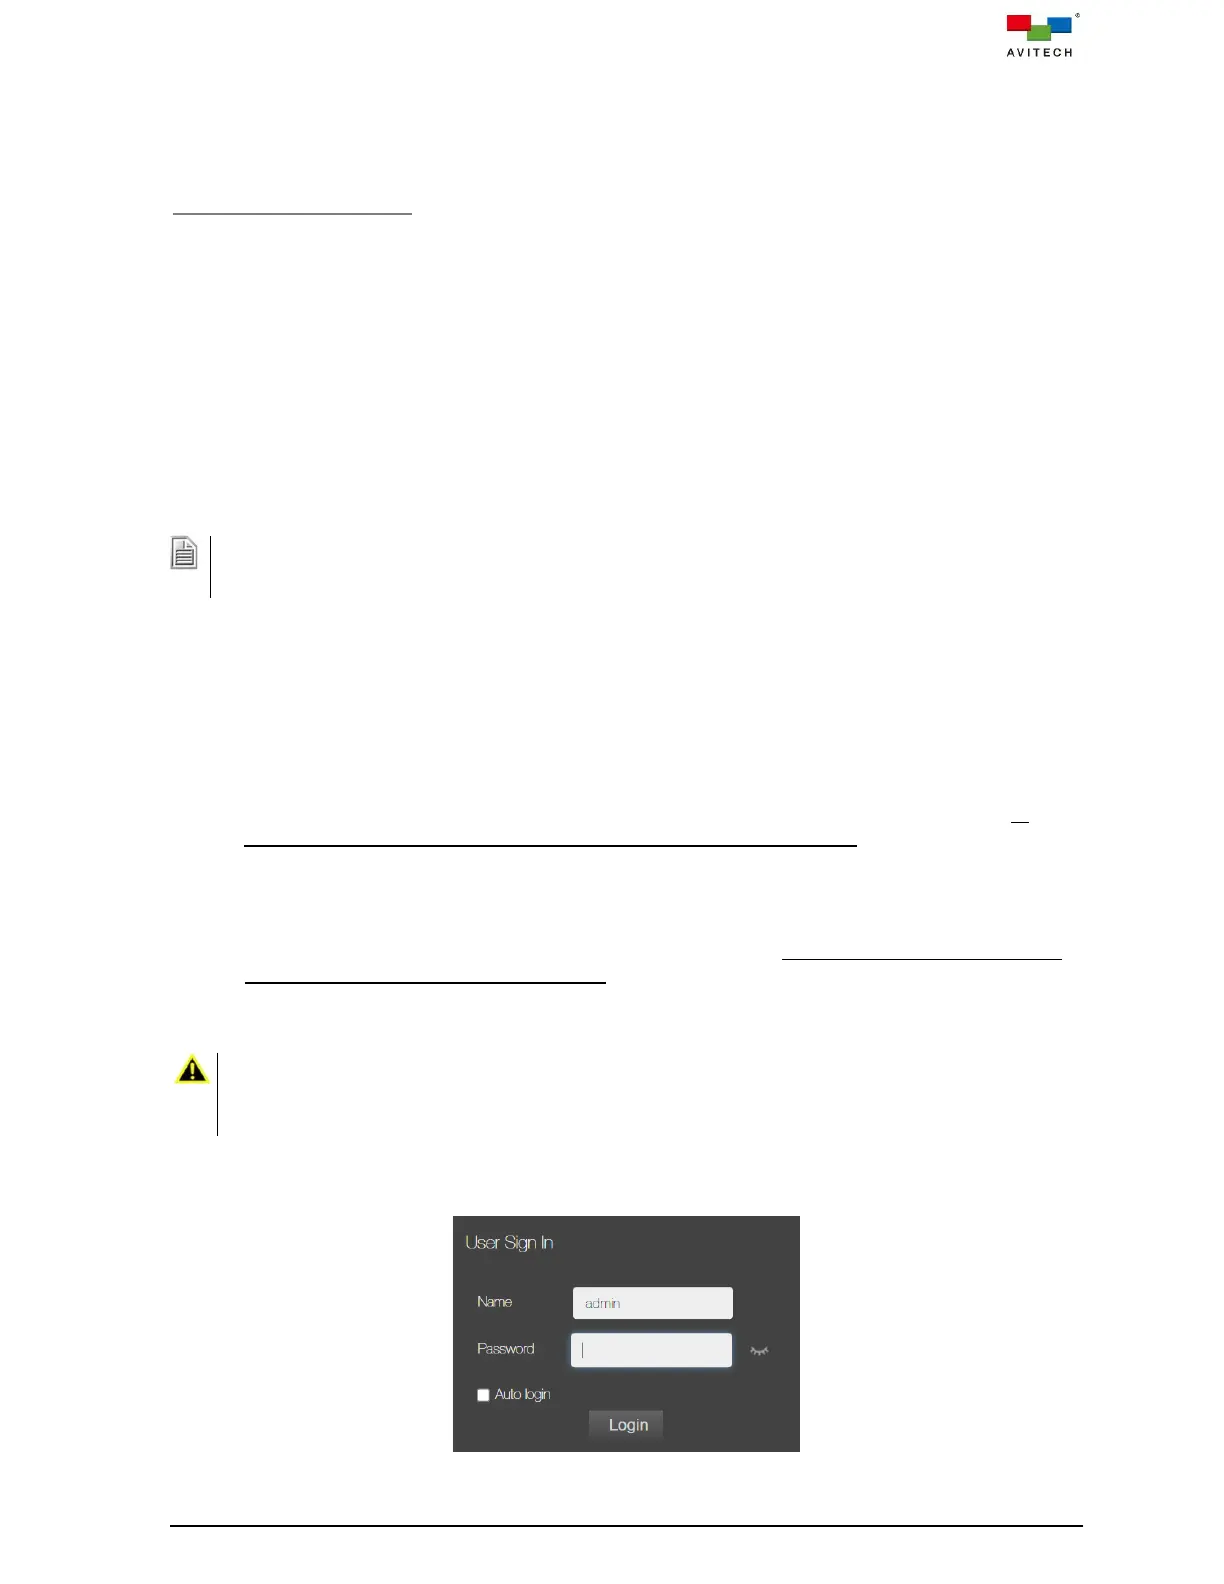
Step 2. When the User Sign In window appears on the webpage, enter the password (admin in lower
case) to login to control of the Sequoia 4K60.
Figure 5.2.1 User Sign In Window