Getting Started
This section of the manual shows you how to get started with your Blackmagic Micro Studio
Camera 4K G2.
Getting started is quick and easy! All you need to do is attach a lens and plug in power.
Attaching a Lens
Your Blackmagic Micro Studio Camera 4K G2 uses Micro Four Thirds lenses. To attach a lens,
begin by removing the protective dust cap. To remove the dust cap, hold down the locking
button and rotate the cap counterclockwise until it’s released. We recommend always turning
your camera off before attaching or removing a lens.
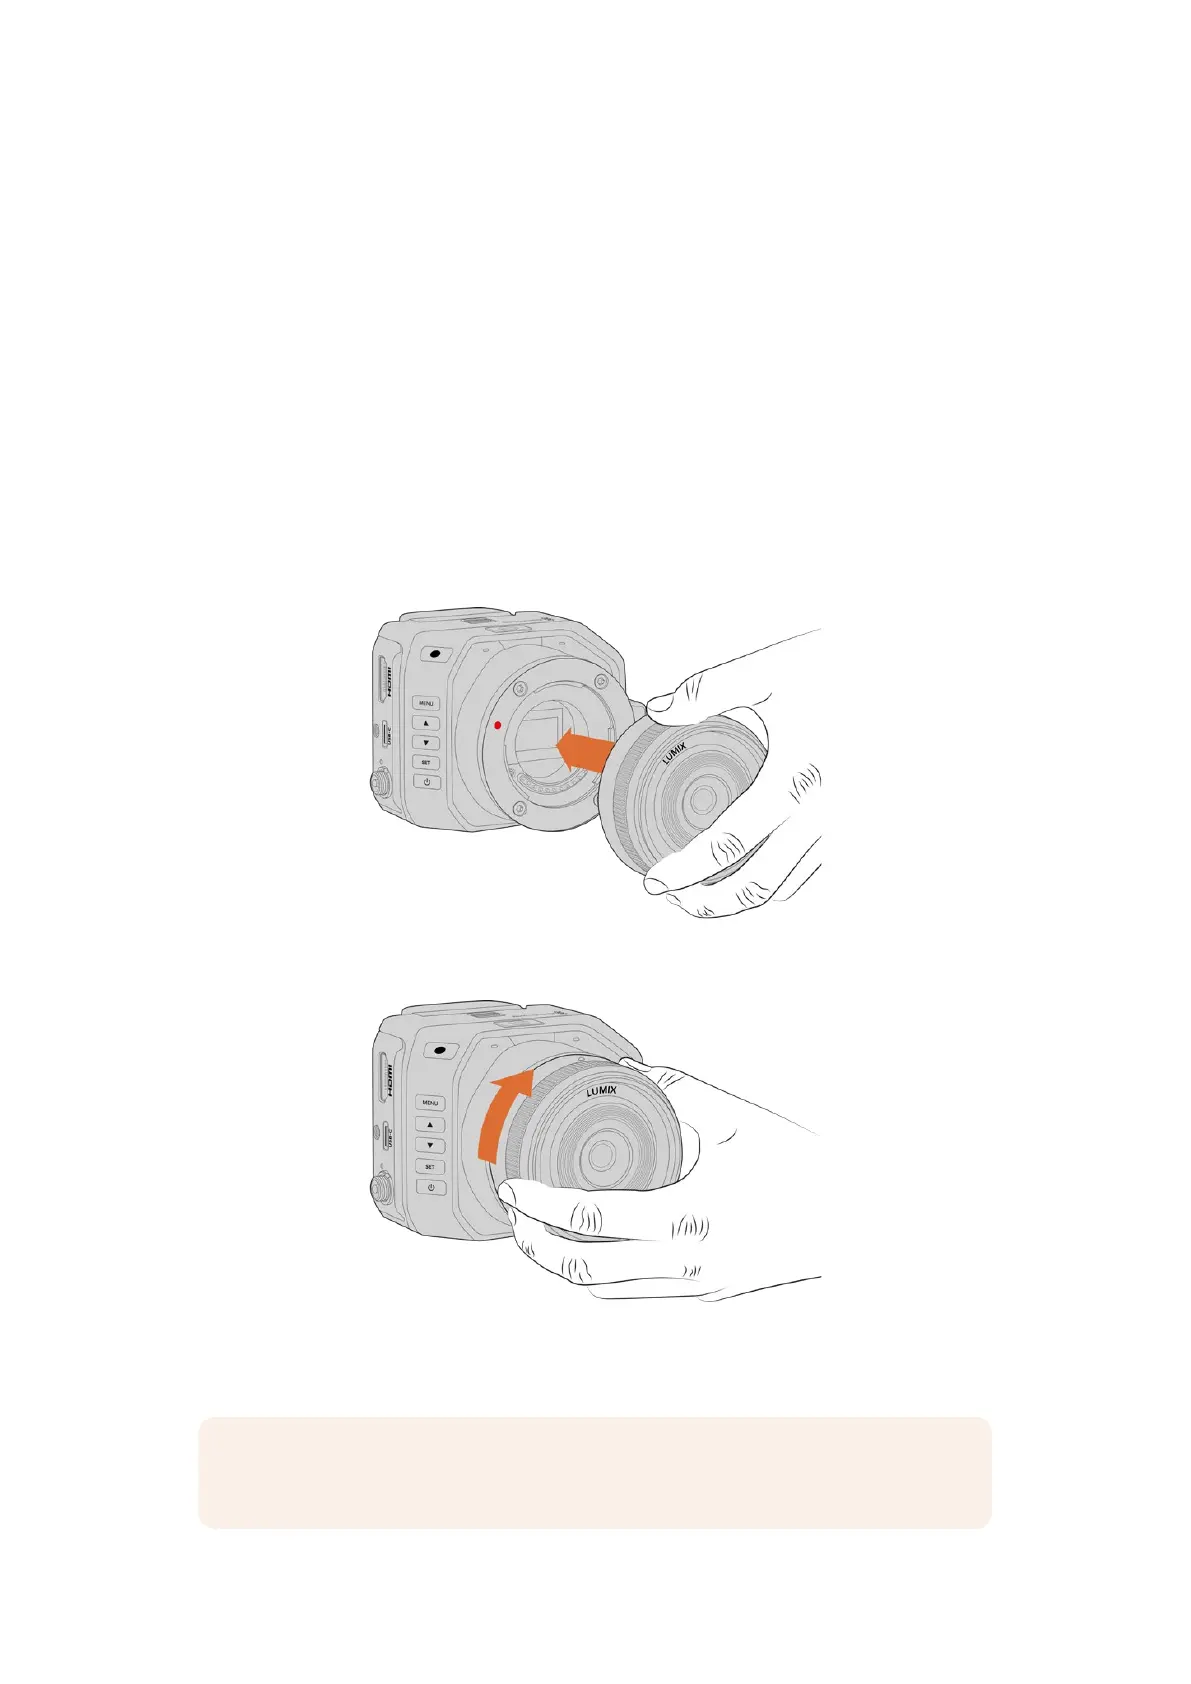
To attach a lens:
1 Align the dot on your lens with the dot on the camera mount. Many lenses have a visual
indicator, for example, a blue, red or white dot.
2 Press the mount of the lens against the camera mount and twist clockwise until the lens
clicks into place.
3 To remove the lens, hold down the locking button, rotate the lens counterclockwise until its
dot or indicator reaches the 10 o’clock position, and gently remove.
NOTE When you don’t have a lens attached to your camera, it’s a good idea to keep
the dust cap on to protect the glass filter covering the sensor from dust and other debris.
5Getting Started
 Loading...