Camera Features
This section contains details about all the connectors and buttons on your Blackmagic Micro
Studio Camera 4K G2.
Left Panel
1
2
3
4
5
6
7
8
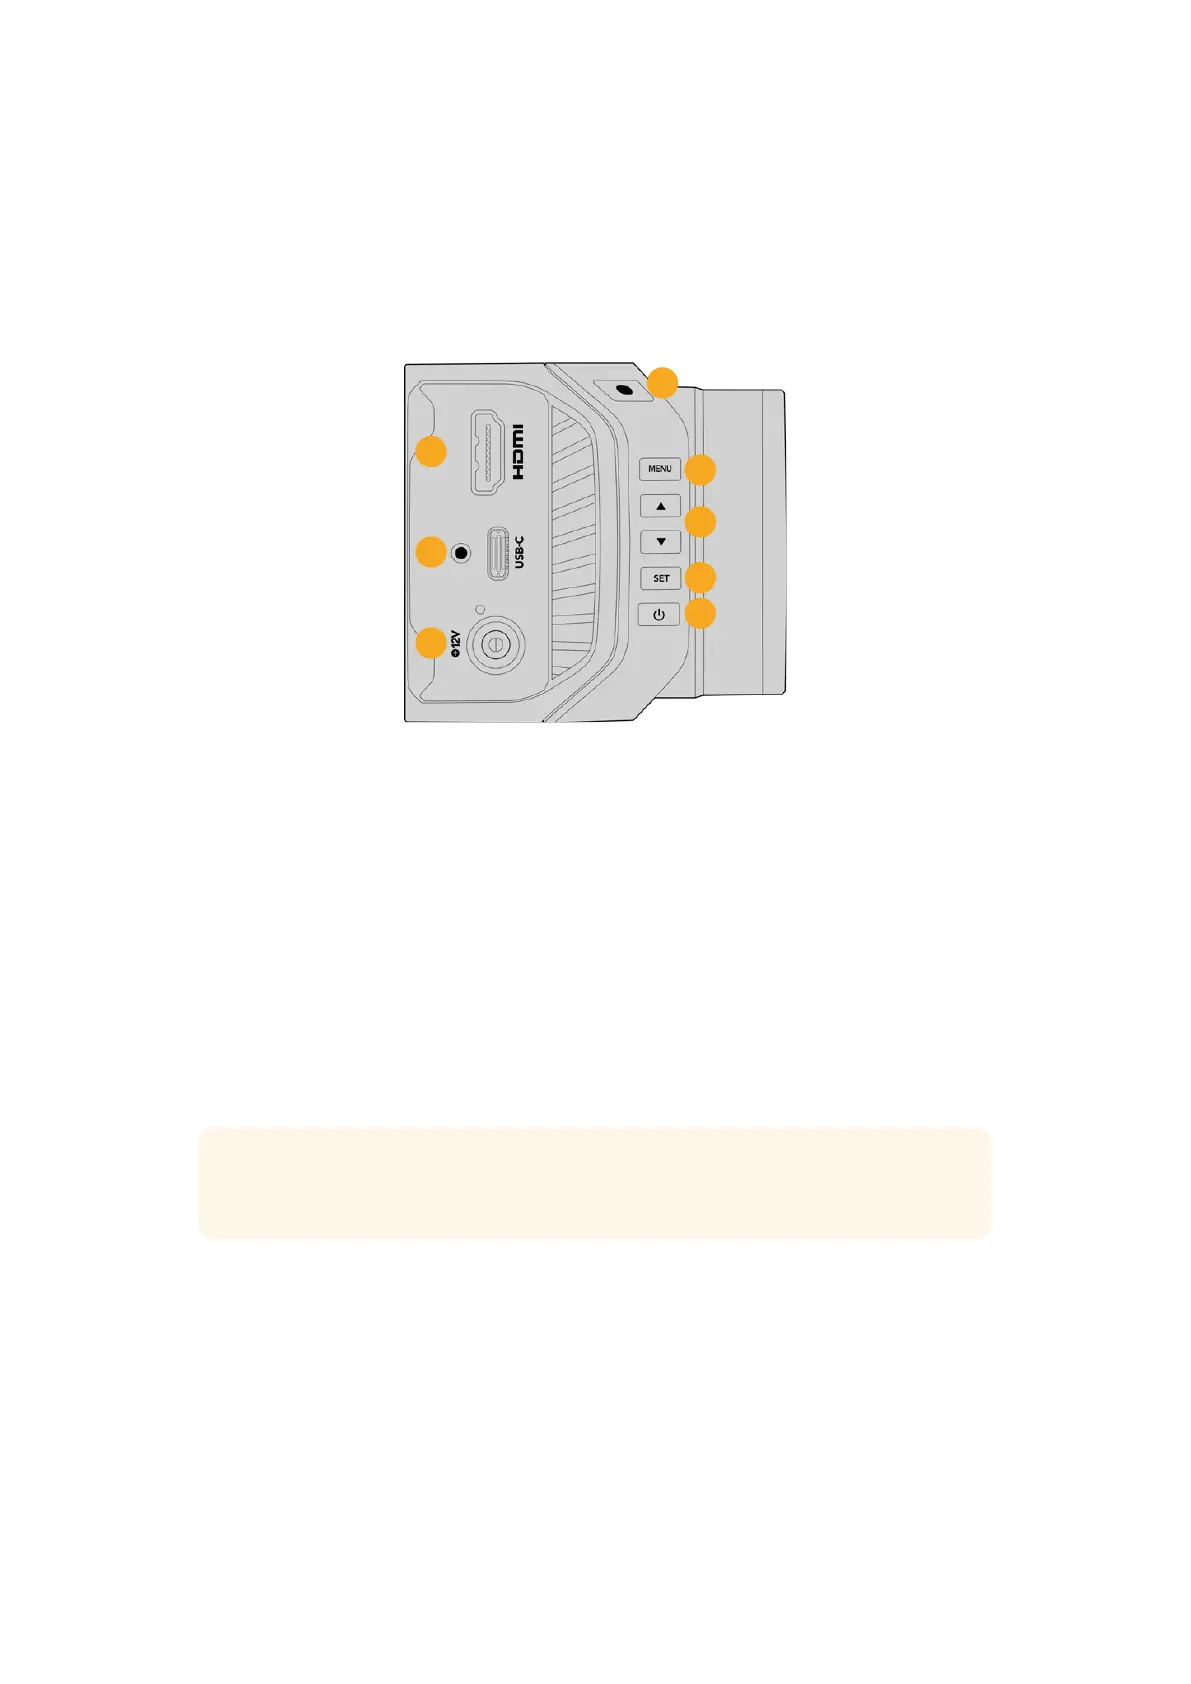
1 HDMI
Use the HDMI port to connect to an external monitor, disk recorder or ATEM Mini switcher.
The HDMI port on your Blackmagic Micro Studio Camera 4K G2 outputs 10-bit 4:2:2 1080p
HD video with 2 channels of embedded audio. The frame rate of the HDMI output will
match the ‘project frame rate’ your camera is set to. For example, if the camera’s ‘project
frame rate’ is set to 30 frames per second the HDMI output will be 1080p30.
Your camera’s settings are visible on the HDMI output via a head up display. The HUD is a
video overlay that shows you important information like shutter speed, iris, histogram, focus
assist, frame guides, zebra and more. The HUD is always on by default, but you can turn
it off by selecting ‘clean feed’ in your camera’s menu settings. Press the ‘menu’ button on
your camera to access the menu settings overlay and press it again to turn it off. For more
information on how to change settings refer to the ‘HUD controls’ and ‘settings’ sections
later in this manual.
TIP Switch your camera’s ‘clean feed’ setting on to disable all status text and overlays
for the HDMI output. For more information, refer to the ‘monitor menu’ section.
2 USB
The USB-C expansion port allows for direct local recording onto USB-C flash disks and can
be used for connecting Blackmagic Zoom and Focus Demands. The USB-C port is also
used for updating your camera’s internal software.
Blackmagic Micro Studio Camera 4K G2 can be connected to a network using a USB-C
to Ethernet adapter. Connecting to a network allows you to control your camera via
REST APIs. For more information, refer to the ‘camera control REST API’ section later in
this manual.
11Camera Features
 Loading...