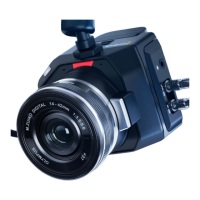
Audio Meter
The peak audio meters display audio levels for channels 1 and 2 when using the internal
microphone, or via external audio when connected. You can display PPM or VU meters. To
change the meter type, see the ‘settings’ section later in this manual.
To achieve optimum audio quality using PPM meters, ensure your levels do not reach 0
dBFS. This is the maximum level that your camera can record before the audio is clipped and
distortion occurs.
Alternatively, when using VU meters, levels can safely peak at 0, allowing you a little room
beyond 0 before clipping occurs. To avoid clipping, make sure the levels do not reach +3 dBFS.
The colored bars on the VU audio meter represent peak audio levels.
Ideally your peak audio levels should fall in the upper end of the green
zone. If your peaks enter into the yellow zone your audio is near clipping.
Audio in the red zone reaching +3 dBFS is at risk of clipping.
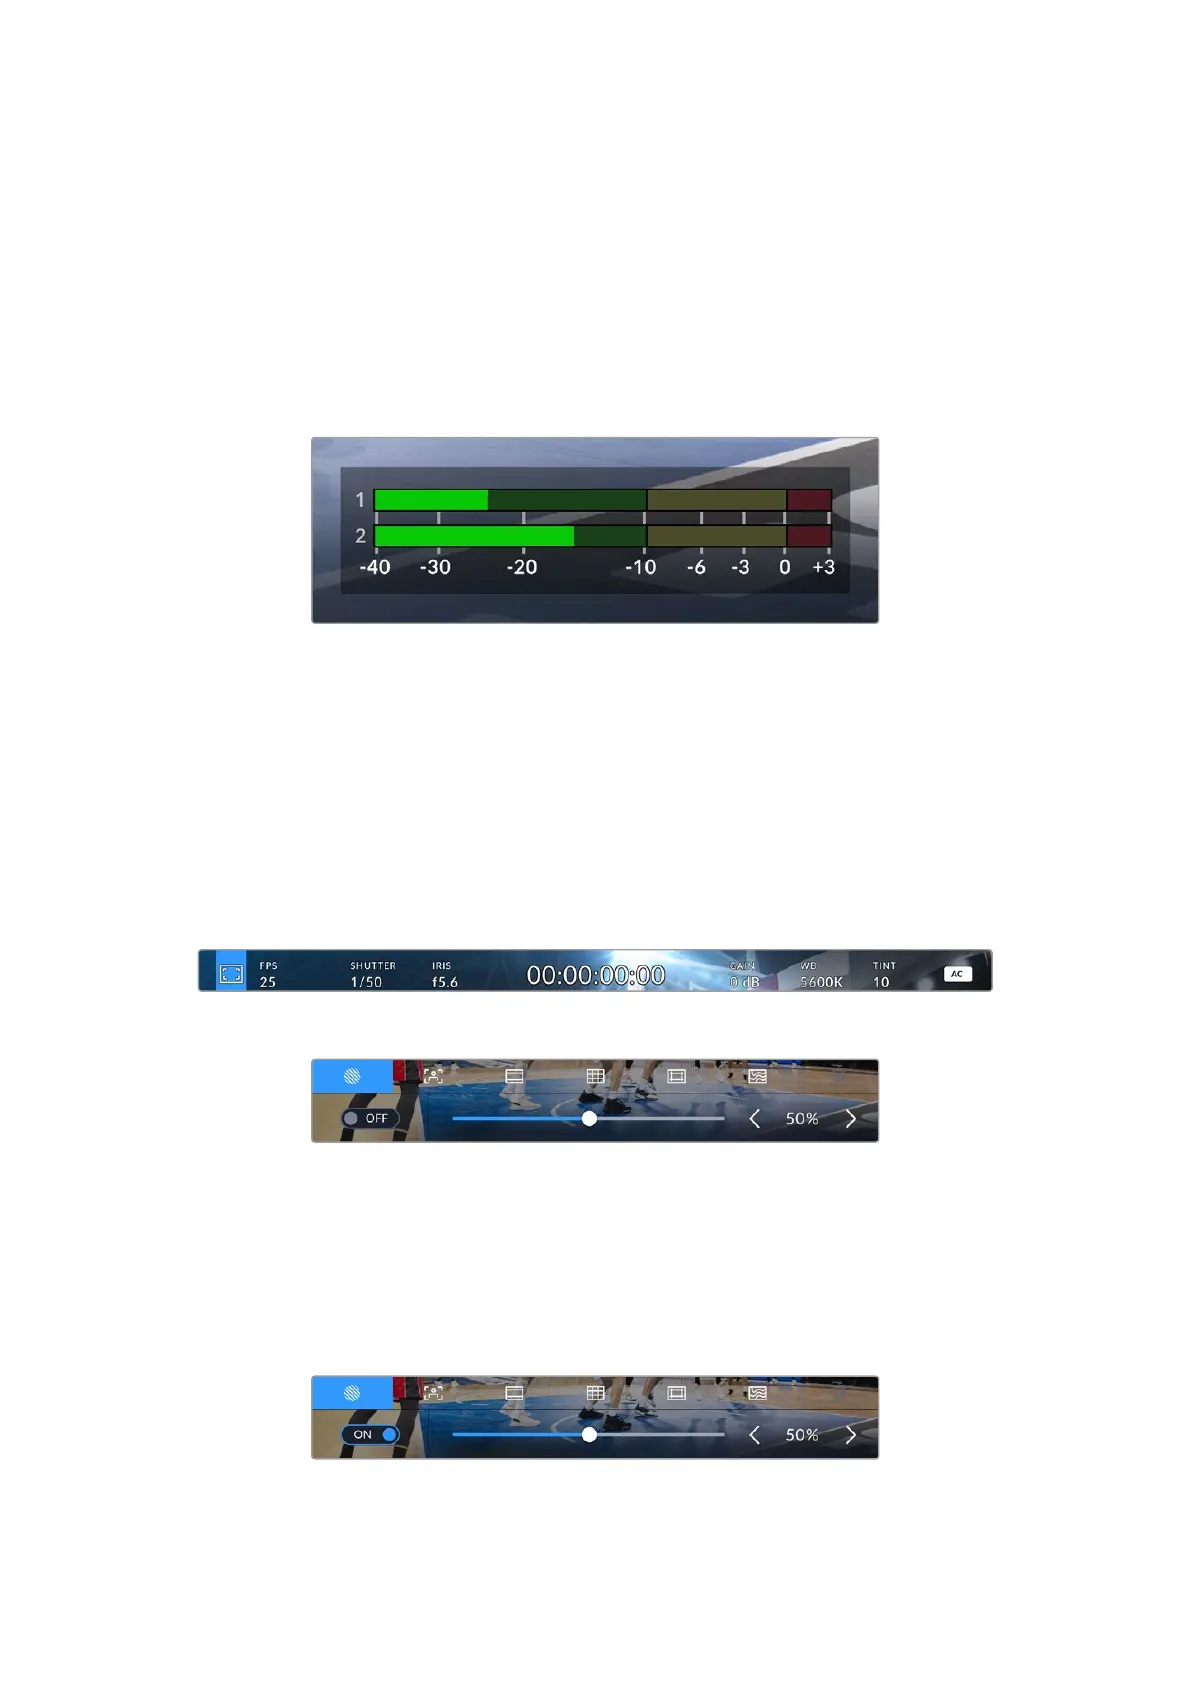
HDMI Monitor Options
The HDMI monitor options let you toggle and adjust the appearance of your camera’s
monitoring features, including zebra, focus assist, frame guides, grids, safe area guides and
false color. To access these options, press the ‘set’ button twice. The controls appear in a
tabbed menu along the bottom edge of the HDMI display. Use your camera’s arrow and ‘set’
buttons to select a monitor option.
Press the ‘set’ button twice to open your camera’s HDMI monitor options
The HDMI monitor options appear at the bottom of the HDMI display
Zebra
The ‘zebra’ setting toggles the appearance of the zebra on the HDMI output.
Zebra displays diagonal lines over areas of your image that exceed a set exposure level. For
example, setting zebra to 100% shows which areas are completely overexposed. This is useful
for achieving optimum exposure in fixed lighting conditions.
Use your camera’s arrow buttons to adjust the zebra setting
27Using the HUD Controls
 Loading...