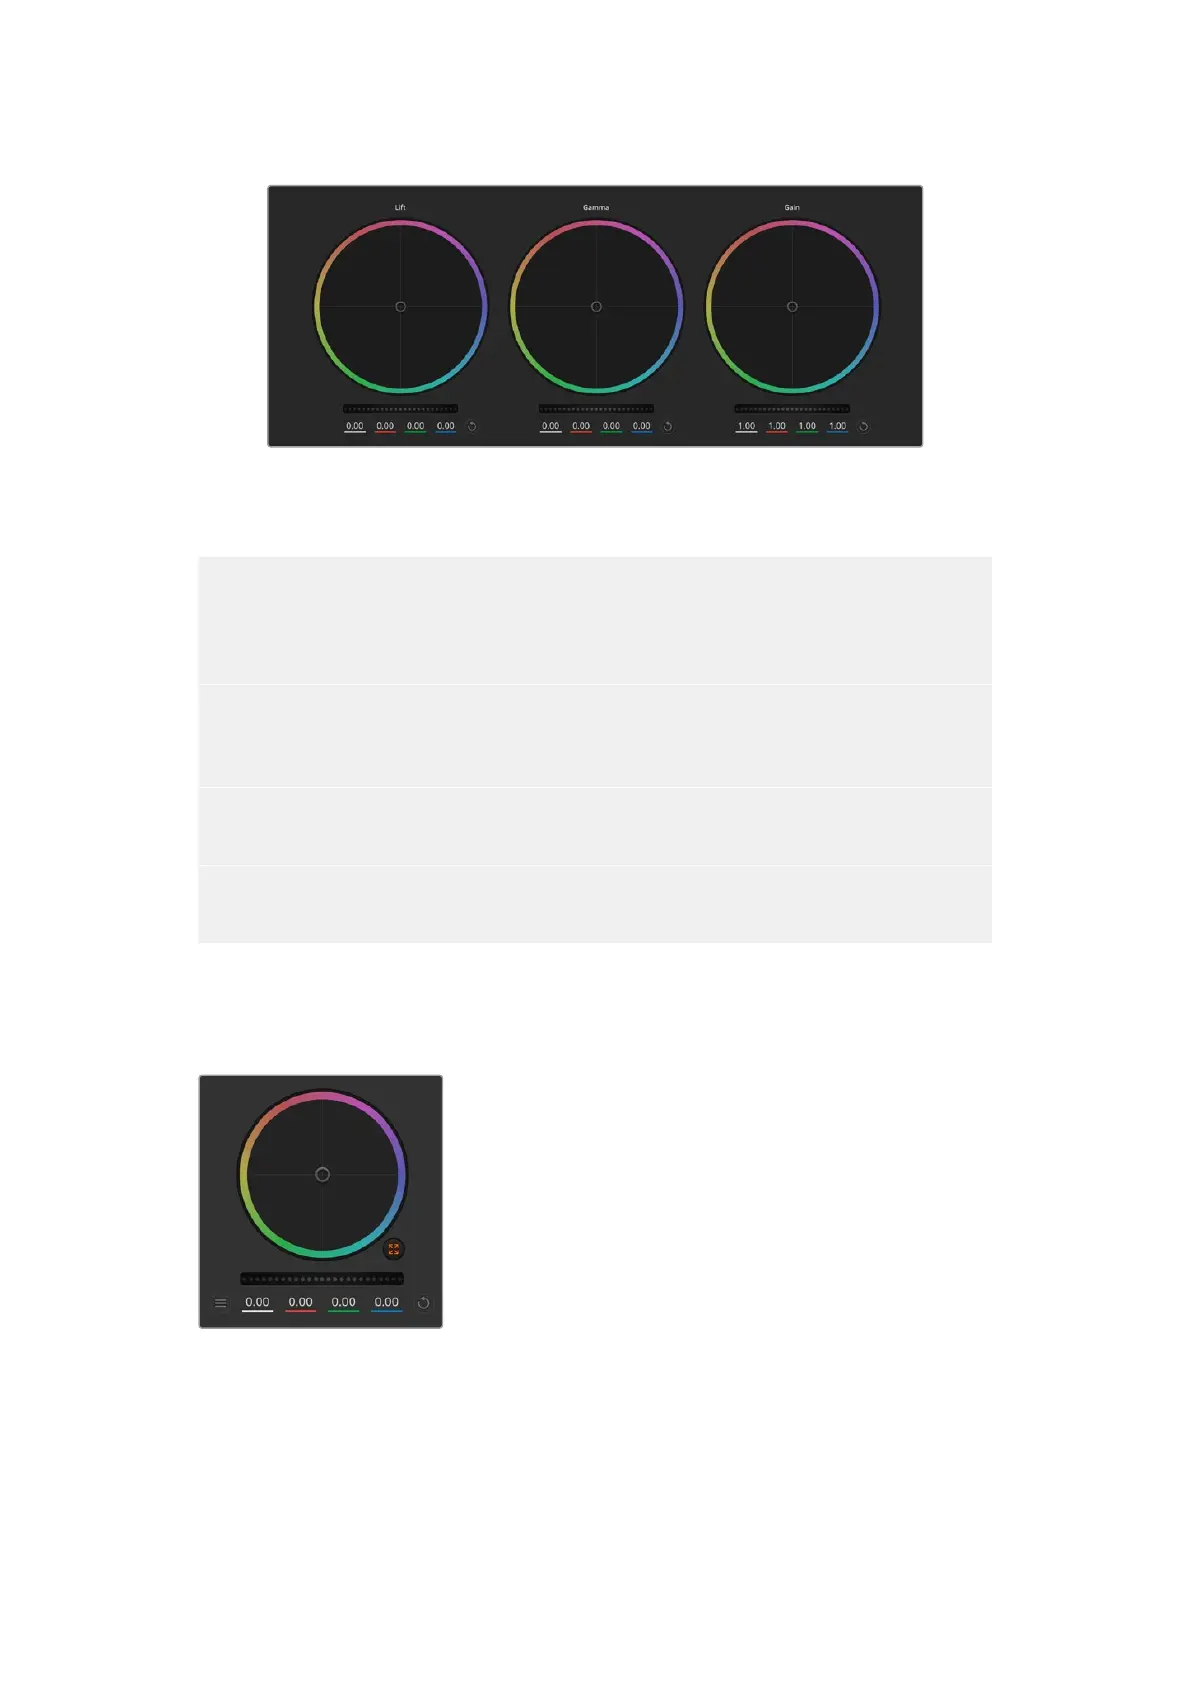
Lift, gamma and gain color wheels in the color corrector panel
Color Wheels
Click and drag anywhere within the color ring
Note that you don’t need to drag the color balance indicator itself. As the color balance
indicatormoves, the RGB parameters underneath change to reflect the adjustments being made
toeach channel.
Shift-Click and drag within the color ring
Jumps the color balance indicator to the absolute position of the pointer, letting you make faster
andmore extreme adjustments.
Double-click within the color ring
Resets the color adjustment without resetting the master wheel adjustment for that control.
Click the reset control at the upper-right of a color ring
Resets both the color balance control and its corresponding masterwheel.
Master Wheels
Use the master wheels below the color wheels to adjust each YRGB channels’ lift, gamma and
gain controls.
Dragging to the left darkens the selected parameter of the
image, dragging to the right lightens that parameter. As you
make an adjustment, the YRGB parameters underneath
change to reflect the adjustment you’re making. To make
a Y-only adjustment, hold down the ALT or Command key
and drag left or right. Because the color corrector uses
YRGB processing, you can get quite creative and create
unique affects by adjusting the Y channel only. Y channel
adjustments work best when the Lum Mix setting is set to
the right side to use YRGB processing vs the left side to use
regular RGB processing. Normally, most DaVinci Resolve
colorists use the YRGB color corrector as you get a lot more
control of color balance without affecting overall gain, so you
spend less time getting the look you want.
Adjust the master wheels
by dragging the wheel
control left or right
89Using ATEM Software Control
 Loading...