48
Section 1. Recording and playing back
8.
At the point where you want to begin re-
recording, press .
Punch-in will begin, and you’ll be in record
mode.
9.
When you’re ready to punch-out, press
(or press ).
Each time you press , you’ll alternately
punch-in and punch-out, so simply perform
the same procedure at any other location
that you want to re-record.
10.
When you’re finished recording, press
to stop.
“Auto punch-in/out” is the method in which
punch-in/out begins automatically at the time
locations you specify beforehand.
This is convenient when you want to punch-in/
out at precise points, or if you want to punch-in/
out automatically so that you can concentrate on
your playing.
In the following example, we’ll re-record a
portion of track 1 which you recorded earlier.
* When using auto punch-in/out, you must set the punch-
in and punch-out points at least 1.0 seconds apart.
1.
Specify the punch-in and punch-out
points as described in steps 1–2 of
“Playing back repeatedly (Repeat) (p.
45)”.
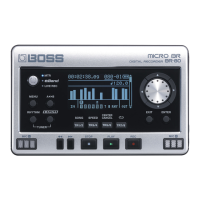
2.
Press [TR2] (AUT).
The region you specified will be the auto
punch-in/out region. and
“A.PUNCH” will light.
fig.Disp-RecTrack-1.eps
3.
Press one of the [TR1]–[TR4] buttons.
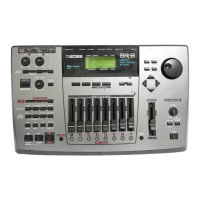
4.
Use CURSOR [ ][ ] to access the
Rec Track screen.
5.
Press [TR1] several times to make “REC”
appear for track 1.
fig.Disp-RecTrack-1.eps
Track 1 will be the recording track.
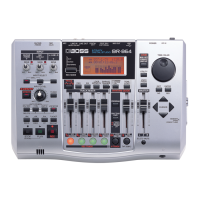
6.
Press CURSOR [ ][ ] to access the
Track Level screen, and set the Tr1 Level
to 100 (p. 35).
fig.Disp-TR1-LEVEL.eps
7.
Press [EXIT].
Auto punch-in/out
MICRO-BR_e.book 48 ページ 2009年5月28日 木曜日 午後2時26分