88
Section 4. Using rhythm
1.
Press [RHYTHM].
The rhythm screen appears.
2.
Press [TR1] to turn on the rhythm.
The “RHYTHM” indication appear, and
rhythm will be on. Each time you press the
button, the “RHYTHM” indication will light
or go dark.
3.
Press [TR2] to make the display indicate
“AR:” (Arrangement mode).
The display will indicate “AR:”. Each time
you press the button, the indication will
alternate between “PT:” and “AR:”.
fig.Disp-ar-P01.eps
4.
Use CURSOR [ ] [ ] to move the
cursor to the P (preset) or S (song), then
use VALUE [-] [+] to select the “S.”
5.
Use CURSOR [ ] [ ] to move the
cursor to the song arrangement number.
6.
Use VALUE [-] [+] to select the number of
the song arrangement (S01–S05) that you
want to create.
fig.Disp-ar-S01.eps
* If you select a preset arrangement number (P01–P50),
you won’t be able to perform the following steps.
7.
Press [TR4] (EDT).
You’ll be in Song Arrangement Edit mode.
fig.Disp-ar-S01-edt.eps
8.
Press [TR1] (STP).
9.
Use CURSOR [ ] [ ] and VALUE [-] [+]
to select a pattern number.
Select the pattern that you want to start
playing from measure 1.
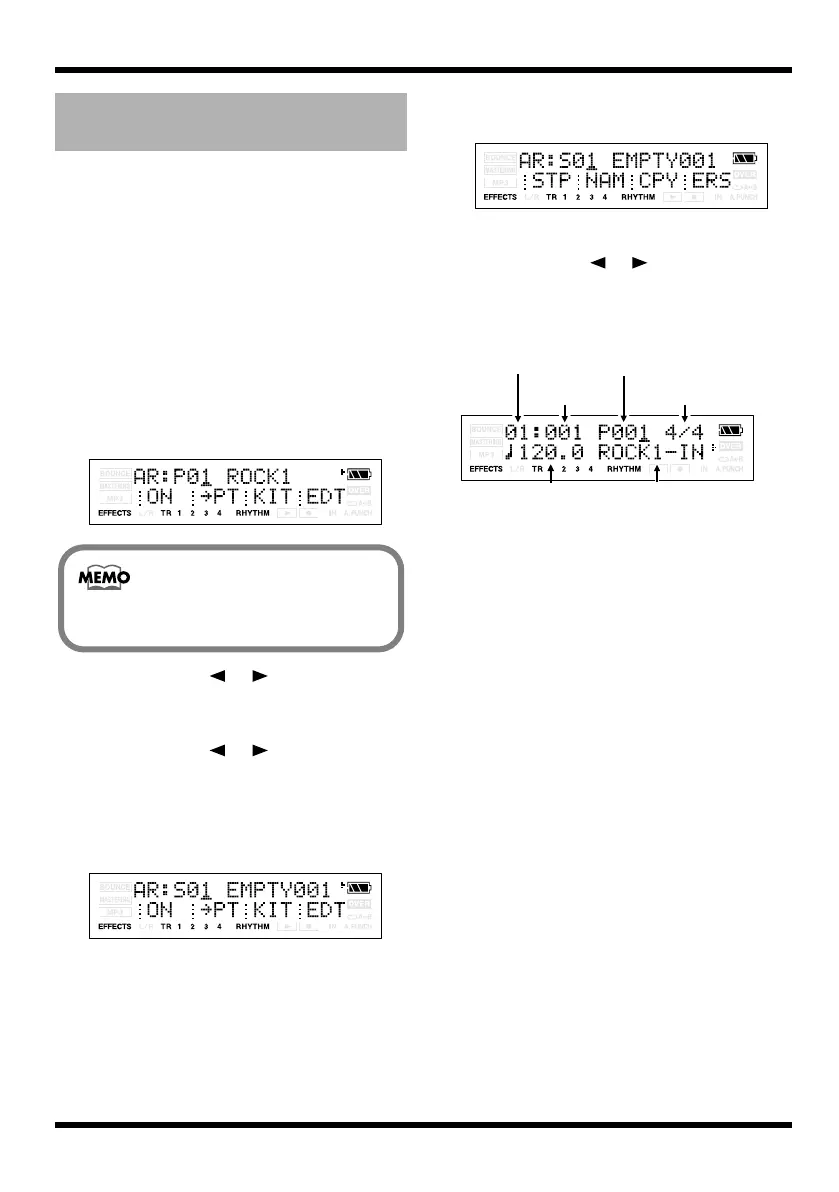
fig.Disp-ar-S01-step.eps
Specifying the pattern for the
first measure
You cannot enter Arrangement mode if
rhythm is turned off.
Tempo Pattern Name
Step Number
Pattern Number
Starting
Measure
Time
Signature
MICRO-BR_e.book 88 ページ 2009年5月28日 木曜日 午後2時26分