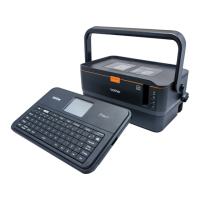
Printing a Tube or Label Using the P-touch Keyboard
39
2
Using Block Layouts 2
You can use pre-installed block layouts to create labels by just entering the text or barcodes. Selectable
“Block Layouts” are listed in the Appendix. (See Block Layout on page 240.)
a Select [Auto Format] in the Home screen using the , , or key, and then press the OK or
Enter key.
b Select [Block Layouts] using the or key, and then press the OK or Enter key.
c Select the tape width using the or key, and then press the OK or Enter key.
d Select a block layout using the or key, and then press the OK or Enter key.
e Enter text or a barcode for each text field if needed, and then press the OK or Enter key.
f When finished, press the OK or Enter key.
To print the label, select [Print] using the or key, and then press the OK or Enter key.
• For more information about barcodes, see Creating a Barcode Label (Labels Only) on page 31.
• You can use the serialize settings with the entered text and barcodes. To specify the serialize settings,
see Entering a Serialised Tube or Label on page 24. (The advanced serialize mode cannot be used.)
• To print the label, see Printing a Label on page 52.
• To preview the label before printing, select [Preview] using the or key, and then press the OK or
Enter key. For more information about the preview screen, see Label Preview on page 56.
• To save the label, see Storing a Tube or Label in the File Memory on page 60.
Cable Label Type 2
You can create labels for cables, patch panels, and other equipment when performing electrical work by
selecting the type of label and setting the necessary items.
a Select [Cable Label] in the Home screen using the , , or key, and then press the OK or
Enter key.
b Select a label type using the or key, and then press the OK or Enter key.
The available cable label types are as follows:
Factory settings are shown in bold.
 Loading...