III - 30
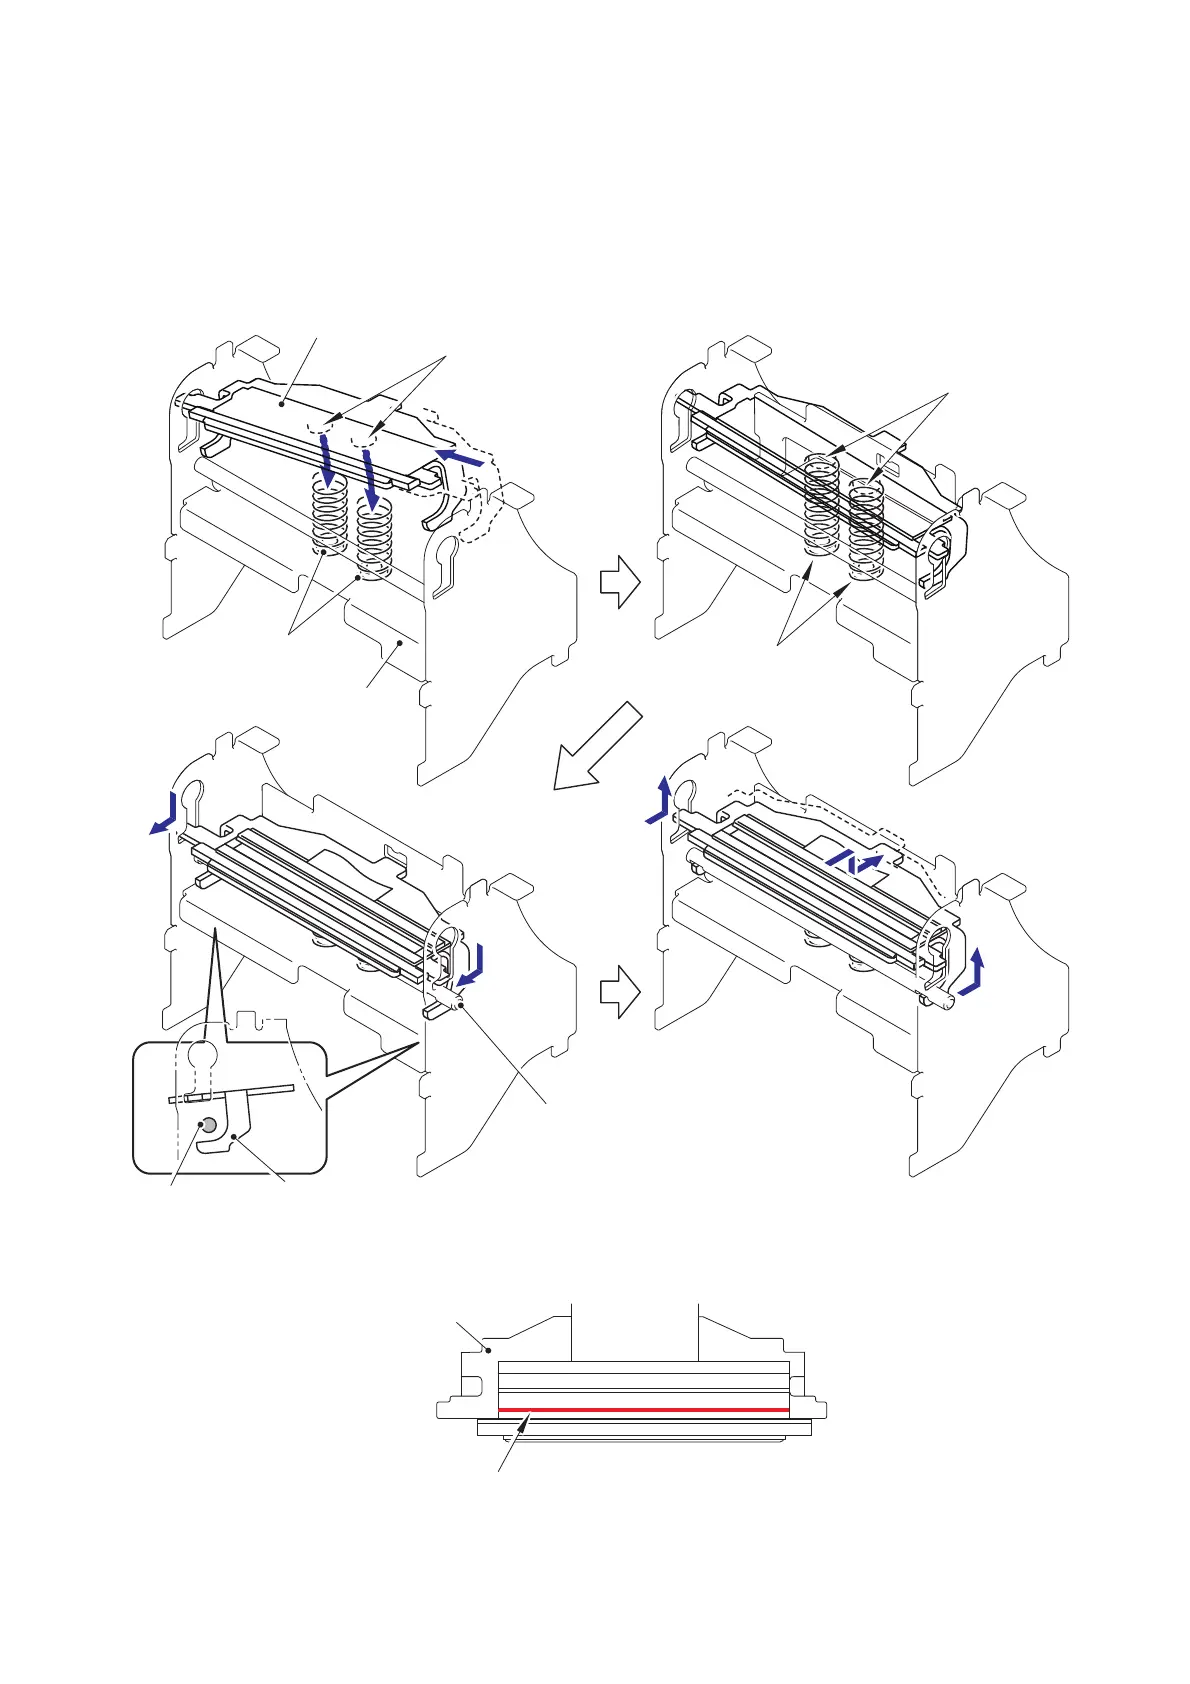
(4) Set the two head springs L on the bosses of the back side of the head ASSY, and
assemble the head ASSY onto the mecha ASSY as shown in the figure below.
NOTE 1: Confirm that the head ASSY moves smoothly.
NOTE 2: Confirm that the head springs L are properly inserted into the upper and
lower bosses.
CAUTION: Pay attention not to give strong impact on the heating element of a
head ASSY when mounting the head ASSY.
Fig. 3.5-4 Reassembling the Mecha ASSY (4)
Bosses
Insert the head springs L properly
into the bosses of the head ASSY.
Insert the head springs L properly
into the bosses of the mecha ASSY.
Head ASSY
Head springs L
Release shaft
Release shaft
Hook the left and right arms of the head ASSY on the release shaft.
4a
4b
4b
4c
4c
4d
4d
4e
Mecha ASSY
 Loading...