128
HYPERION User Manual Bruker Optik GmbH
Repair and Maintenance 6
6.2.3 Removal and installation procedure of the FPA detector
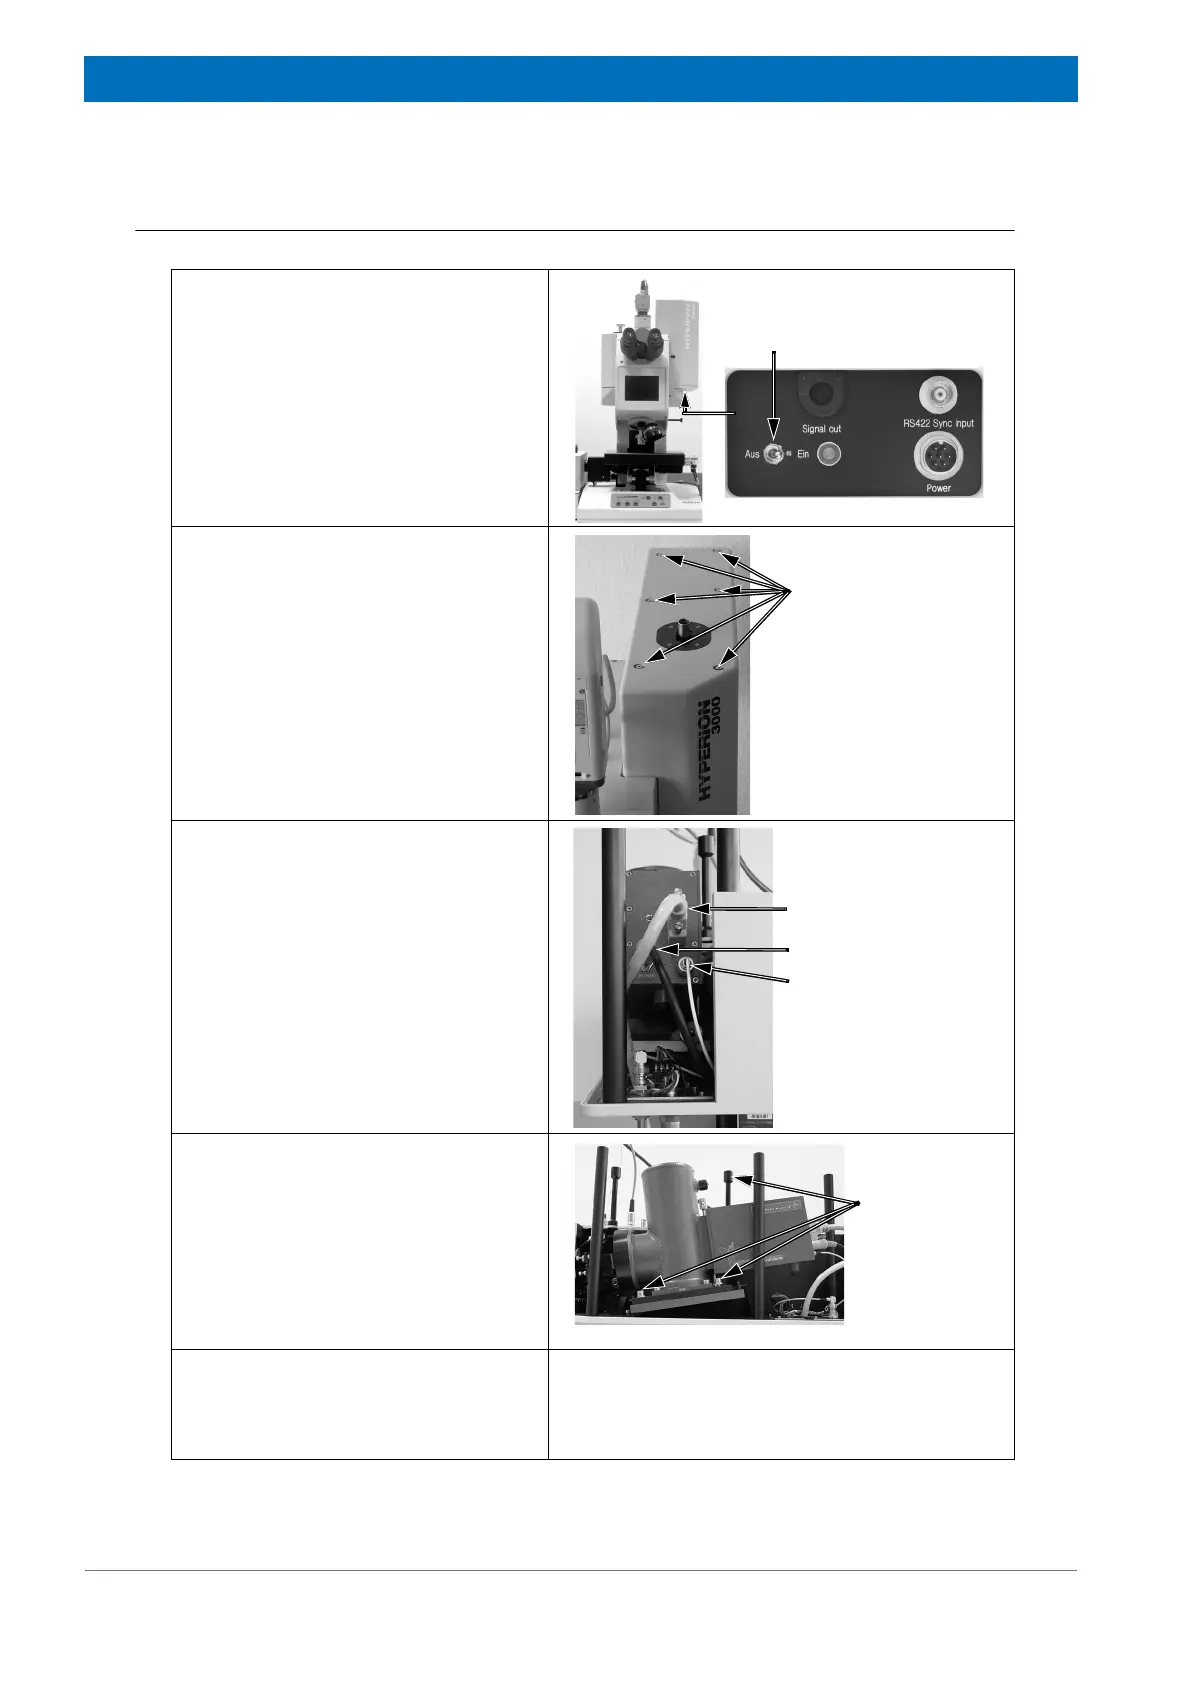
Step 1
Switch off the FPA detector.
Note: The On/Off switch is located on
the bottom side of the FPA detector
compartment.
Step 2
Remove the housing of the FPA detec-
tor compartment. Loosen the six fasten-
ing screws (Allen screws) using an Allen
wrench (2 mm) and remove the hous-
ing.
Step 3
Disconnect all cable at the rear side of
the FPA detector.
Step 4
Loosen the three mounting screws at
the base plate of the FPA detector.
Note: For loosening the two front
screws, use an Allen wrench (5 mm).
The back screw is factory-equipped with
a kind of screw driver.
Step 5
Remove the FPA detector from the
detector compartment.
Fastening
screws of the
housing
Power cable
Trigger cable
Data cable