Cellwatch Frontier System Installation & User Manual
Section III – Configuration Build and Hardware Integration Guide-94
Batteries
Battery name – The name of the battery can be changed to facilitate identification. It is
recommended to leave the word “Battery” in the name.
String count – Enter the number of strings that are in parallel for the corresponding Battery.
Refer to the terminology above if there are questions on how many strings are connected to the
Battery.
Strings
String name – The name of the string can be changed to facilitate identification. It is
recommended to leave the word “String” in the name.
Assigned TPs – One or more available temperature probes can be assigned to a string. Select the
checkbox next to the desired TP port to assign it to the string.
Assigned CTs – One or more available current transducers can be assigned to a string. Select the
checkbox next the desired CT port to assign it to the string.
Assigned Digital Input Bits – Number of digital input bits (DIB) to be assigned to a string.
Channel Count – The total number of DCM channels in the Frontier system. Each DCM has four
channels, so this number can be calculated by multiplying the number of DCM units in the
system by four. A channel map will display based on the channel count.
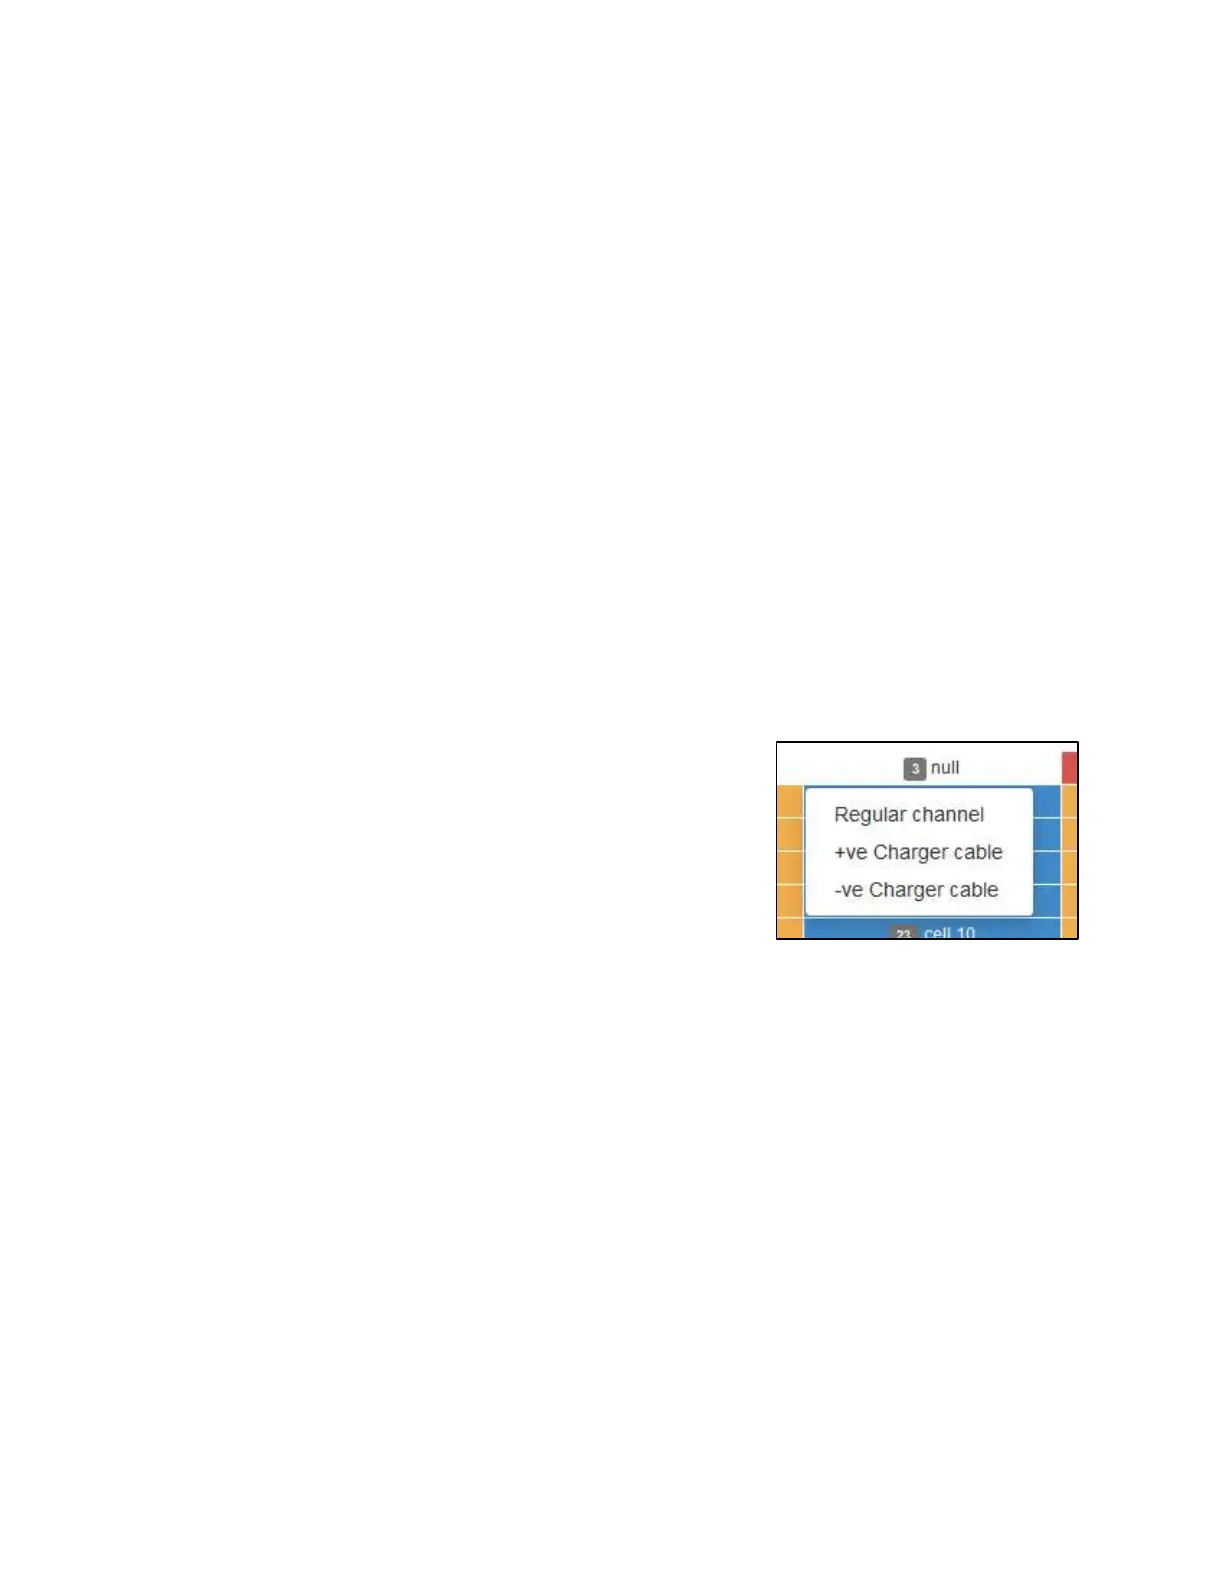
Channel Map
A corresponding Channel map will display, allowing the user to
specify each channel as a cell, inter-cell strap, inter-tier strap, or
charger cable. The screenshot below is an example channel map for
a string with 30 cells (two tiers of 15 containers each), monitoring
inter-cell links, inter-tier straps, and charger cables separately. The
number of each channel is shown in grey, next to the assignment
description for that channel. A channel dedicated to monitoring a
cell is shown in blue, while a channel dedicated to monitoring an inter-cell link is shown in gold. Inter-
tier straps and charger cables are shown in brown and red, respectively.
To change the assignment of a channel, left-click the channel and select one of the assignment menu
options. A channel can be assigned as a cell, inter-cell strap or link, inter-tier strap, or a charger cable
(either positive or negative).
To restore all channel assignments back to their defaults, select Reset All Channels.
Null channels
If a channel will not be used for monitoring, it will need to be nulled. To null a channel, left-click on the
desired channel and select the option Null channel. Selecting this option will turn the channel white and
display “null” for that channel.