Home
CERUS
Laboratory Equipment
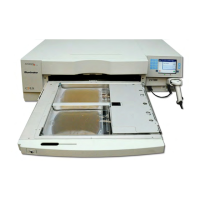
INTERCEPT INT100
Page 2 (Cerus and INTERCEPT are trademarks of Cerus Corporation.)
CERUS INTERCEPT INT100 - Cerus and INTERCEPT are trademarks of Cerus Corporation.
182 pages
Manual
Save Page as PDF
To Next Page
To Next Page
To Previous Page
To Previous Page
Loading...
Cerus Corp
orat
ion
Cerus Euro
pe B
.V
.
2550
Stanwe
ll Drive
Stationsst
raat 79
-
D
Concord, CA 94520 U
SA
3811 MH Am
ersfoort
Made in USA
The Neth
erlands
www.interceptbloodsy
stem.com
Cerus and IN
TERC
EPT a
re trade
marks o
f Cerus C
orporat
ion.
MAN-EN 00601, v3.0
1
3
Table of Contents
Main Page
MAN-EN 00601-1 v1.0
1
Cerus and INTERCEPT are trademarks of Cerus Corporation.
2
MAN-EN 00601-2 v1.0
5
MAN-EN 00601-3 v2.0
7
Section 1.1 What the Illuminator Does
9
• The blood product is prepared in accordance with approved specifications for processing with INTERCEPT. Refer to the Instructions for Use provided with the processing sets for treatment specifications.
9
• The blood product is then mixed with amotosalen HCl.
9
• The amotosalen interacts with DNA or RNA in virus, bacteria, parasites or leukocytes if they are present in the blood product.
9
• When the blood product with amotosalen is exposed to UVA light, the amotosalen “crosslinks” the DNA or RNA. Pathogens can be prevented from replicating by this process.
9
• Residual amotosalen is reduced by adsorption prior to storage.
9
Section 1.2 Intended Use of the Illuminator
10
Section 1.3 Indications for Use
11
Section 1.4 Contraindications for Use
12
Section 1.5 Notes to Transfusionists
13
Section 1.6 Warnings
14
Section 1.7 Cautions
17
MAN-EN 00601-4 v1.0
19
MAN-EN 00601-5 v1.0
29
• 10 numeric characters : 0 through 9
32
• 6 control characters : minus (-), dollar sign ($), period (.), plus (+), colon (:), forward slash (/)
32
• 8 start / stop characters : a, b, c, d, t, n, *, e (upper and lower case allowed)
32
• All 128 ASCII characters
32
• the front panel, where the operator controls are located.
33
• the door and drawer, where blood products are placed for illumination.
33
• (Left hand light) This light is green when the power is on.
36
• (Right hand light) When the amber service light comes on, attention to the illuminator is needed.
36
• Arrow buttons — up and down arrow buttons allow you to scroll through the screen choices.
38
• Function buttons — the meaning of these buttons change to guide you through the screen choices.
38
• Keypad — buttons with a number, letter and special character function.
38
• The backspace (() button will delete the last number or letter only. To delete all the numbers and letters you need to push the button several times.
41
• The advance (() button is used to let you enter the next number or letter using the same button as the previous number or letter. For example, to enter the number 2334+, you would do the following:
41
• Turn on the device and press the ‘Enter’ button once it appears.
48
• The ‘Select a function’ screen will appear. Select the ‘Enter Credentials’ option and press the ‘Enter’ button.
48
• The ‘Enter username’ screen will appear. Use the keypad to enter your username and press the ‘Enter’ button. A confirmation screen will appear. If the username is correct, press the ‘OK’ button.
48
• Alternatively, you may scan your username via the barcode scanner. If the barcode scanner is used, you will not need to press ‘Enter’ and there will not be a confirmation screen.
49
• The ‘Enter password’ screen will appear. Use the keypad to enter your password and press the ‘Enter’ button. A confirmation screen will appear. If the password is correct, press the ‘OK’ button. Alternatively, if allowed by your institution, you may...
49
• The ‘Select an option’ screen will appear. Select the ‘Illuminator Settings’ option and press the ‘Enter’ button. The ‘Select a setting’ screen will appear.
50
• While in the ‘Select a setting’ screen, use the arrow buttons at the right of the screen to choose ‘Date/Time’.
50
• Press the ‘Enter’ button to select the option. The ‘Select a date format’ screen will appear.
50
• Use the arrow buttons at the right of the screen to choose the date format. Your choices are month/day/year, day/month/year or year/month/day.
51
• Press the ‘Enter’ button to select the format. The ‘Enter date’ screen will appear.
51
• Use the keypad (to the left of the screen) to enter the date manually. The illuminator will automatically take you to the next field (for example, month or year) when you have entered the numbers.
51
• Press the ‘Enter’ button when the date has been entered. The ‘Select a time format’ screen will appear.
51
• Use the arrow buttons to choose the time format. Your choices are a 12-hour clock or a 24-hour clock.
51
• Press the ‘Enter’ button to select the format. The ‘Enter time’ screen will appear.
51
• Use the keypad to enter the time manually.
51
• Press the ‘Enter’ button when the time has been entered.
51
• If you selected the 12-hour clock, then the ‘Select 12 hour period’ screen will appear. Use the arrow buttons at the right of the screen to choose whether the time is ‘Morning: am’ or ‘Evening: pm’.
51
• Press the ‘Enter’ button to select the time period. A confirmation screen will appear.
51
• If you selected the 24-hour clock, the confirmation screen will appear.
51
• If the date and time are incorrect, press the ‘Edit’ button to return to the ‘Select 12 hour period’ screen.
51
• If this screen is incorrect, press the ‘Back’ button to find the incorrect screen. Repeat the above steps to correct the information.
51
• Press the ‘Enter’ button after every entry. A confirmation screen will appear once you have entered all the data for date and time.
52
• Press the ‘OK’ button to confirm the date and time. The ‘Select a setting’ screen will appear.
52
• From the ‘Select a setting’ screen, use the arrow buttons to choose the ‘Language’ option.
52
• Press the ‘Enter’ button to select the option. The ‘Select a language’ screen will appear.
52
• Use the arrow buttons to choose the desired language. If your language is not listed on the screen, press the advance (() button on the keypad to display the next page of languages. Then use the arrow buttons again to choose the desired language.
52
• Press the ‘Enter’ button to select the language. A confirmation screen will appear.
52
• If the language is incorrect, press the ‘Edit’ button to return to the ‘Select a language’ screen.
52
• Use the arrow buttons to choose the correct language. Press the ‘Enter’ button to select the language. A confirmation screen will appear.
52
• Press the ‘OK’ button to confirm the language choice. The ‘Select a setting’ screen will appear.
53
• From the ‘Select a setting’ screen, use the arrow buttons to choose the ‘Illuminator Identification’ option.
53
• Press the ‘Enter’ button to select the option. The ‘Enter illuminator identification’ screen will appear.
53
• Use the keypad to enter the instrument 9-digit serial number manually. The serial number is located inside the front door of the illuminator.
53
• Press the ‘Enter’ button when the number has been entered. A confirmation screen will appear.
53
• If the number is incorrect, press the ‘Edit’ button to return to the ‘Enter illuminator identification’ screen.
53
• Using the keypad, press the backspace (() button to delete the numbers. Then, re-enter the correct number using the keypad.
53
• Press the ‘Enter’ button when the number has been entered. A confirmation screen will appear.
53
• If the number is correct, press the ‘OK’ button to confirm the number. The ‘Select a setting’ screen will appear.
54
• Set printing options: report printing, auto-printing, and label printing
54
• Configure user accounts: add accounts, disable accounts, reset passwords, and set password expiration interval
54
• Export data: export all treatments, treatments in a date range, all service data, and service data in a date range
54
• Enable a data management system: send information to a data management system
54
• Press the ‘Enter’ button to select the ‘Configurations’ option. The ‘Select a configuration setting’ screen will appear.
54
• Use the arrow buttons to choose the ‘Configure Printing’ option.
54
• Press the ‘Enter’ button to select the ‘Configure Printing’ option.
54
• The ‘Select a printer configuration setting’ screen will appear.
55
• Use the arrow buttons to choose the ‘Report Printer’ option.
55
• Press the ‘Enter’ button to select the ‘Report Printer’ option. The ‘Select a report printer option’ screen will appear.
55
• Use the arrow buttons to choose either ‘On’ or ‘Off’. Selecting the ‘On’ option will allow you to print the last treatment report, a specific treatment report, a shift report for a given day, or all treatment reports in a date range. If not using th...
55
• Press the ‘Enter’ button to select ‘On’ or ‘Off’. A confirmation screen will appear.
55
• If the option is incorrect, press the ‘Edit’ button to return to the ‘Select a report printer option’ screen. Use the arrow buttons to select the correct option.
55
• If the selection is correct, press the ‘OK’ button to confirm the selection. The ‘Select a printer configuration setting’ screen will appear.
55
• Press the ‘Enter’ button to select the ‘Configure Printing’ option.
56
• The ‘Select a printer configuration setting’ screen will appear. Use the arrow buttons to choose the ‘Auto-Printing’ option.
56
• Press the ‘Enter’ button to select the ‘Auto-Printing’ option. The ‘Select an auto-printing option’ screen will appear.
56
• Use the arrow buttons to choose either ‘On’ or ‘Off’. Selecting the ‘On’ option will automatically print the last treatment record(s) during the container unloading. If not using Auto-Printing, select the ‘Off’ option. (Refer to Chapter 4 for printi...
57
• Press the ‘Enter’ button to select ‘On’ or ‘Off’. A confirmation screen will appear.
57
• If the option is incorrect, press the ‘Edit’ button to return to the ‘Select an auto-printing option’ screen. Use the arrow buttons to select the correct option.
57
• If the selection is correct, press the ‘OK’ button to confirm the selection. The ‘Select a printer configuration setting’ screen will appear.
57
• Donation number
58
• Blood product code
58
• Status of illumination
58
• Illumination chamber number
58
• From the ‘Select a configuration setting’ screen, use the arrow buttons to choose the ‘Configure Printing’ option.
59
• Press the ‘Enter’ button to select the ‘Configure Printing’ option. The ‘Select a printer configuration setting’ screen will appear.
59
• Use the arrow buttons to choose the ‘Label Printer’ option.
59
• Press the ‘Enter’ button to select the ‘Label Printer’ option. The ‘Select a blood component’ screen will appear.
59
• Use the arrow buttons to choose ‘Platelets’ or ‘Plasma’. Press the ‘Enter’ button to select component. The ‘Enter the number of platelets/plasma labels’ screen will appear.
60
• Use the keypad to enter the desired quantity (0 - 6) of labels to be printed.
60
• Press the ‘Enter’ button to select the number of labels. A confirmation screen will appear.
60
• If the number of labels is incorrect, press the ‘Edit’ button to return to the ‘Enter the number of platelet/plasma labels’ screen. Use the backspace (() button on the keypad to delete the number and re-enter the correct number. Press the ‘Enter’ bu...
60
• If the number of labels is correct, press the ‘OK’ button. The ‘Select a blood component’ screen will appear.
60
• Repeat the process for the desired number of platelet/plasma labels to be printed.
60
• Press the ‘Back’ button to return to the ‘Select a configuration setting’ screen.
60
• From the ‘Select a configuration setting’ screen, use the arrow buttons to choose the ‘Configure User Accounts’ option.
61
• Press the ‘Enter’ button to select the ‘Configure User Accounts’ option. The ‘Configure user accounts’ screen will appear.
61
• Use the arrow buttons to choose the ‘Add Account’ option. Press the ‘Enter’ button to select the ‘Add Account’ option.
61
• The ‘User account type’ screen will appear and provide a choice of user account to add, either Operator or Administrator.
61
• Use the arrow buttons to select the account type, Operator or Administrator. Press the ‘Enter’ button.
61
• If the manually-entered username is correct, press the ‘OK’ button. The ‘Enter New Password’ screen will appear.
62
• Enter the password for the account, either by scanning a barcode or by entering the password manually with the keypad. (Refer to Section 4.2.) Press the ‘Enter’ button if the password is manually entered.
63
• The ‘Confirm password’ pop-up window will appear if the password was manually entered. If the manually-entered password is incorrect, press the ‘Edit’ button and correct it.
63
• If the manually-entered password is correct, press the ‘OK’ button.
63
• From the ‘Select a configuration setting’ screen, use the arrow buttons to choose the ‘Configure User Accounts’ option.
64
• Press the ‘Enter’ button to select the ‘Configure User Accounts’ option. The ‘Configure user accounts’ screen will appear.
64
• Use the arrow buttons to select the ‘Disable Account’ option. Press the ‘Enter’ button to choose the ‘Disable Account’ option.
64
• The ‘Disable account’ screen will appear. Enter the username of the account to be disabled, either by scanning a barcode or by entering the username manually with the keypad. (Refer to Section 4.2.) Press the ‘Enter’ button if the username is manua...
64
• The ‘Confirm username’ pop-up window will appear if the username was manually entered. If the manually-entered username is incorrect, press the ‘Edit’ button and correct it.
65
• If the manually-entered username is correct, press the ‘OK’ button.
65
• From the ‘Select a configuration setting’ screen, use the arrow buttons to choose the ‘Configure User Accounts’ option.
65
• Press the ‘Enter’ button to select the ‘Configure User Accounts’ option. The ‘Configure user accounts’ screen will appear.
65
• Use the arrow buttons to choose the ‘Reset Password’ option. Press the ‘Enter’ button to select the ‘Reset Password’ option.
66
• The ‘Enter username’ screen will appear. Enter the username of the account whose password is to be reset either by scanning a barcode or by entering the username manually with the keypad. (Refer to Section 4.2.) Press the ‘Enter’ button if the user...
66
• If the username is valid, the ‘Enter New Password’ screen will appear.
66
• Enter the new password for the account, either by scanning a barcode or by entering the password manually with the keypad. (Refer to Section 4.2.) Press the ‘Enter’ button if the password is manually entered. The ‘Confirm Password’ popup window wil...
66
• Upon successful completion, the ‘Select an option’ screen will appear.
67
• From the ‘Select a configuration setting’ screen, use the arrow buttons to choose the ‘Configure User Accounts’ option.
67
• Press the ‘Enter’ button to select the ‘Configure User Accounts’ option. The ‘Configure user accounts’ screen will appear.
67
• Use the arrow buttons to choose the ‘Password Expiry’ option. Press the ‘Enter’ button to select the ‘Password Expiry’ option.
67
• The ‘Configure password expiry time’ screen will appear.
68
• Use the arrow buttons to choose ‘Disable,’ ‘30 days,’ ’90 days,’ or ‘180 days’. Press the ‘Enter’ button to choose one of the options.
68
• The ‘Confirm password expiry time’ pop-up window will appear. If the expiry time is incorrect, press the ‘Edit’ button and correct it.
68
• If the expiry time is correct, press the ‘OK’ button to confirm the expiry time.
68
• Export All Treatments
68
• Export Treatments in Date Range
68
• Export All Service Data
68
• Export Service Data in Date Range
68
• Press the ‘Enter’ button to select the ‘Export Data’ option. The ‘Select Data To Export’ screen will appear. The following sections detail each of the export data options.
69
• From the ‘Select Data To Export’ screen, use the arrow buttons to choose the ‘Export All Treatments’ option. Press the ‘Enter’ button to select the ‘Export All Treatments’ option.
70
• The ‘Export all treatment records’ screen will appear. To cancel before the export operation begins, press the ‘Cancel’ button.
70
• To start exporting all treatment records, press the ‘Export’ button. The ‘Exporting treatment records’ screen will appear. Alternatively, if the ‘Export’ button is NOT pressed, the ‘Exporting treatment records’ screen will appear automatically after...
70
• When the export operation is finished, the ‘Completed’ pop-up window will appear. Press the ‘OK’ button.
70
• From the ‘Select Data To Export’ Screen, use the arrow buttons to choose the ‘Export Treatments in Date Range’ option. Press the ‘Enter’ button to select the ‘Export Treatments in Date Range’ option.
71
• The ‘Specify date range’ screen will appear. Use the keypad to enter the ‘From’ date.
71
• Use the arrow buttons to advance to the ‘To’ date. Use the keypad to enter the ‘To’ date.
71
• Press the ‘Enter’ button. The ‘Confirm date range for export’ screen will appear.
71
• If the data entered is incorrect, press the ‘Edit’ button. The ‘Specify date range’ screen will appear. Use the arrow buttons and the keypad to edit the date range and correct it.
71
• If the data entered is correct, press the ‘Export’ button to begin exporting data. The ‘Exporting treatment records’ screen will appear. Alternatively, if the ‘Export’ button is NOT pressed, the ‘Exporting treatment records’ screen will appear autom...
71
• When the export operation is finished, the ‘Completed’ pop-up window will appear. Press the ‘OK’ button.
71
• From the ‘Select Data To Export’ screen, use the arrow buttons to choose the ‘Export All Service Data’ option. Press the ‘Enter’ button to select the ‘Export All Service Data’ option.
72
• The ‘Export all service data’ screen will appear. To cancel before the export operation begins, press the ‘Cancel’ button.
72
• To start exporting all service data, press the ‘Export’ button. The ‘Exporting service data’ screen will appear. Alternatively, if the ‘Export’ button is NOT pressed, the ‘Exporting service data’ screen will appear automatically after a short delay.
72
• When the export operation is finished, ‘Completed’ pop-up window will appear. Press the ‘OK’ button.
72
• From the ‘Select Data to Export’ screen, use the arrow buttons to choose the ‘Export Service Data in Date Range’ option. Press the ‘Enter’ button to select the ‘Export Service Data in Date Range’ option.
73
• The ‘Specify date range’ screen will appear. Use the keypad to enter the ‘From’ date.
73
• Use the arrow buttons to advance to the ‘To’ date. Use the keypad to enter the ‘To’ date.
73
• Press the ‘Enter’ button.
73
• The ‘Confirm date range for export’ screen will appear.
73
• If the data entered is incorrect, press the ‘Edit’ button. The ‘Specify date range’ screen will appear. Use the arrow buttons and the keypad to edit the date range and correct it.
74
• If the data entered is correct, press the ‘Export’ button to begin exporting service data. The ‘Exporting service data’ screen will appear. Alternatively, if the ‘Export’ button is NOT pressed, the ‘Exporting service data’ screen will appear automat...
74
• When the export operation is finished, the ‘Completed’ pop-up window will appear. Press the ‘OK’ button.
74
• From the ‘Select a configuration setting’ screen, use the arrow buttons to choose the ‘Data Management System’ option.
75
• Press the ‘Enter’ button to select the ‘Data Management System’ option. The ‘Enter data management system TCP/IP address’ screen will appear.
75
• Use the keypad to enter the TCP/IP address of the data management system connected to the illuminator.
75
• Press the ‘Enter’ button when the address has been entered. A confirmation screen will appear.
75
• If the address is incorrect, press the ‘Edit’ button to return to the ‘Enter data management system TCP/IP address’ screen.
75
• Using the keypad, press the backspace (() button to delete the address. Then, re-enter the correct address using the keypad.
75
• Press the ‘Enter’ button when the address has been entered. A confirmation screen will appear.
75
• If the address is correct, press the ‘OK’ button to confirm the address. The ‘Enter illuminator TCP/IP address’ screen will appear.
75
• Use the keypad to enter the TCP/IP address of the illuminator.
76
• Press the ‘Enter’ button when the address has been entered. A confirmation screen will appear.
76
• If the address is incorrect, press the ‘Edit’ button to return to the ‘Enter illuminator TCP/IP address’ screen.
76
• Using a keypad, press the backspace (() button to delete the address. Then, re-enter the correct address using the keypad.
76
• Press the ‘Enter’ button when the address has been entered. A confirmation screen will appear.
76
• If the address is correct, press the ‘OK’ button to confirm the address. The ‘Select a configuration setting’ screen will appear.
76
• Press the ‘Back’ button to return to the ‘Select a setting’ screen.
76
• Press the ‘Back’ button again to return to the ‘Select an option’ screen.
76
• Turn on the device and press the ‘Enter’ button once it appears.
77
• The ‘Select a function’ screen will appear. Select the ‘Enter Credentials’ option and press the ‘Enter’ button.
77
• The ‘Enter username’ screen will appear. Enter your username and press the ‘Enter’ button.
77
• The ‘Enter password’ screen will appear. Enter your password and press the ‘Enter’ button.
77
• The ‘Select an option’ screen will appear. Select the ‘Change Password’option and press the ‘Enter’ button. The ‘Enter New Password’ screen will appear.
78
• Enter the new password either by scanning a barcode or by entering the password manually with the keypad. (Refer to Section 4.2.) Press the ‘Enter’ button if the password is manually entered.
78
• The ‘Confirm password’ pop-up window will appear if the password was manually entered. If the manually-entered password is incorrect, press the ‘Edit’ button and correct it.
79
• If the manually-entered password is correct, press the ‘OK’ button.
79
• Air flow sensor — to make sure that the fan is working.
80
• Air filter — to cover the fan vent and prevent dust from entering the illuminator.
80
• Container placement sensors — to ensure the containers are positioned correctly for illumination.
80
• Door lock — to lock the door during treatment.
80
• Door lock sensor — to ensure the door is locked during treatment.
80
• Magnetic door sensor — to ensure the door is closed.
80
• Interlock switch — to ensure the door is closed.
80
• Side access panel sensor — to ensure the side access panel is closed during illumination.
80
• Agitator sensor — to ensure the agitator is moving.
80
• Drawer sensor — to ensure the drawer is closed.
80
• If you notice the illuminator is damaged, contact your authorized service representative. Please refer to the front of this manual for contact details.
82
• Each illuminator chamber has 4 photodiode sensors, 2 at the top and 2 at the bottom. These sensors measure the amount of light through the blood product with every treatment cycle and the illuminator adjusts the time of the cycle to provide the corr...
82
• As a secondary check, the illuminator software checks the treatment time to make sure that it is within the appropriate range set by the authorized service representative.
82
• The bulbs will need changing if the time approaches the limit for adequate illumination. The light system is automatically checked during power on or every 24 hours, and during power failure recovery.
82
• The sensors are calibrated by your authorized service representative when the illuminator is installed and during preventive maintenance.
82
• Occasionally, the barcode scanner will not scan the barcodes on the containers. If this happens, enter the numbers of the barcode into the illuminator manually via the keypad if this is permitted by your facility’s procedures. Refer to Sections 3.4 ...
82
• If the problem seems to be with the scanner, not the barcode label, contact your authorized service representative for assistance.
82
• The correct dose of light is being administered to the blood product, so pathogen inactivation is being appropriately achieved. The treatment time automatically increases as the bulbs gradually become dimmer, so that the correct dose is administered.
83
• If the treatment time exceeds the appropriate range as set by the authorized service representative, a message will be displayed to change the bulbs.
83
MAN-EN 00601-6 v1.0
85
• The illuminator will run several self-tests. When the self-tests are complete, the ‘Enter’ function button will appear.
88
• Use the keypad to enter your username name or number.
89
• If the username is incorrect, press the backspace (() button on the keypad to delete the wrong username. Then, re-enter the correct username using the keypad.
89
• If the identification is correct, press the ‘Enter’ button. A confirmation screen will appear. Press ‘OK’ to confirm.
89
Section 4.4 Scan Barcodes
95
• The illuminator will make a pair of triple beep sounds (i.e., beep-beep-beep, pause, beep-beep-beep).
100
• The screen will start counting the elapsed number of minutes, after the illumination has been completed.
101
• The agitator will continue shaking the containers for platelet products but stop for plasma products.
101
• Approximately every 2 minutes the illuminator will make a beep sound to remind you that the containers need to be removed from the illuminator.
101
• Print the last treatment manually
103
• Print a specific treatment
103
• Print a shift report
103
• Print treatments in a date range
103
• Print labels
103
• If the self-tests are not successful, an error message will appear on the screen with additional instructions. However, if these additional instructions are not helpful, turn the illuminator off, wait until the screen darkens, then turn it back on. ...
114
• If your operator badge will not scan into the illuminator, use the keypad to manually enter your operator username into the illuminator.
114
• When only one chamber is working and can be used, the illuminator will display which chamber is available in the last option of the menu on the ‘Number of containers’ screen. There will be a blue ‘X’ on the screen across the chamber that is not work...
114
• When one of the chambers cannot be used, you may use the other chamber, if the ‘Run Treatment’ choice is offered. This screen will show a number for the chamber that can be used and an ‘X’ for the chamber that cannot be used. Some problems are such ...
115
• The treatment record will be marked as Incomplete. Follow your center guidelines or contact the medical director, to determine if the product is acceptable.
115
• To locate a treatment record in the illuminator, refer to Section 4.9, Optional Printing Treatment Reports and Additional Labels. See Specific Record for details on how to find a treatment record. If you cannot locate a record for a given product, f...
115
• Follow your center’s guidelines or contact the medical director, since the pathogen inactivation process has not been validated for products recorded as Incomplete.
115
• If there are multiple illuminators at a blood center or a single illuminator for treating plasma, means must be employed to protect against release of a double illuminated blood product.
115
• The label applied to the illumination container after treatment, provides visual evidence that the unit received partial or complete treatment in the illuminator, and should not be re-illuminated.
115
MAN-EN 00601-7 v1.0
116
• If you notice the illuminator is damaged, contact your authorized service representative. Please refer to the front of this manual for contact details.
119
• Each illuminator chamber has 4 photodiode sensors, 2 at the top and 2 at the bottom. These sensors measure the amount of light through the blood product with every treatment cycle and the illuminator adjusts the time of the cycle to provide the corr...
119
• As a secondary check, the illuminator software checks the treatment time to make sure that it is within the appropriate range set by the authorized service representative.
119
• The bulbs will need changing if the time approaches the limit for adequate illumination. The light system is automatically checked during power on or every 24 hours, and during power failure recovery.
119
• The sensors are calibrated by your authorized service representative when the illuminator is installed and during preventive maintenance.
119
• Occasionally, the barcode scanner will not scan the barcodes on the containers. If this happens, enter the numbers of the barcode into the illuminator manually via the keypad, if this is permitted by your facility’s procedures. Refer to Sections 3.4...
119
• If the problem seems to be with the scanner, not the barcode label, contact your authorized service representative for assistance.
119
• The correct dose of light is being administered to the blood product, so pathogen inactivation is being appropriately achieved. The treatment time automatically increases as the bulbs gradually become dimmer, so that the correct dose is administered.
120
• If the treatment time exceeds the appropriate range as set by the authorized service representative, a message will be displayed to change the bulbs.
120
• If the self-tests are not successful, an error message will appear on the screen with additional instructions. However, if these additional instructions are not helpful, turn the illuminator off, wait until the screen darkens, then turn it back on. ...
120
• If your operator badge will not scan into the illuminator, manually enter your operator username into the illuminator using the keypad.
120
• When only one chamber is working and can be used, the illuminator will display which chamber is available in the last option of the menu on the ‘Number of containers’ screen. There will be a blue ‘X’ on the screen across the chamber that is not work...
120
• When one of the chambers cannot be used, you may use the other chamber, if the ‘Run Treatment’ choice is offered. This screen will show a number for the chamber that can be used and an ‘X’ for the chamber that cannot be used. Some problems are such ...
121
• The treatment record will be marked as Incomplete. Follow your center guidelines or contact the medical director, to determine if the product is acceptable.
121
• To locate a treatment record in the illuminator, refer to Section 4.9, Optional Printing Treatment Reports and Additional Labels. See Specific Record for details on how to find a treatment record. If you cannot locate a record for a given product, f...
121
• Follow your center’s guidelines or contact the medical director, since the pathogen inactivation process has not been validated for products recorded as Incomplete.
121
• If there are multiple illuminators at a blood center or a single illuminator for treating plasma, means must be employed to protect against release of a double illuminated blood product.
121
• The label applied to the illumination container after treatment, provides visual evidence that the unit received partial or complete treatment in the illuminator, and should not be re-illuminated.
121
• The System Issue message is used to alert the operator of critical issues with the illuminator. Turn the illuminator OFF, wait 10 seconds, then turn it back on. Should the System Issue screen continue to occur, contact your authorized service repres...
122
• On most error screens, there are two buttons: an ‘OK’ button and a ‘Cancel’ button. If an error occurs, follow the instructions on the screen to resolve the issue and select the ‘OK’ button. If you have tried to resolve the issue and cannot, select...
122
• The service light indicates that the illuminator needs servicing. The illuminator will display a message indicating the reason for the issue when the service light turns on. For example, the service light may be turned on when an accessory printer o...
122
• Agitator
123
• Bulbs
123
• Data Entry
123
• Drawer
123
• Fan
123
• Front Door
123
• Integrity Check Issues (Self-tests)
123
• Processing Sets and Treatment
123
• Hardware Accessories
123
• Side Access Panel
123
MAN-EN 00601-8 v1.0
143
• (1) Illuminator (INT100)
145
• (1) Tray
145
• (2) Glass filter plates
145
• (1) Barcode scanner with operating instructions and cable
145
• Placed on a solid and level surface capable of supporting the illuminator(s) and any optionally connected devices. See Chapter 7 for details.
146
• At least 8 cm (3 inches) away from anything that will block the air filter on the bottom left-hand side of the illuminator.
146
• Use in an environment that is maintained between +18 C and +30 C.
146
MAN-EN 00601-9 v2.0
156
1. Codabar (including Monarch 11 and UKBTS)
163
• 10 numeric characters: 0 through 9
163
• 6 control characters: minus (-), dollar sign ($), period (.), plus (+), colon (:), forward slash (/)
163
• 8 start / stop characters: a, b, c, d, t, n, *, e (upper and lower case)
163
2. Code 128 (includes ISBT 128 and Eurocode)
163
• All 128 ASCII characters
163
1. Code 128
163
• Code 128 Scanned Data Input
163
All Code 128 characters are accepted, stored and printed both in human-readable and in barcode format on the printed label if label printing is selected.
163
• Codabar Scanned Data Input not allowed.
163
• Manually Entered Data Input
163
All keypad characters accepted. The manually entered characters are printed only in a human-readable form on the printed label, if label printing is selected.
164
2. Codabar
164
• Code 128 Scanned Data Input not allowed.
164
• Codabar Scanned Data Input
164
All legal Codabar characters accepted. If asterisks and alpha stop and start characters are encountered, they are not printed in human-readable form on the printed label if label printing is selected.
164
• Manually Entered Data Input
164
All legal Codabar numeric and control characters accepted. The manually entered characters are printed only in human-readable form on the printed label if label printing is selected.
164
3. Monarch 11
164
• Code 128 Scanned Data Input not allowed.
164
• Codabar Scanned Data
164
Must be in the following format:
164
• Manually Entered Data
165
Must be in the following format
165
4. I SBT 128
165
• Code 128 Scanned Data
165
Must be in the following format:
165
• Codabar Scanned Data not allowed.
165
• Manually Entered Data
166
Must be in the following format:
166
5. Eurocode
166
• Code 128 Scanned Data
166
Must be in the following format:
166
• Codabar Scanned Data not allowed.
166
• Manually Entered Data
166
Must be in the following format:
166
1. Code 128
167
• Code128 Scanned Data Input
167
• Codabar Scanned Data Input not allowed.
167
• Manually Entered Data Input
167
2. Codabar
167
• Code128 Scanned Data Input not allowed.
167
• Codabar Scanned Data Input
167
• Manually Entered Data Input
167
3. UKBTS Codabar
168
• Code128 Scanned Data Input not allowed.
168
• Codabar Scanned Data Input
168
Must be in the following format:
168
• Manually Entered Data
168
Must be in the following format:
168
4. ISBT 128
168
• Code128 Scanned Data
168
Must be in the following format:
168
• Codabar Scanned Data not allowed.
169
• Manually Entered Data
169
Must be in the following format:
169
5. Eurocode
169
• Code128 Scanned Data
169
Must be in the following format:
169
• Codabar Scanned Data not allowed.
169
• Manually Entered Data
169
Must be in the following format:
169
MAN-EN 00601-10 v1.0
172
MAN-EN 00601-11 v3.0
181