Chapter 3 – Illuminator Description
Section 3.7 – Illuminator Settings
3-43
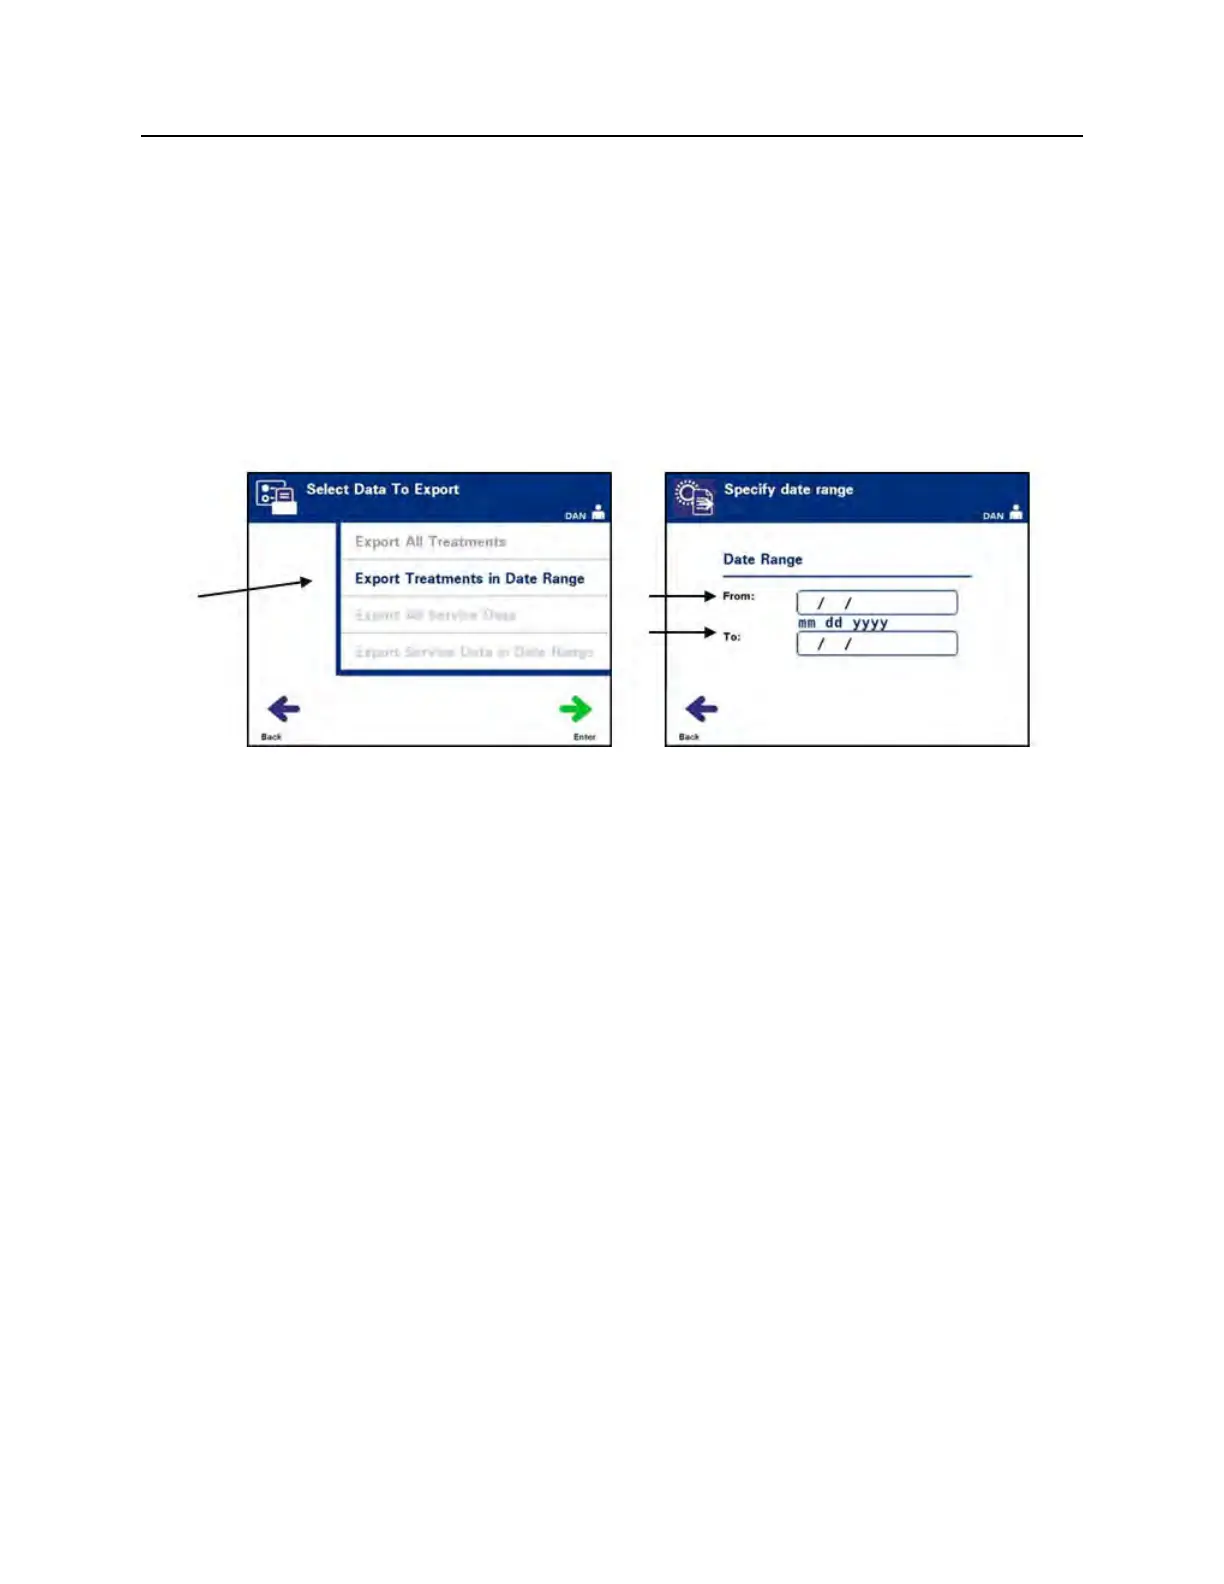
Export
Treatments in
Date Range
Use to export treatment records within a specified date range to a host
computer.
• From the ‘Select Data To Export’ Screen, use the arrow
buttons to choose the ‘Export Treatments in Date Range’
option. Press the ‘Enter’ button to select the ‘Export
Treatments in Date Range’ option.
• The ‘Specify date range’ screen will appear. Use the keypad
to enter the ‘From’ date.
• Use the arrow buttons to advance to the ‘To’ date. Use the
keypad to enter the ‘To’ date.
• Press the ‘Enter’ button. The ‘Confirm date range for export’
screen will appear.
NOTE:
After ‘Enter’ is pressed, there may be a delay while the illuminator
prepares the files. DO NOT re-press ‘Enter.’
• If the data entered is incorrect, press the ‘Edit’ button. The
‘Specify date range’ screen will appear. Use the arrow
buttons and the keypad to edit the date range and correct
it.
• If the data entered is correct, press the ‘Export’ button to
begin exporting data. The ‘Exporting treatment records’
screen will appear. Alternatively, if the ‘Export’ button is NOT
pressed, the ‘Exporting treatment records’ screen will appear
automatically after a short delay.
• When the export operation is finished, the ‘Completed’
pop-up window will appear. Press the ‘OK’ button.