6-12
Cisco Wireless LAN Controller Configuration Guide
OL-17037-01
Chapter 6 Configuring WLANsWireless Device Access
Configuring WLANs
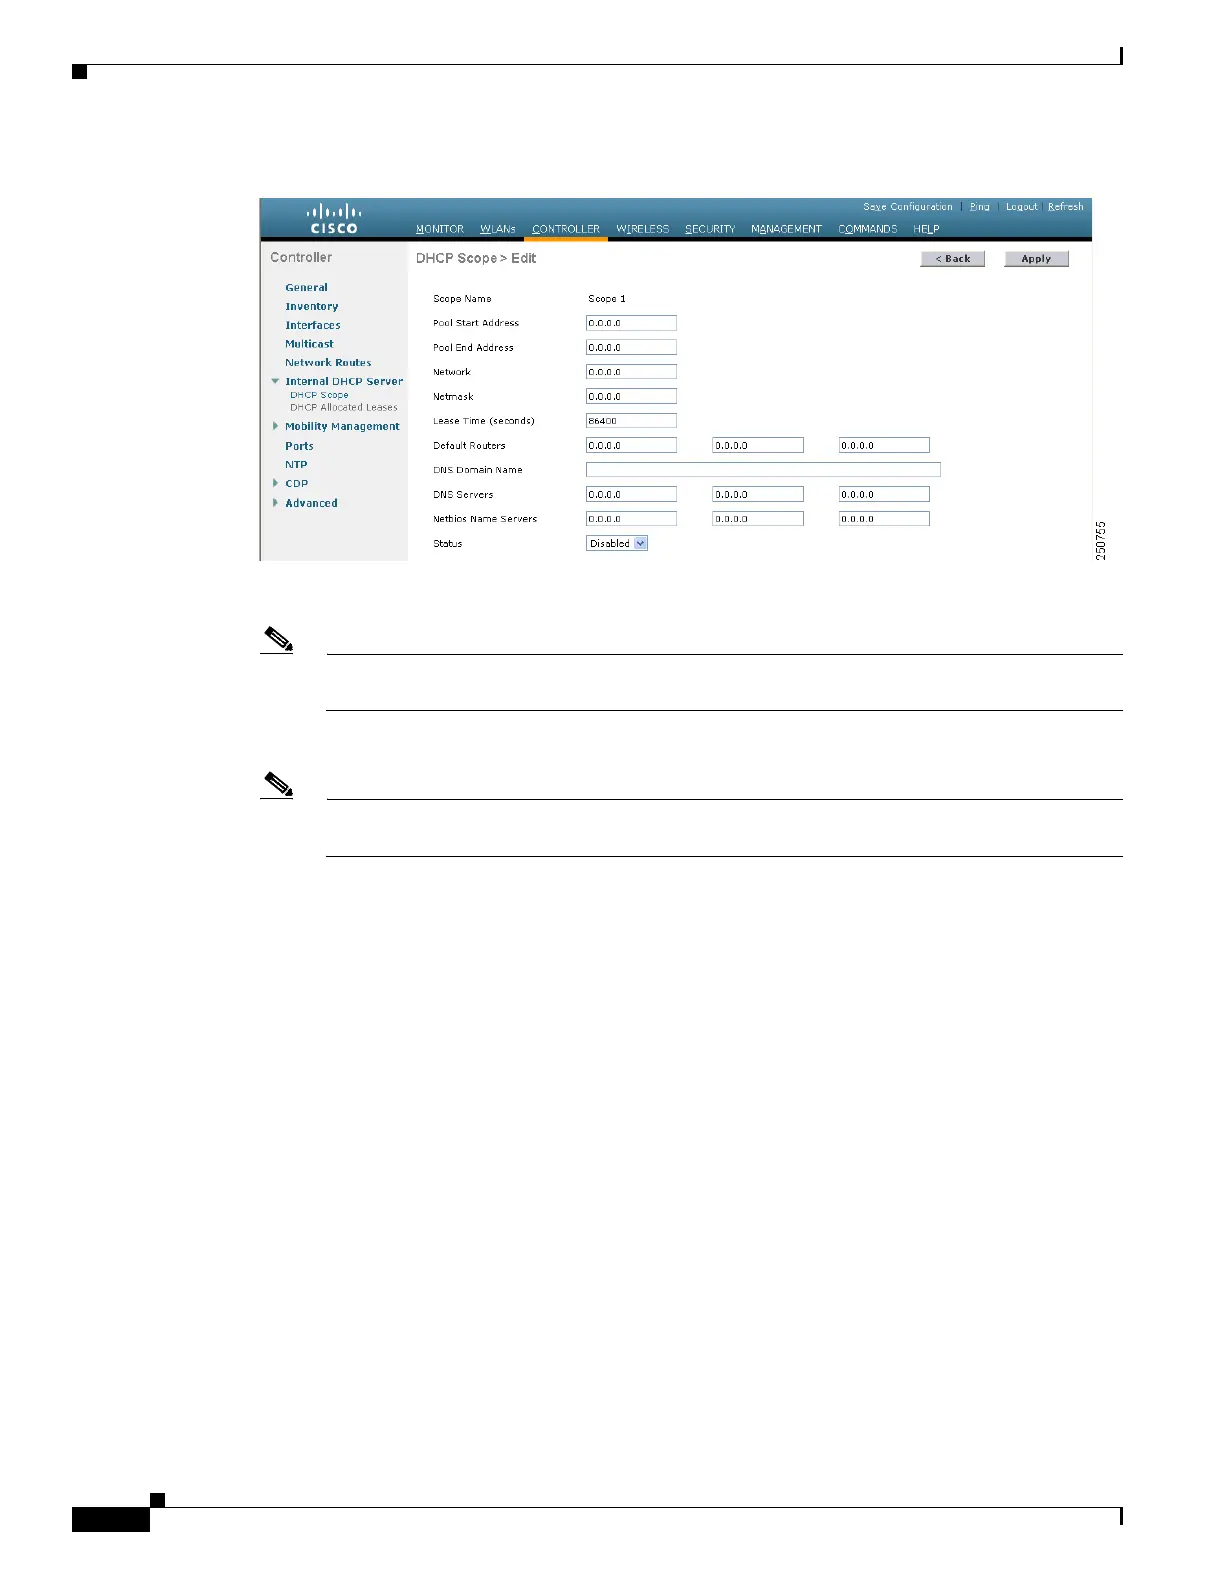
Figure 6-6 DHCP Scope > Edit Page
Step 5
In the Pool Start Address field, enter the starting IP address in the range assigned to the clients.
Note This pool must be unique for each DHCP scope and must not include the static IP addresses of
routers or other servers.
Step 6 In the Pool End Address field, enter the ending IP address in the range assigned to the clients.
Note This pool must be unique for each DHCP scope and must not include the static IP addresses of
routers or other servers.
Step 7 In the Network field, enter the network served by this DHCP scope. This is the IP address used by the
management interface with Netmask applied, as configured on the Interfaces page.
Step 8 In the Netmask field, enter the subnet mask assigned to all wireless clients.
Step 9 In the Lease Time field, enter the amount of time (from 0 to 65536 seconds) that an IP address is granted
to a client.
Step 10 In the Default Routers field, enter the IP address of the optional router(s) connecting the controllers.
Each router must include a DHCP forwarding agent, which allows a single controller to serve the clients
of multiple controllers.
Step 11 In the DNS Domain Name field, enter the optional domain name system (DNS) domain name of this
DHCP scope for use with one or more DNS servers.
Step 12 In the DNS Servers field, enter the IP address of the optional DNS server(s). Each DNS server must be
able to update a client’s DNS entry to match the IP address assigned by this DHCP scope.
Step 13 In the Netbios Name Servers field, enter the IP address of the optional Microsoft Network Basic Input
Output System (NetBIOS) name server(s), such as a s Internet Naming Service (WINS) server.
Step 14 From the Status drop-down box, choose Enabled to enable this DHCP scope or Disabled to disable it.
Step 15 Click Apply to commit your changes.
Step 16 Click Save Configuration to save your changes.

 Loading...