2-3
Cisco Wireless LAN Controller Configuration Guide
OL-17037-01
Chapter 2 Using the Web-Browser and CLI Interfaces
Using the Web-Browser Interface
Using the GUI to Enable Web and Secure Web Modes
Follow these steps to enable web mode, secure web mode, or both using the controller GUI.
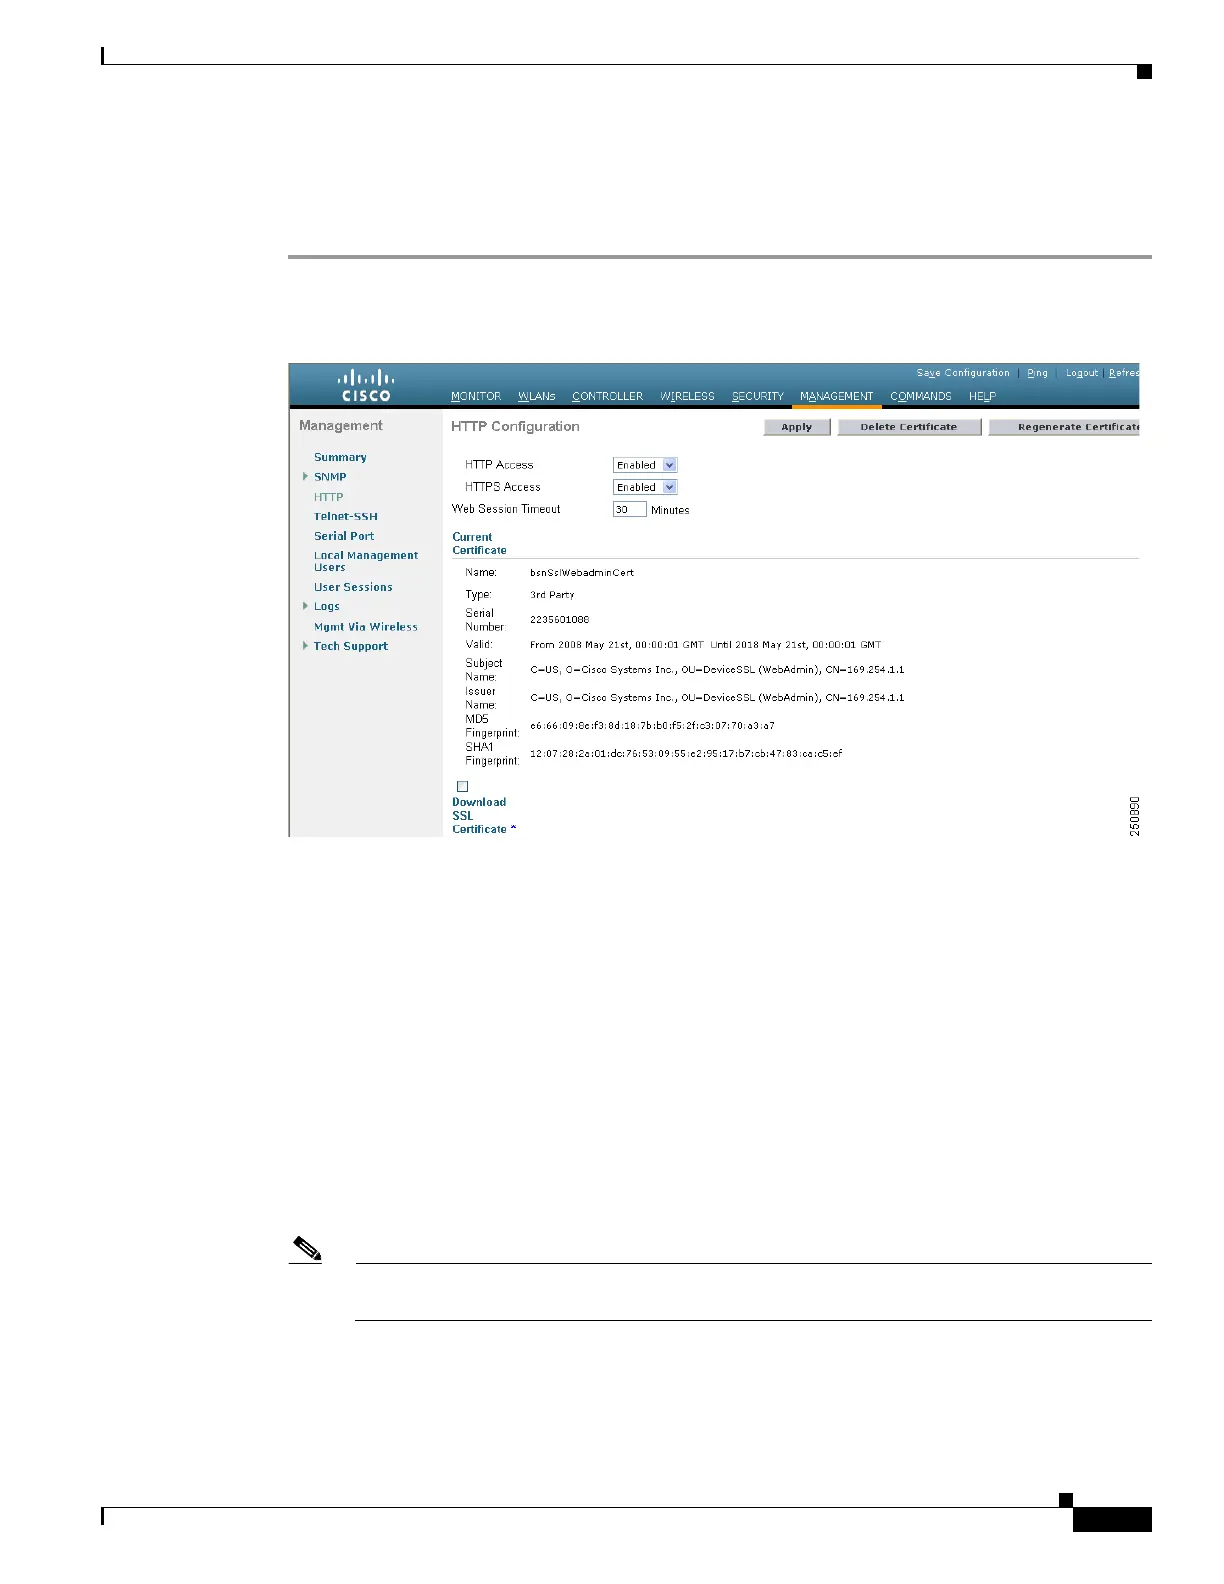
Step 1 Click Management > HTTP to open the HTTP Configuration page (see Figure 2-1).
Figure 2-1 HTTP Configuration Page
Step 2
To enable web mode, which allows users to access the controller GUI using “http://ip-address,” choose
Enabled from the HTTP Access drop-down box. Otherwise, choose Disabled. The default value is
Disabled. Web mode is not a secure connection.
Step 3 To enable secure web mode, which allows users to access the controller GUI using “https://ip-address,”
choose Enabled from the HTTPS Access drop-down box. Otherwise, choose Disabled. The default
value is Enabled. Secure web mode is a secure connection.
Step 4 In the Web Session Timeout field, enter the amount of time (in minutes) before the web session times
out due to inactivity. You can enter a value between 30 and 160 minutes (inclusive), and the default value
is 30 minutes.
Step 5 Click Apply to commit your changes.
Step 6 If you enabled secure web mode in Step 3, the controller generates a local web administration SSL
certificate and automatically applies it to the GUI. The details of the current certificate appear in the
middle of the HTTP Configuration page (see Figure 2-1).
Note If you want to download your own SSL certificate to the controller, follow the instructions in the
“Loading an Externally Generated SSL Certificate” section on page 2-5.

 Loading...