5-115
Cisco Wireless LAN Controller Configuration Guide
OL-17037-01
Chapter 5 Configuring Security Solutions
Configuring IDS
• The number of access points on the channel on which the attack was detected
• The day and time when the access point detected the attack
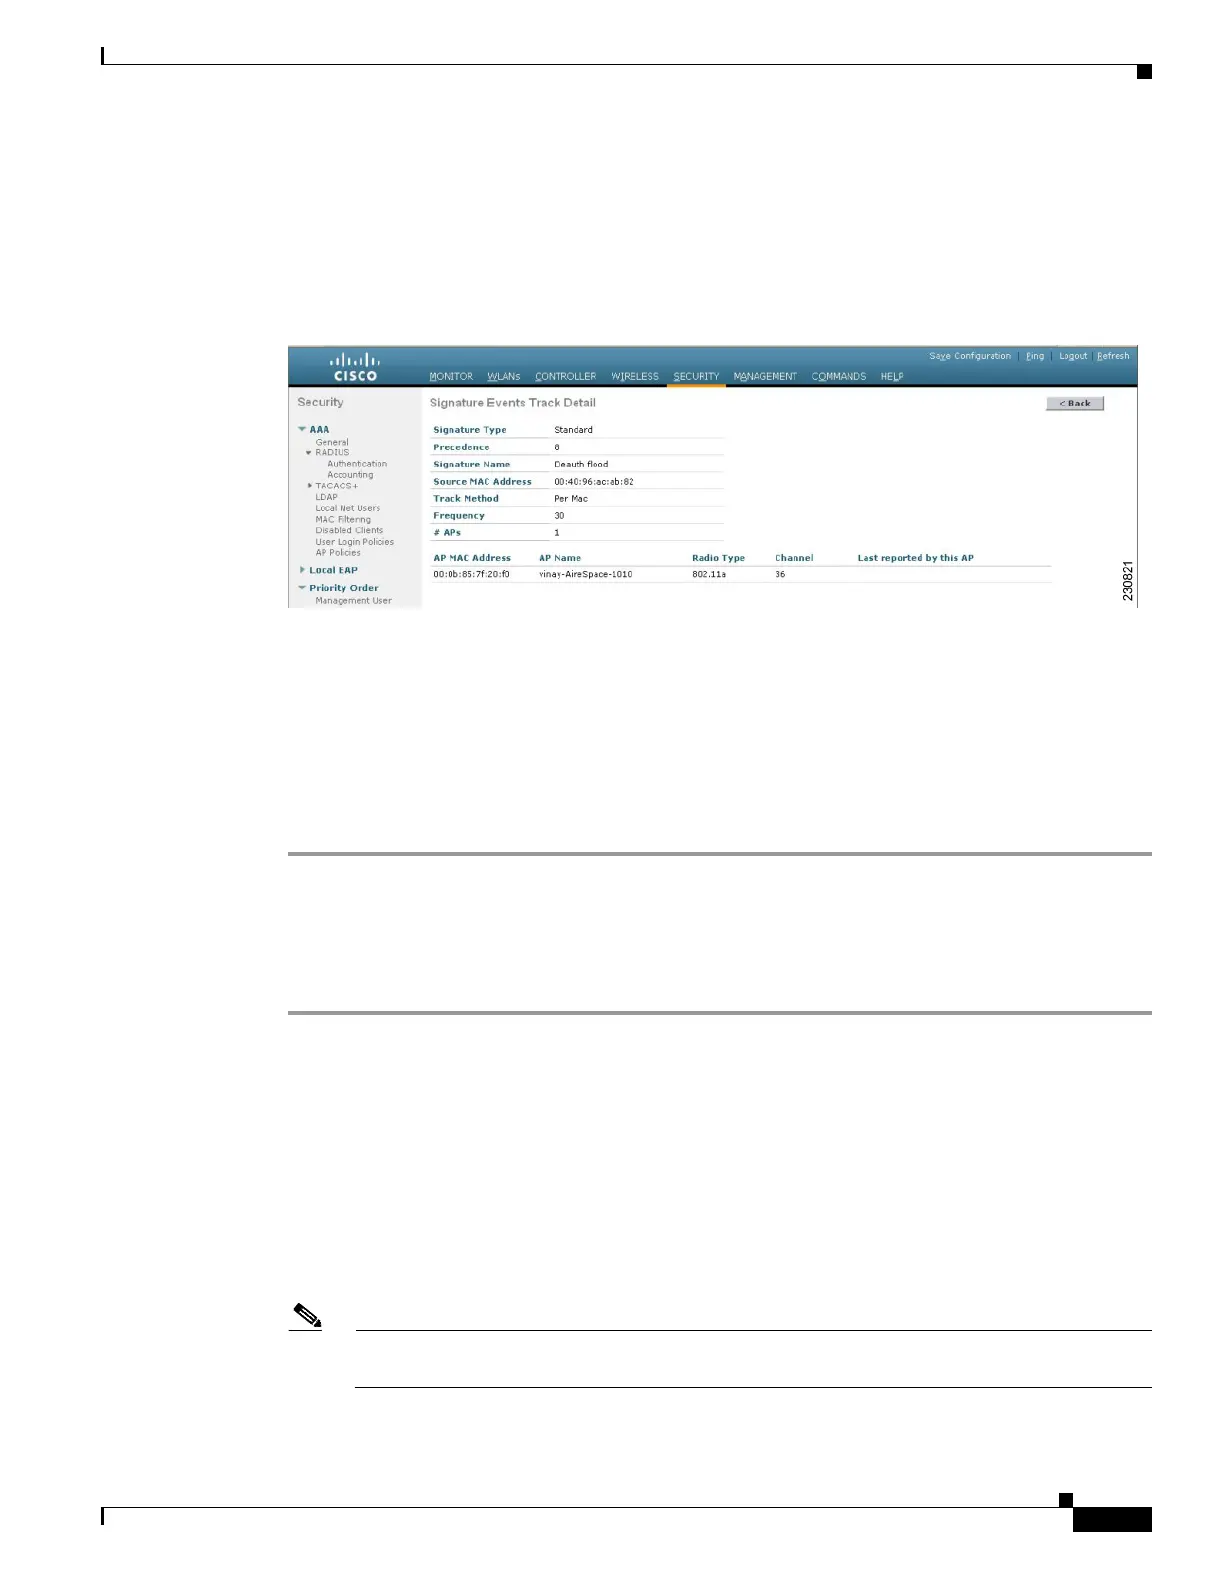
Step 3 To see more information for a particular attack, click the Detail link for that attack. The Signature Events
Track Detail page appears (see Figure 5-62).
Figure 5-62 Signature Events Track Detail Page
This page shows the following information:
• The MAC address of the access point that detected the attack
• The name of the access point that detected the attack
• The type of radio (802.11a or 802.11b/g) used by the access point to detect the attack
• The radio channel on which the attack was detected
• The day and time when the access point reported the attack
Using the CLI to Configure IDS Signatures
Follow these steps to configure IDS signatures using the controller CLI.
Step 1 If desired, create your own custom signature file.
Step 2 Make sure that you have a TFTP server available. See the guidelines for setting up a TFTP server in
Step 2 of the “Using the GUI to Upload or Download IDS Signatures” section on page 5-110.
Step 3 Copy the custom signature file (*.sig) to the default directory on your TFTP server.
Step 4 To specify the download or upload mode, enter transfer {download | upload} mode tftp.
Step 5 To specify the type of file to be downloaded or uploaded, enter transfer {download | upload} datatype
signature.
Step 6 To specify the IP address of the TFTP server, enter transfer {download | upload} serverip
tftp-server-ip-address.
Note Some TFTP servers require only a forward slash (/) as the TFTP server IP address, and the TFTP
server automatically determines the path to the correct directory.

 Loading...