User Guide | FreeSpeak II™ Base station version
disabled the audio route is only open when the key is pressed. To enable key
latching:
Select the Latching Talk Keys checkbox. The factory default is latching
disabled.
Partyline display mode
Use this option to determine whether the beltpack can display in partyline mode.
Dimmed tallies
Use this option to enable dimmed tally lights. When enabled, keys will always
show a dimmed state of the active state. The factory default is enabled.
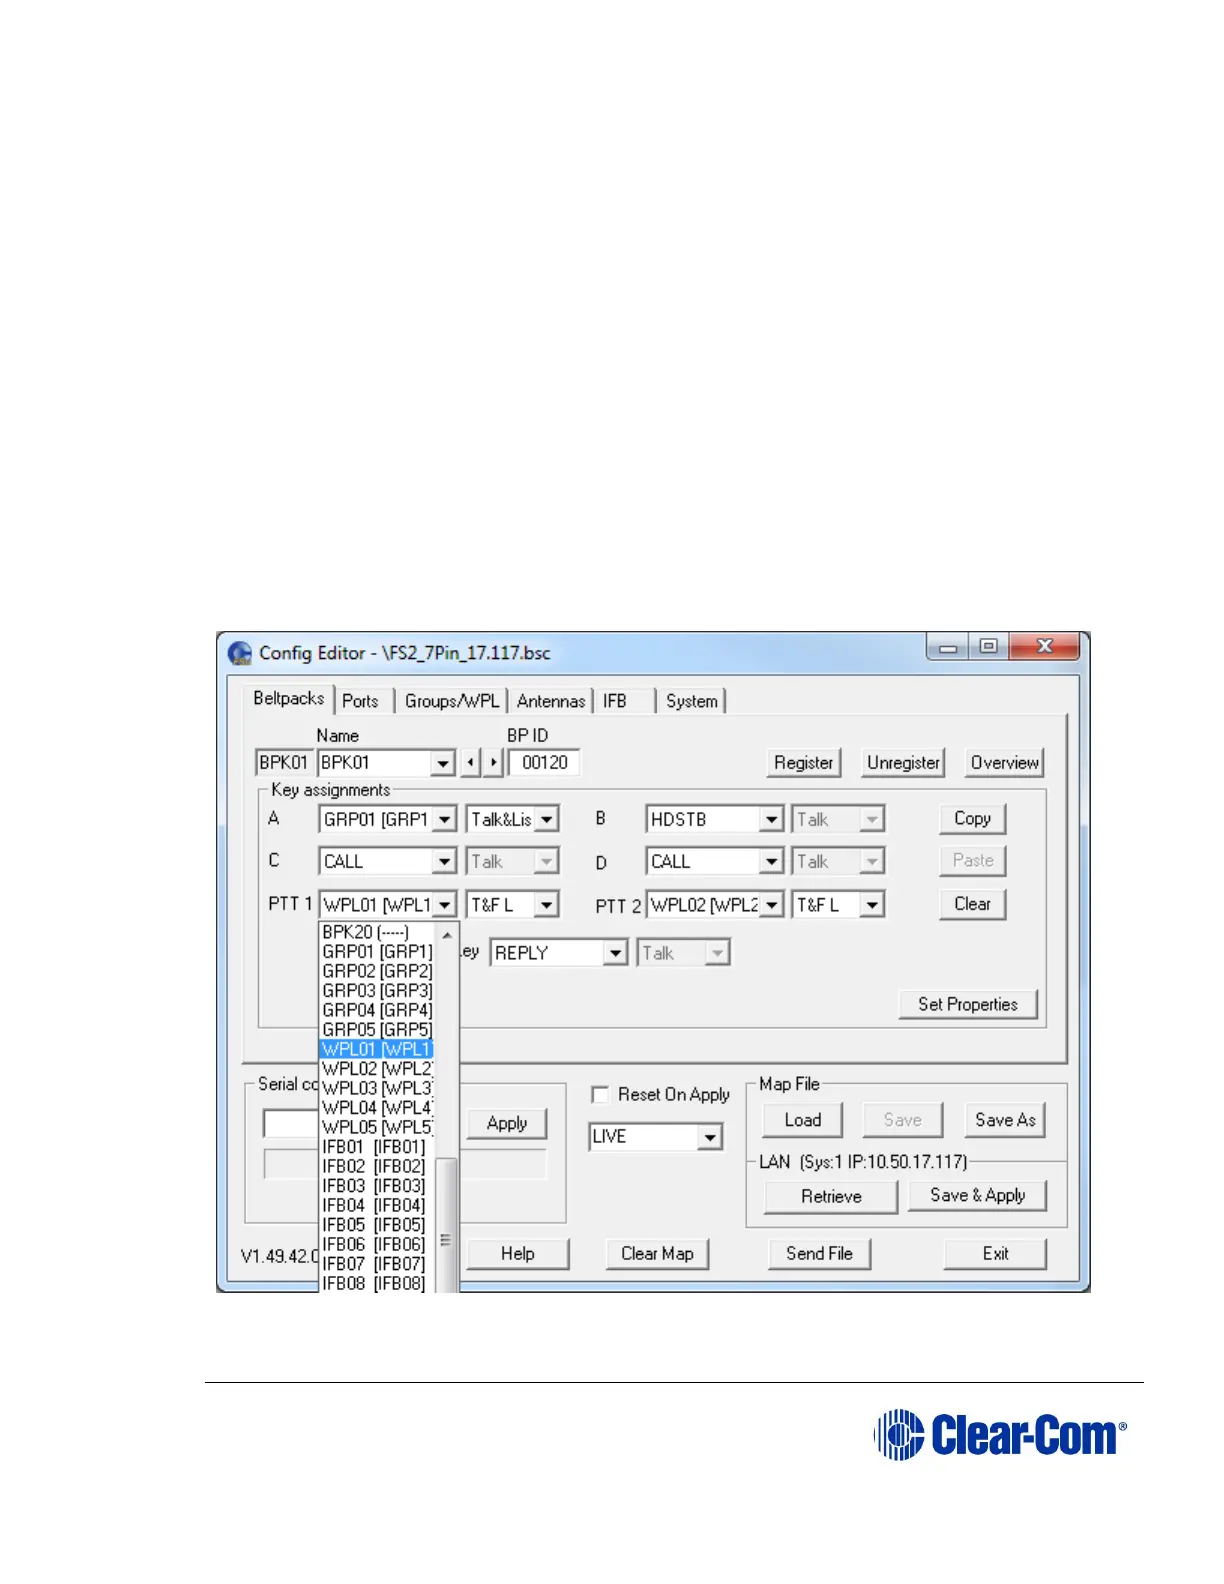
10.4.8 Assigning beltpack keys
You can use Configuration Editor to assign destinations for each of the four
beltpack talk keys, A, B, C and D. If you are using a 7-pin headset, you can also
configure the two press-to-talk buttons (PTT1 and PTT2).
Figure 10-10 Beltpack Key Assignments