User Guide | FreeSpeak II™ Base station version
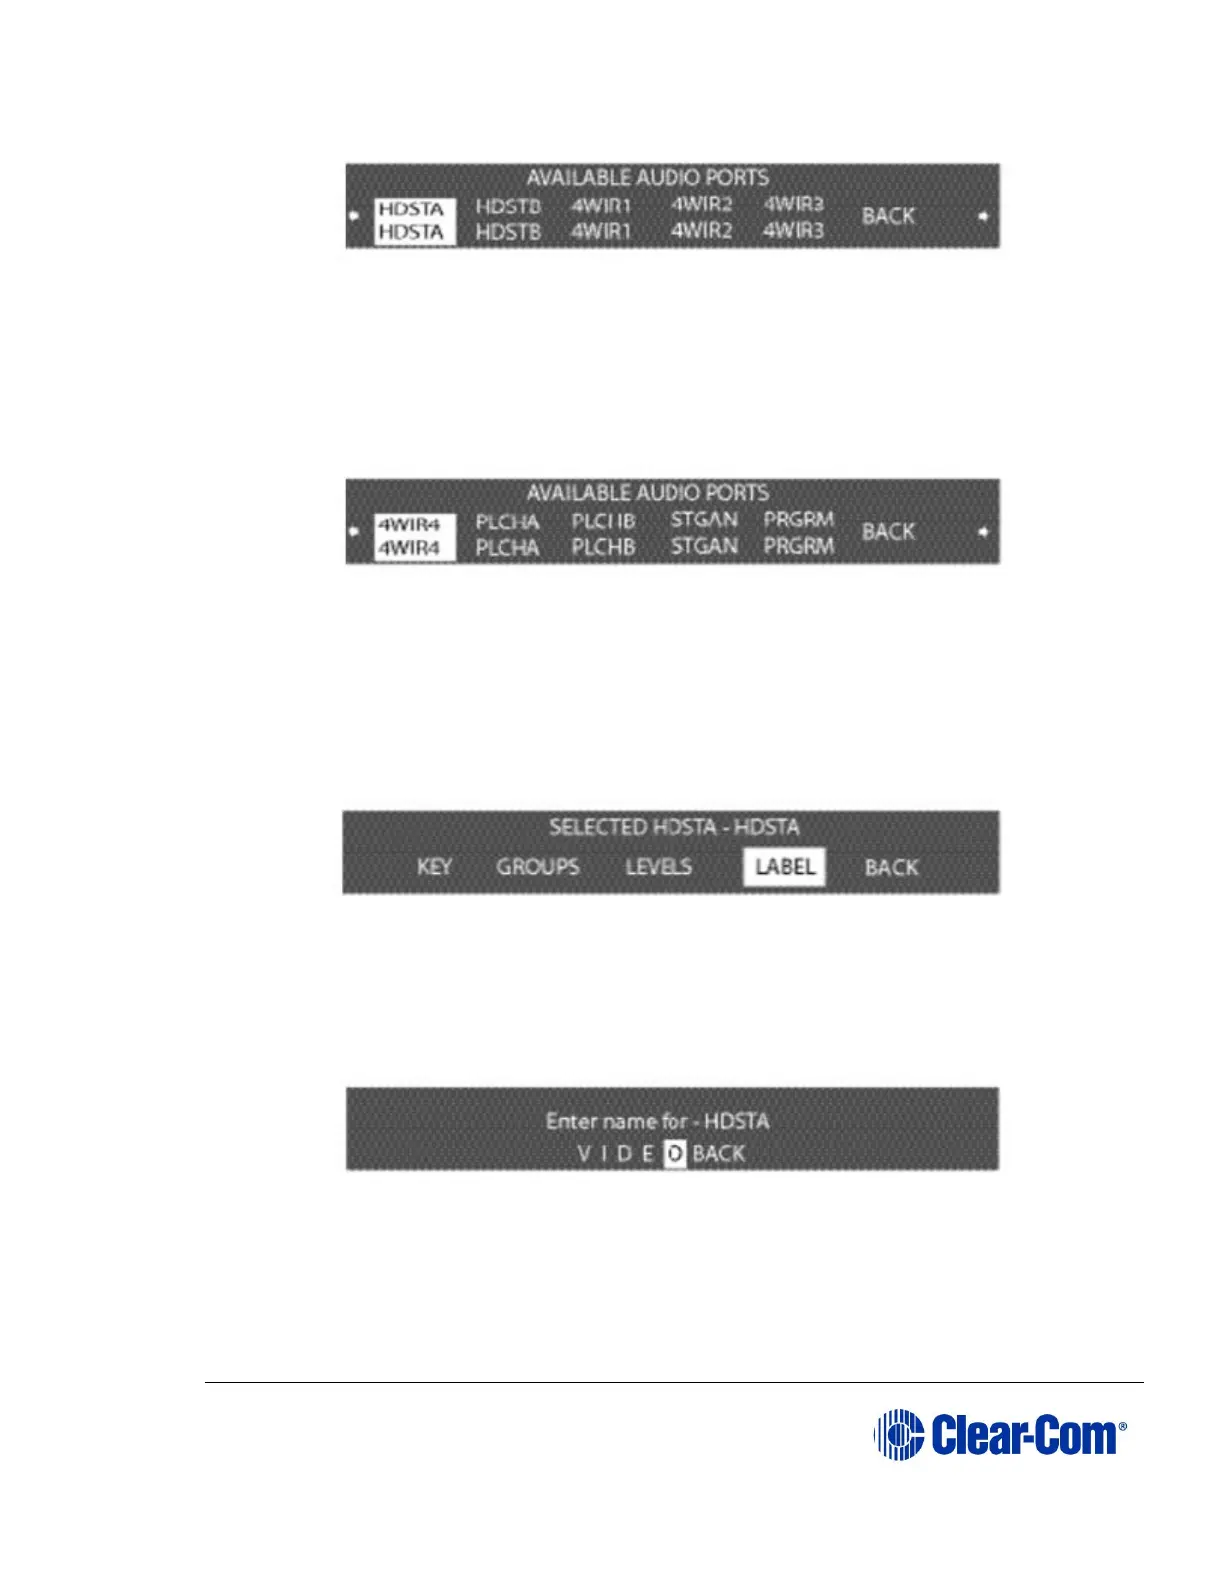
Figure 6-7 First available ports menu
The first page of the menu shows the first 5 ports, starting with HDSTA (front-
panel headset A) and continuing through 4WIR3 (the third 4-wire connector on
the rear panel), as shown in Figure 6-7 First available ports menu.
By scrolling all the way to the right, and then continuing to scroll, 4WIR4 through
PRGRM (program) will be displayed (Figure 6-8 Second available ports menu).
Figure 6-8 Second available ports menu
Note: The upper character of the pair is a generic label, while the lower
character is editable.
2) Select an audio port from the menu. A screen appears that gives the
options for programming the selected port, as shown in Figure 6-9 Port
programming options menu.
Figure 6-9 Port programming options menu
3) Select LABEL from the menu.
A menu to edit that port’s label appears as shown in Figure 6-10 Editing a port’s
label.
Figure 6-10 Editing a port’s label
4) Scroll to and select the alphanumeric character to be changed. A box
appears around the character.