EasyManuals Logo

Compaq 100eu - All-in-One PC User Manual

Compaq 100eu - All-in-One PC
215 pages
To Next Page IconTo Next Page
To Previous Page IconTo Previous Page
Page #138 background imageLoading...
Page #138 background image
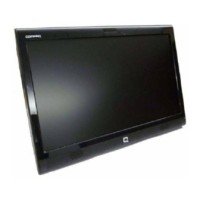
8. Remove the six silver Torx 3.0x7.0 screws that secure the system board assembly to the
computer.
NOTE: Two of the screws secure the system board bracket to the computer.
Figure 8-21 Removing the system board
9. Lift the assembly from the computer.
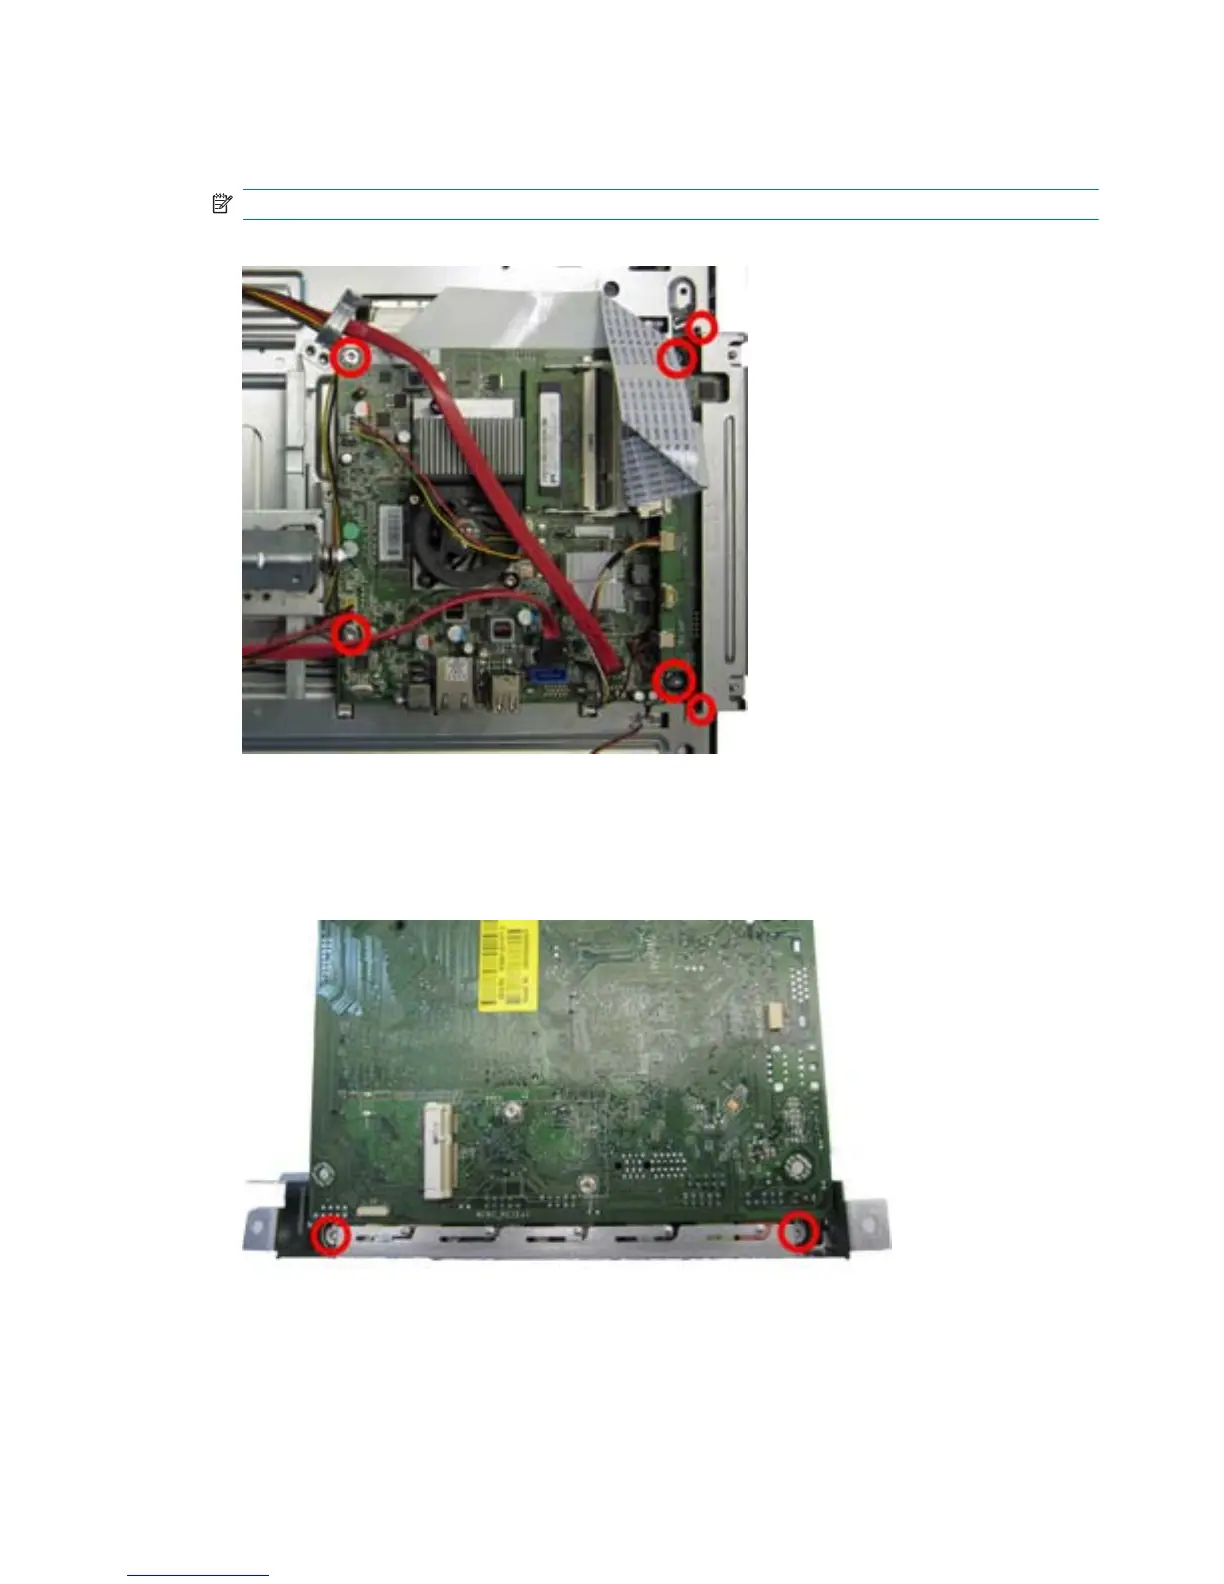
10. To separate the I/O board from the system board, remove the two silver Torx 3.0x7.0 screws
that secure the bracket to the I/O board, and then remove the bracket from the board.
Figure 8-22 Removing the I/O board from the bracket
128 Chapter 8 Removal and Replacement Procedures All-in One (AIO) Chassis

Table of Contents

Other manuals for Compaq 100eu - All-in-One PC

Questions and Answers:

Question and Answer IconNeed help?

Do you have a question about the Compaq 100eu - All-in-One PC and is the answer not in the manual?

Compaq 100eu - All-in-One PC Specifications

General IconGeneral
BrandCompaq
Model100eu - All-in-One PC
CategoryDesktop
LanguageEnglish

Related product manuals