Compaq Deskpro EN Series of Personal Computers 6-17
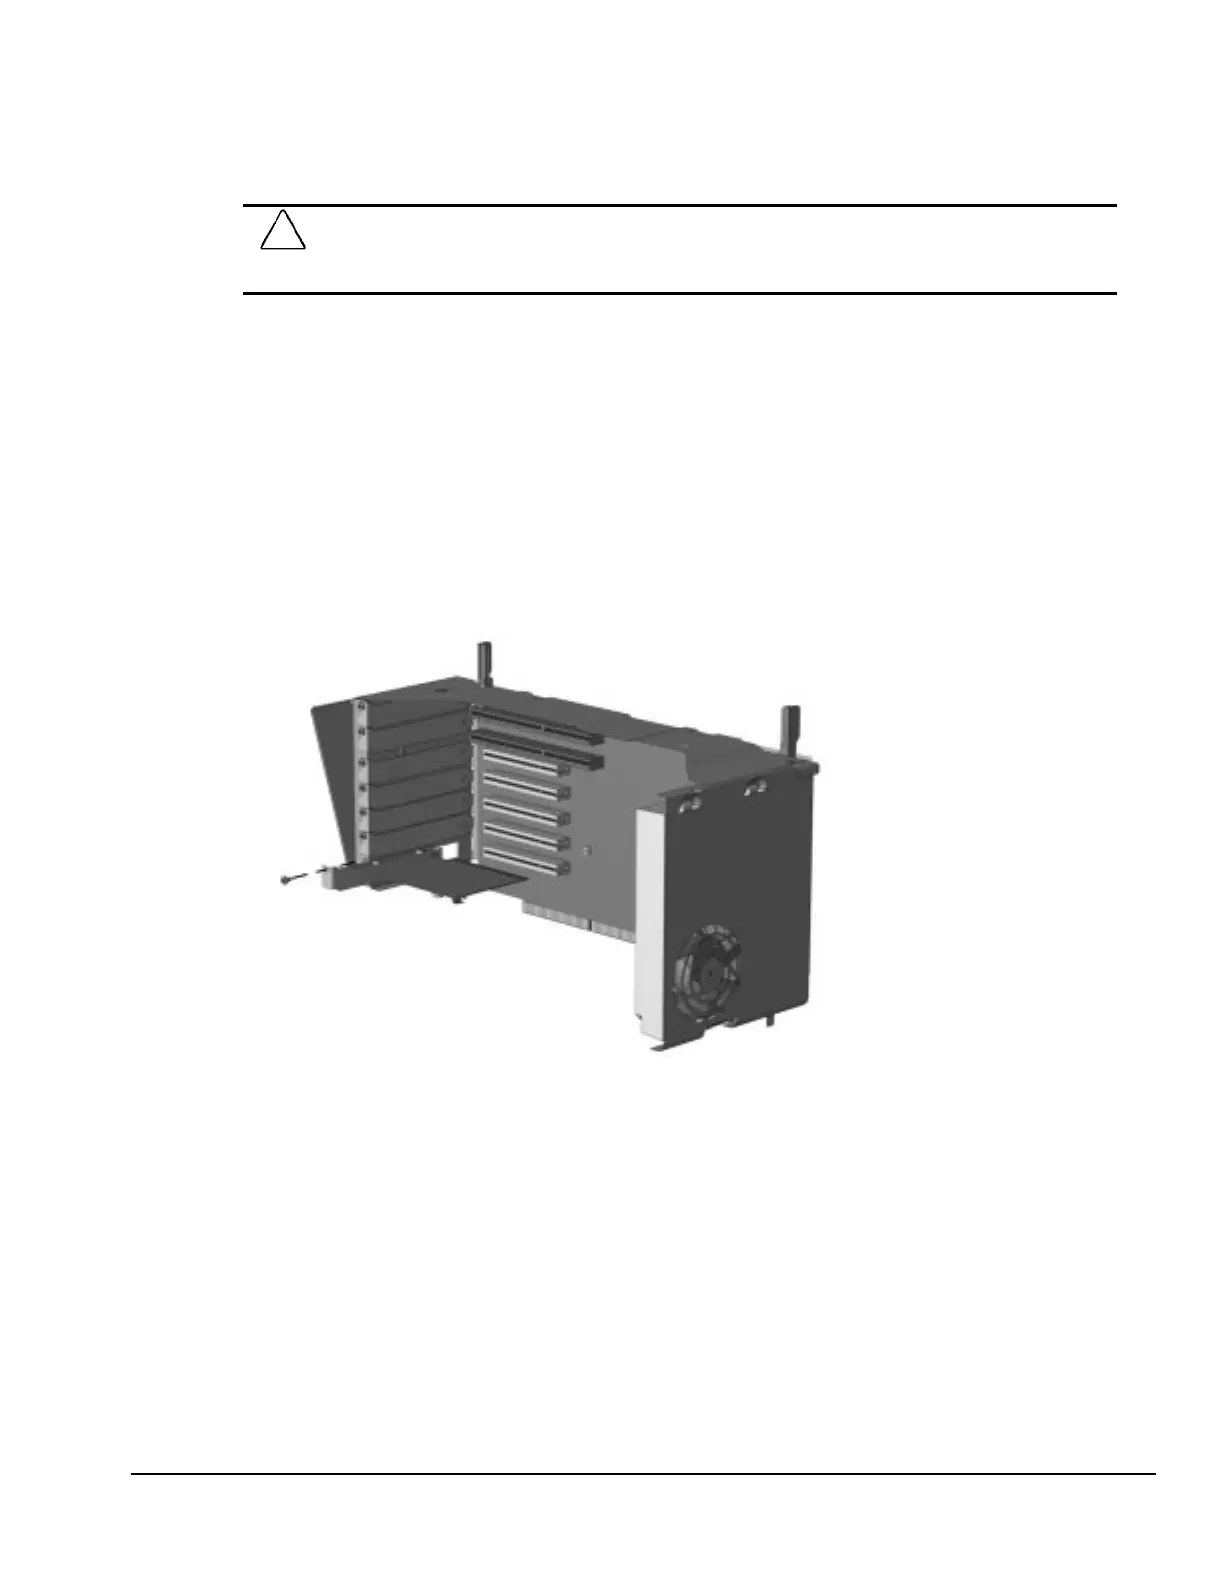
6.10.2 Expansion Board Removal
1. Prepare the computer for disassembly (Section 6.3).
CAUTION:
When the computer is plugged into an AC power source, there is always voltage applied to the
system board. You must disconnect the power cord from the power source before opening the computer
to prevent system board or component damage.
2. Remove the access panel (Section 6.6).
3. Lay the computer down on its side for easier access to the expansion slots.
4. Disconnect and raise the expansion board cage board to service position 2 (Section 6.10.1),
making sure that it is retained by the built-in catch.
5. Disconnect any interconnect cables attached to the expansion board.
6. Remove the screw that secures the expansion board to the board cage; then, remove the
expansion board.
✎
Use a stubby screwdriver to remove the screw that secures the expansion board to
the board cage to prevent interference with the chassis.
Removing an Expansion Board
To replace the expansion board, reverse the removal procedure.
✎
If you are installing an expansion board for the first time, remove the desired
expansion board slot cover before installing the board.
When installing a SCSI controller with an internal SCSI device, route the data
cable across the top of the expansion board cage. The SCSI board should be
mounted in the top slot if possible for cable routing purposes.
When installing a NIC expansion board, ensure that the Remote Wakeup cable is
properly installed. Failure to do so may cause computer startup or network
problems.
The computer should automatically recognize the added plug and play expansion board.

 Loading...