166
Icon Description
Control the PTZ rotation speed. The larger the value, the faster the PTZ
rorates.
For example, the rotation speed of step 8 is much faster than the speed of
step 1.
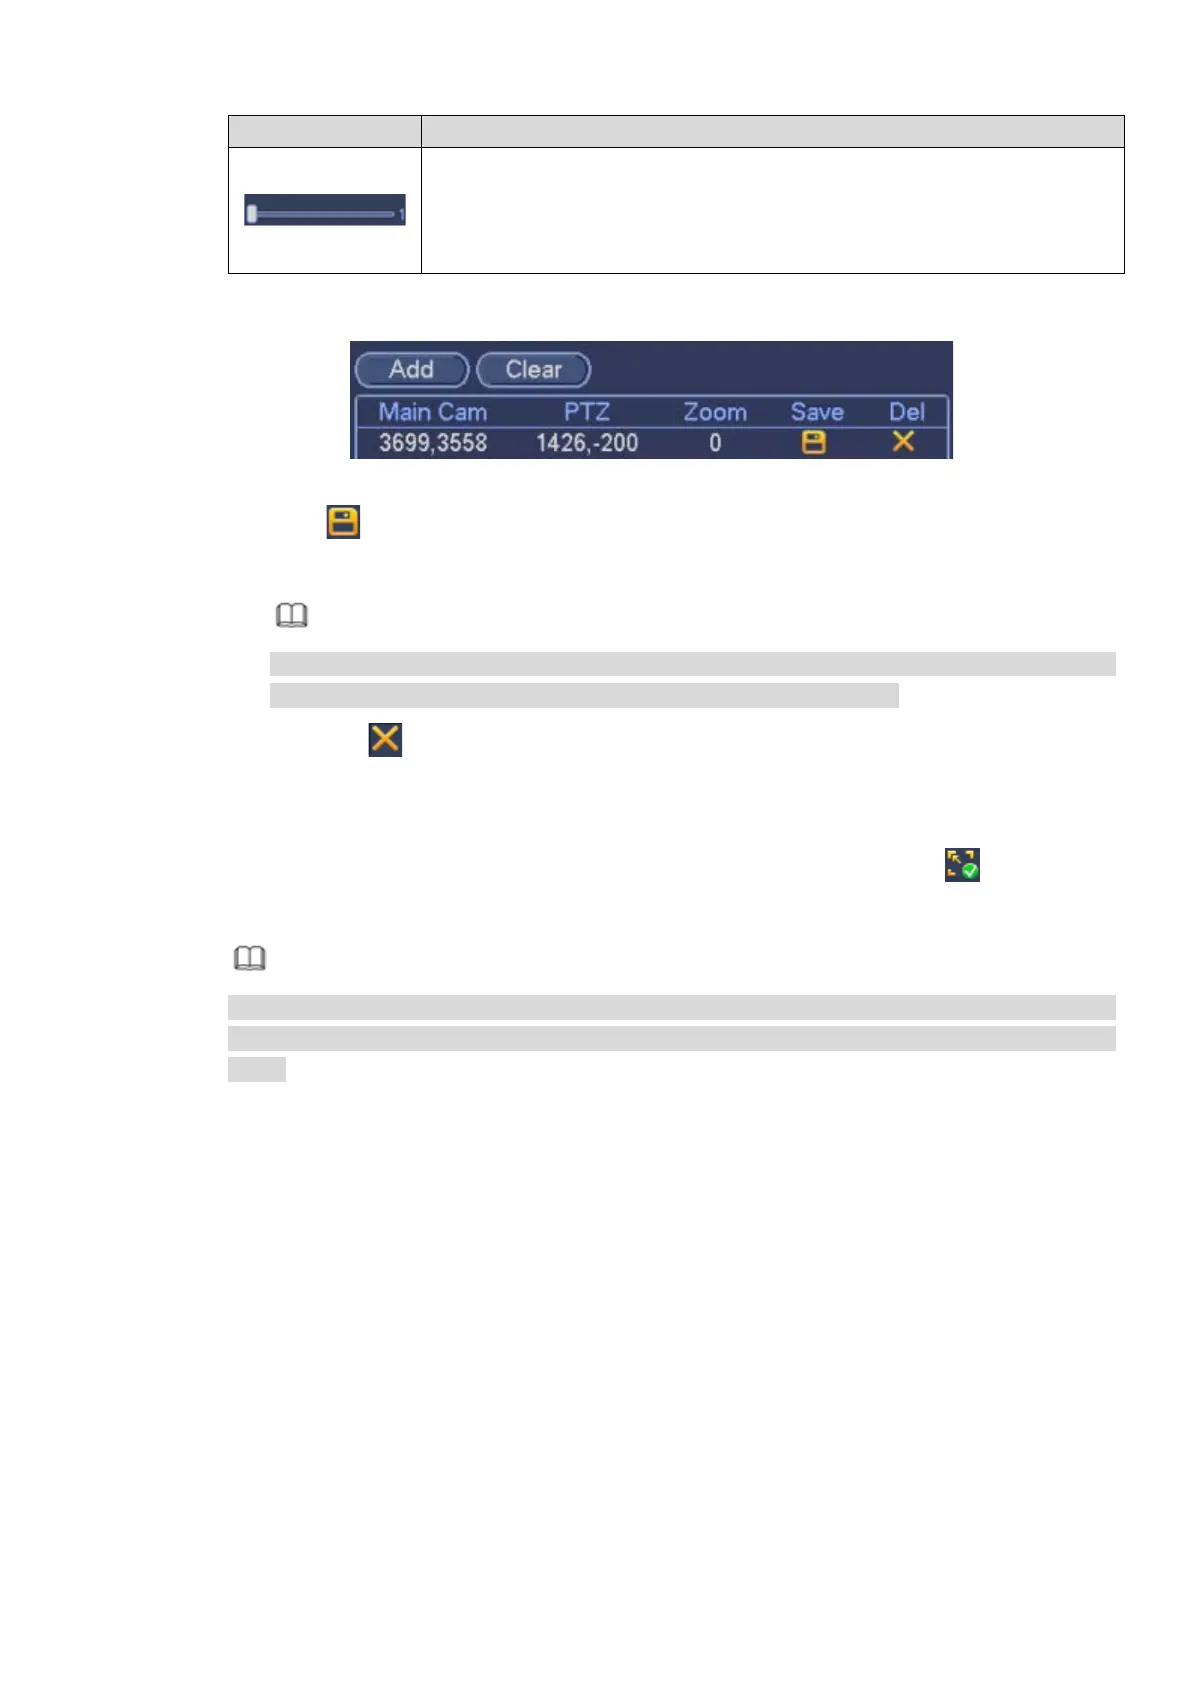
4. Click Add.
The calibration record is displayed in the list box. See Figure 3-155.
Figure 3-155
5. Click
to save the calibration record.
6. Repeat 4-7 to add more calibration records.
Note
You shall set at least 3 sets and at most 8 sets of calibration spots for each PTZ camera.
The position of the calibration spot shall be as accurate as possible.
Click to delete the calibration record.
Click Clear to delete all the records in the list.
Step 4 Click OK to complete the calibration settings.
Return to the Smark Track interface. If the status of surveillance scene is
, the setting is
successful.
Note
After configuring the smart track, right click the mouse on the Preview interface and select Smart
Track, and then you can view the smart track window. For details, see chapter 3.6.9 Smart
Track.
3.10.10 Alarm Settings
In the main menu, from Setting->Event->Alarm, you can see alarm setup interface.
Alarm in: Here is for you to select channel number.
In the main menu, from Setting->Event->Alarm, you can see alarm setup interface. See Figure 3-156.
There are four alarm types. See Figure 3-156 to Figure 3-159.
Local alarm: After connect the alarm device to the NVR alarm input port, system can trigger the
corresponding alarm operations when there is alarm signal from the alarm input port to the NVR.
Network alarm: NVR trigger corresponding alarm operations when it receives the alarm signal via the
network transmission.
IPC external alarm: When the network camera connected peripheral device has triggered an alarm,
it can upload the alarm signal to the NVR via the network transmission. The system can trigger the
corresponding alarm operations.
IPC offline alarm: When the network connection between the NVR and the network camera is off, the
system can trigger the corresponding alarm operations.
 Loading...