Chapter 9: Working with Tracks 65
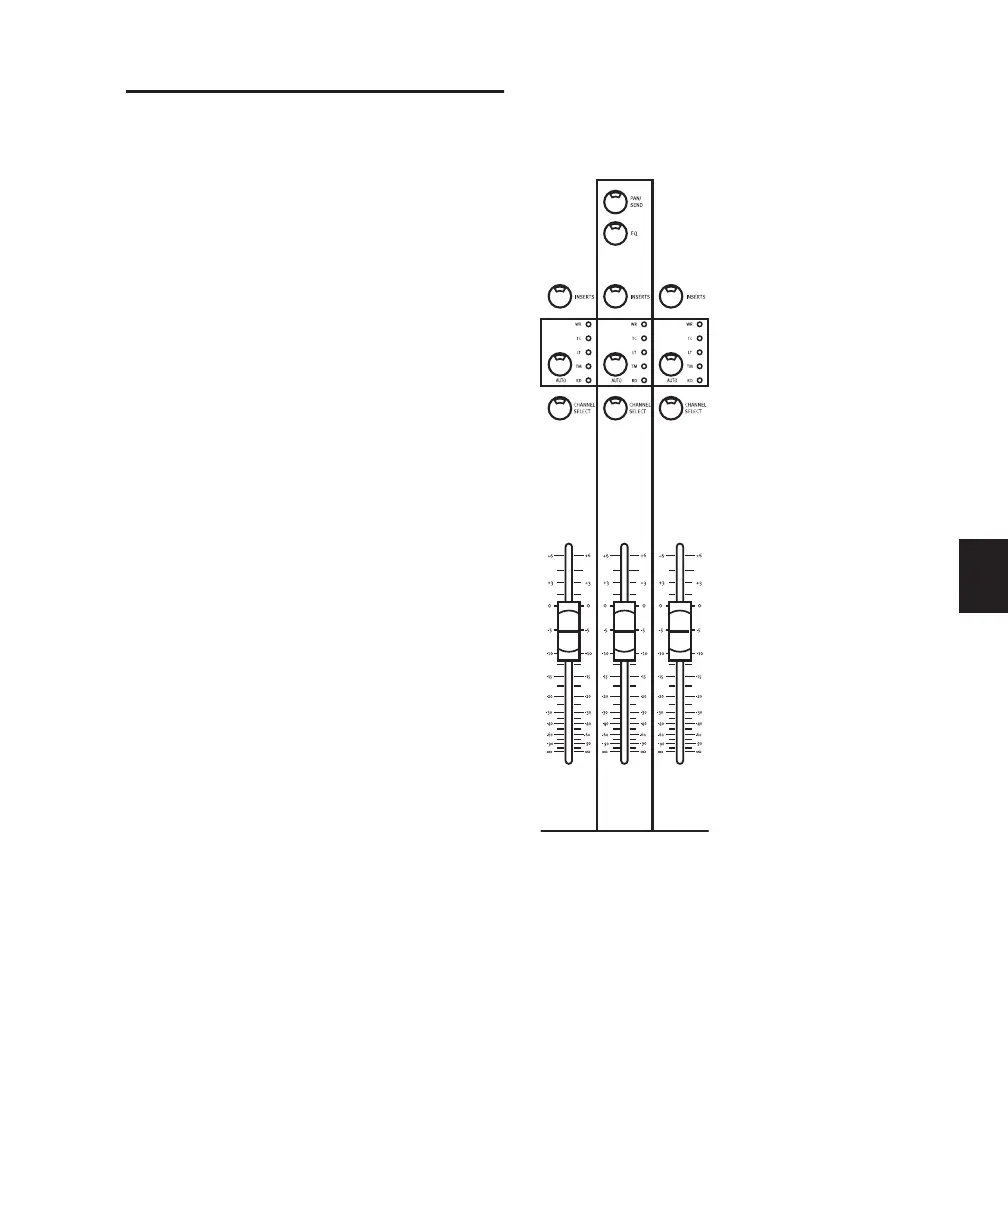
Channel Automation Controls
The AUTO switch is located above the SELECT
switch. Next to this are five Automation mode
LED indicators.
The AUTO switch is used to set channel automa-
tion mode, and to punch out of automation re-
cording on a channel during an automation
record pass (placing the channel in Read mode).
The LEDs next to the AUTO switch indicate the
various automation modes and their present sta-
tus. The auto modes are indicated by the labels
as follows:
WR LED (red) indicates Write mode.
TC LED (red) indicates Touch mode.
LT LED (red) indicates Latch mode.
TM LED (yellow) indicates Trim mode is enabled
(for Read, Write, Touch, or Latch).
RD LED (green) indicates Read mode.
All LEDs Off indicates that automation is off for
the channel.
The channel AUTO switch can also be used in
combination with the master AUTOMATION
MODE and ENABLE switches.
Master Automation MODE and
ENABLE Switches
To the left of the channel faders is the AUTO-
MATION section that includes the six master
AUTOMATION MODE switches and the six AU-
TOMATION ENABLE switches.
Instructions for setting, recording and editing
automation can be found in Chapter 14, “Auto-
mation.”
Channel Auto Section