Chapter 2: Installing Control|24 7
Chapter 2: Installing Control|24
Installation and Maintenance
Guidelines
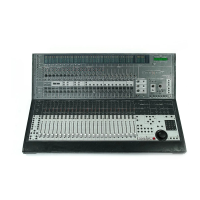
Control|24 can be mounted in studio furniture
or set on a table top. Wherever you decide to put
Control|24, be sure not to block air circulation
to the vents on the top and front of the unit.
To avoid damage to Control|24, never rest the
unit on its face or rear panel, and always allow
free air flow around the front and top of the
unit.
If you need to clean the Control|24 top surface,
use a cloth or paper towel that has been very
slightly dampened with water only, then care-
fully wipe the surface. Do not use abrasives, or
any cleaning solution that contain bleach, alco-
hol, solvents, or ammonia, as these can damage
the finish.
Making Necessary
Connections
Control|24 requires power and Ethernet connec-
tions for basic communication and control of
Pro Tools.
For audio connections, additional audio cables
and connections are required. For instructions
on audio connections and options, see
Chapter 3, “Audio Connections.”
Power Connection
The Control|24 back panel has an IEC standard
AC receptacle. This connector accepts a stan-
dard AC power cable, and is auto power-select-
ing (100V to 240V), and will automatically work
with a standard modular cable to connect to AC
power receptacles in any country.
To connect power to Control|24:
■ Plug one end of a power cord (included with
Control|24) into the Control|24 AC receptacle
and plug the other end into a power source such
as a power strip or wall outlet.
Before powering up your Control|24, be sure
to allow it to reach room temperature, as
there are some components that are sensi-
tive to cold temperatures. Unpack your unit
and allow it to adjust to the room tempera-
ture for several hours before turning it on for
the first time.
Early Control|24 units (up to and including
Rev G units) include a heat sink on the back
of the unit. Allow air circulation around the
heat sink in addition to the top and front.
Power down your speaker monitor system,
and make sure the levels are all the way
down on your amplifiers before turning
Control|24 on or off. A loud pop can occur
during power cycling that could possibly
damage playback systems.

 Loading...