REPAIR
8--30 27080 Issue 1 Sept 98
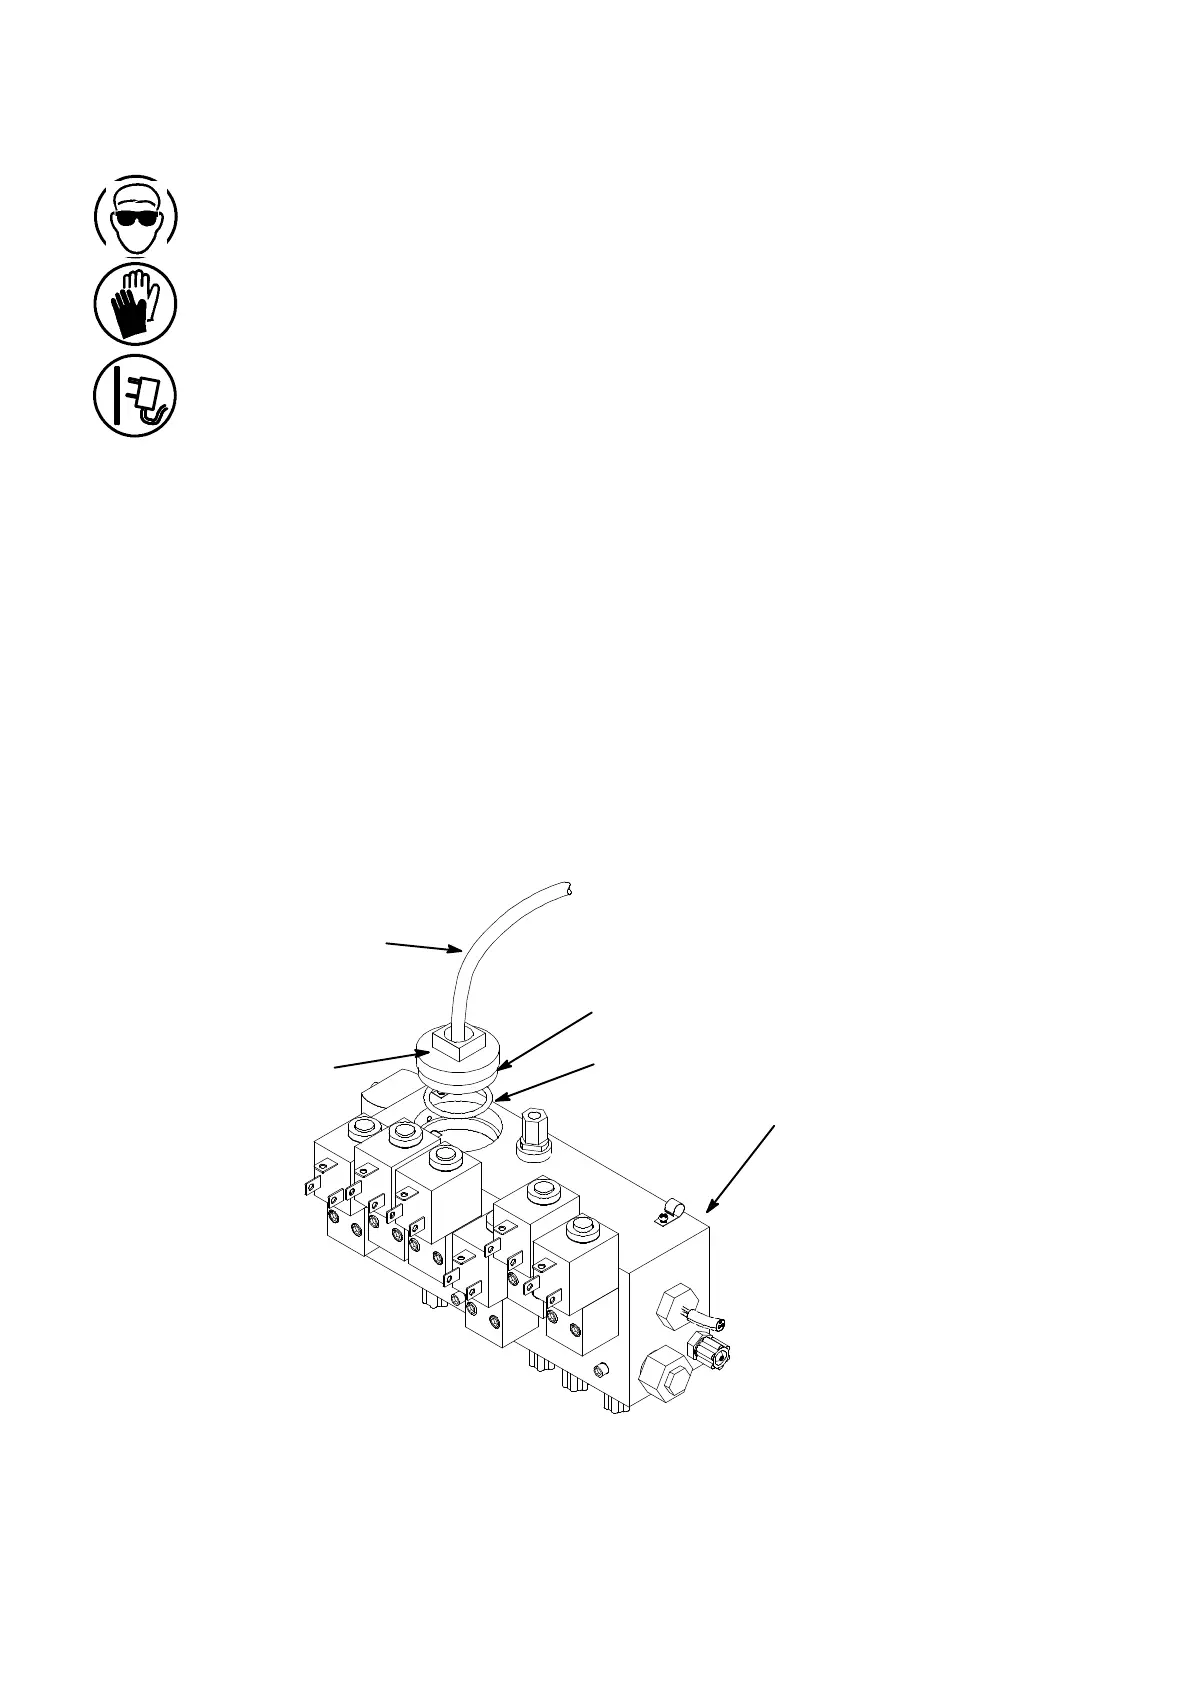
Pressure Transducer Replacement
Note: Tools required: Pressure transducer removal tool (or large
adjustable spanner) -- see step (3).
Protective clothing (especially safety glasses).
Lint--free tissue to catch any escaping ink
The printer must be shut down and the cartridges removed.
(1) Remove the securing screw and pull the ink system from the
cabinet.
(2) Disconnect the pressure transducer electrical connector at the ink
system interface PCB.
(3) Unscrew the pressure transducer clamp nut from the block, and
removethetransducer(takingcarenottotwistthecableorlosethe
’O’ ring).
(4) Clean the top of the block.
(5) Fit a new transducer and tighten the clamp nut, ensuring that the
’O’ ring is in place.
(6) Fit the transducer connector into the ink system interface PCB.
(7) Return the ink system to the cabinet, and replace the cartridges.
Pressure
Transducer
’O’ Ring
Ink Management
Block
Electrical
Cable
Pressure Transducer Replacement
MG021_2
Clamp Nut

 Loading...

