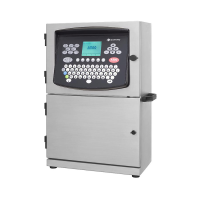
APPENDIX B : A--SERIES AIR DRIVEN AIRDRYER
B--16 20951 Issue 1 Apr 98
Fuse Replacement.
WARNING: Power must be removed from the airdryer.
(1) Releasethesixquickreleasefastenersaroundtheedgeofthecover.
Lift the cover away from the housing.
(2) Inside the housing, replace the fuses in the in--line fuse holders
near the power connector. Fuse values are as follows:
Power input 120V nominal: 2A (T)
Power input 240V nominal: 1A (T)
(3) Refit the cover.
Humidity Sensor Replacement
CAUTION Handle the humidity sensor with care. Do notcrush
or allow finger marksor dirtto collecton thesensor.
The humidity sensor isattached by double--sided adhesive tape to the
insidefaceofthecabinet. Toreplacetheoldsensor,disconnectthewires
and ease the sensor off the cabinet. To fit the new sensor, connect the
wiresandstickthesensorontothewallofthecabinet,firstensuringthat
thesurfaceisclean. Ensurethatthetubefromtheairsystemisdirecting
air onto the sensor.
Needle Valve Refurbishment and Adjustment
WARNING: The airdryer must be turned off at the isolator and
the power removed. The cover must also be
removed.
(1) Unscrew the needle and withdraw from the valve body.
(2) Check needle is clean. Clean and check the ’O’ ring -- replace if
necessary.
(3) Refit the needle into the valve body.
(4) Screw the needle into the valve until the valve is closed, avoiding
over--tightening the needle.
(5) Adjust the air flow as in the Air Supply Check on Pg. B--19.

 Loading...