APPENDIX B : COMPRESSOR DRIVEN AIRDRYER
B--32 20950 Issue 1 April 98
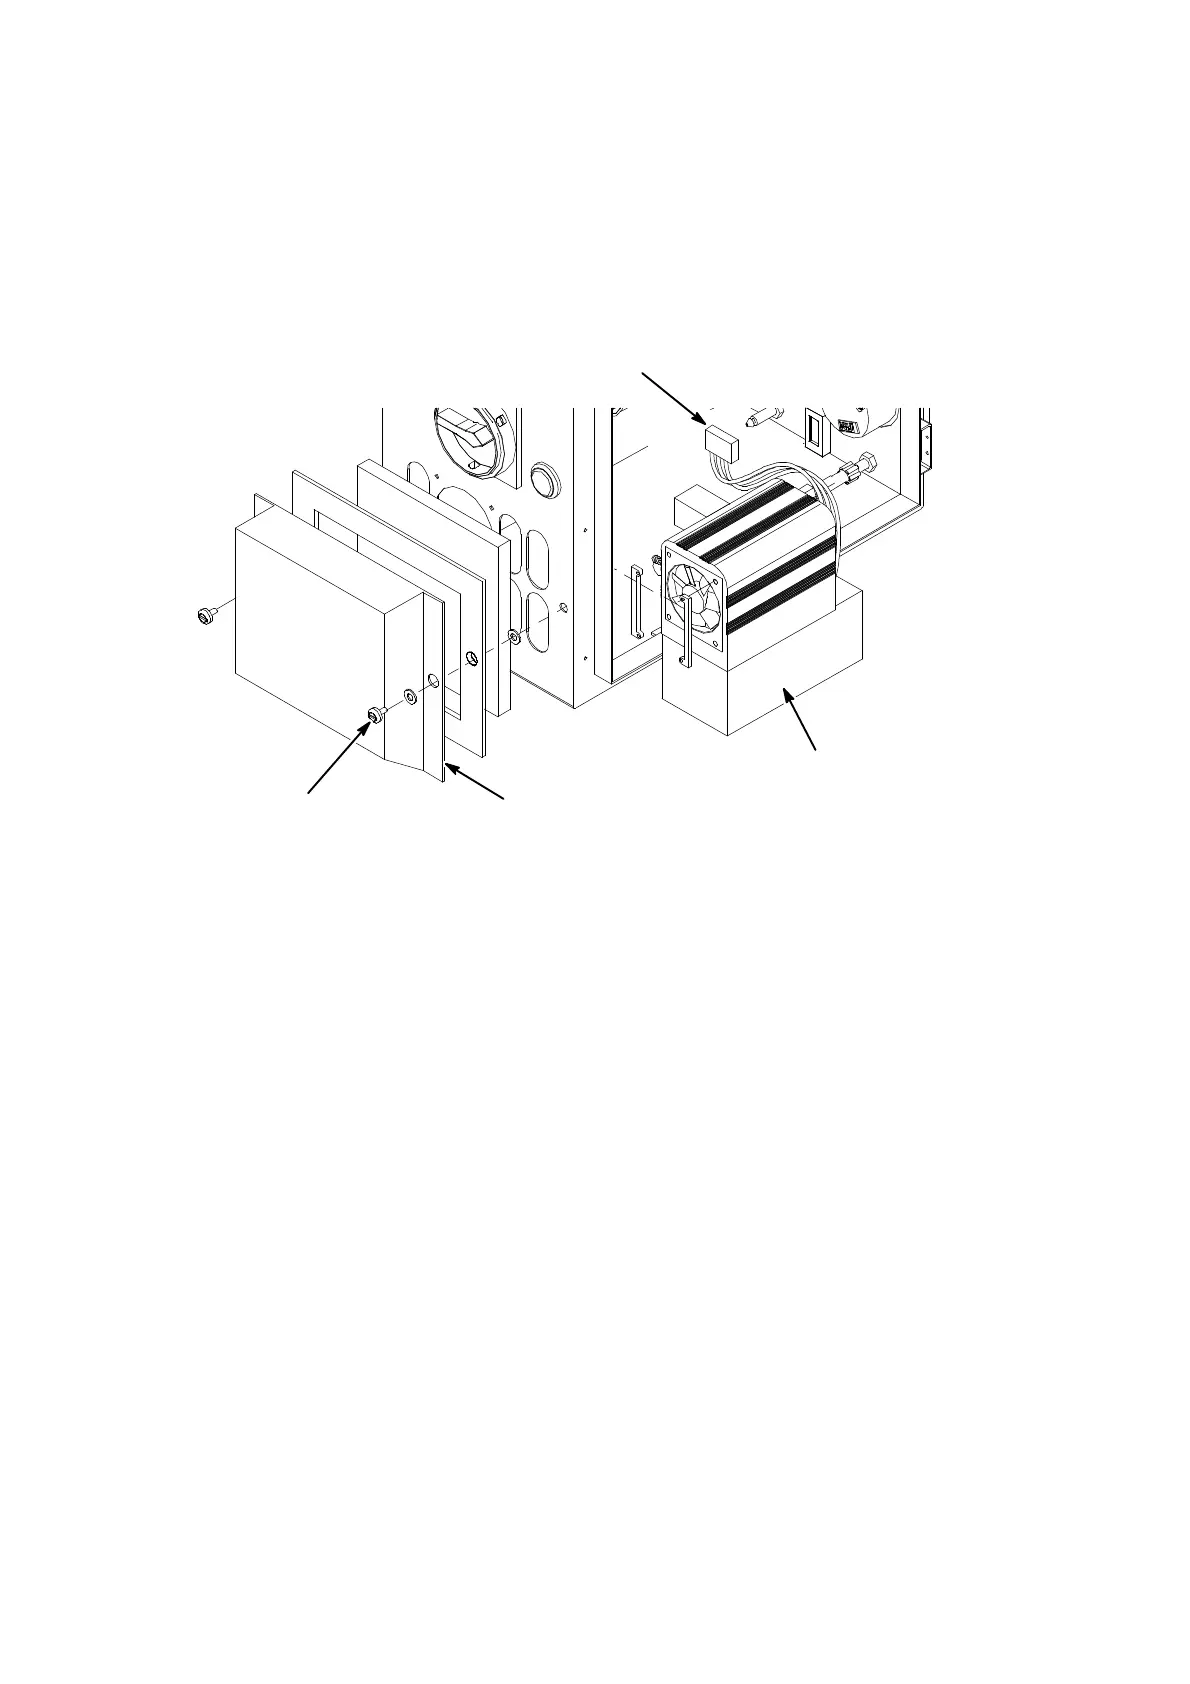
Peltier Assembly Replacement
WARNING: The airdryer must be switched off and power
removed.
The door must be open.
Peltier
Heatsink
Assembly
Connectors
Replacing the Peltier Assembly
Shroud
AD009--2
Shroud Fixings
(1) Release the quick release fasteners and remove the input filter
shroud.
(2) Disconnect the Peltier assembly connections from the PCB.
(3) Remove the screws securing the needle valve mounting bracket
and move the bracket to one side (see Pg. B--8).
(4) Disconnect the tubes at the quickrelease connectors(seePg.B--29)
on the Peltier assembly.
(5) On the outside of the cabinet, remove the screws securing the
Peltier assembly and lift the assembly out of the cabinet.
The Peltier assembly can now be replaced as a single assembly by
reversing the above procedure. Alternatively, the heatsink fan can be
replaced as in the following procedure.
 Loading...


