REPAIR
27080 Issue 1 Sept 98 8--33
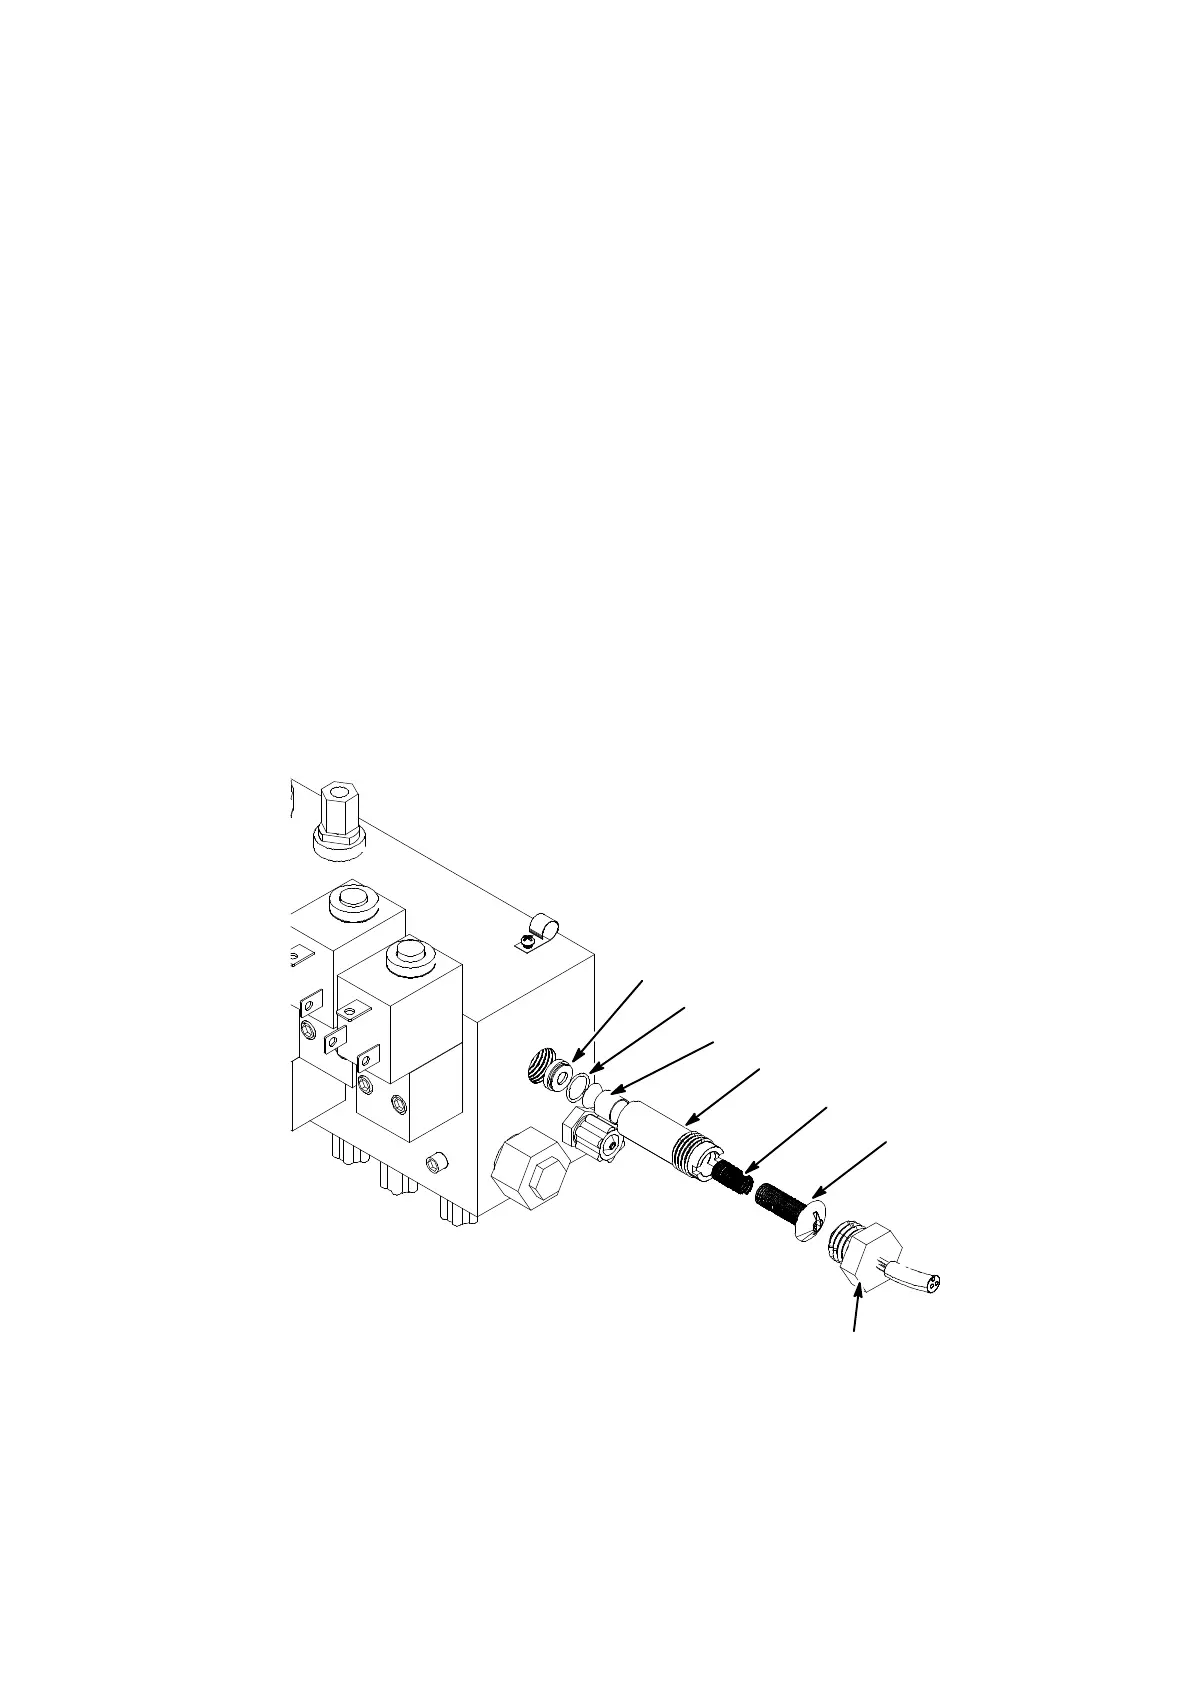
(4) Using a suitable screwdriver, unscrew the setting screw from the
PRVbodyandremovefromtheblock. ThePRVbodyshouldcome
out with poppet, valve seat,etc. as a complete assembly. If itdoes
not, ensure that all parts are removed from the recess.
(5) Dismantle the PRV, including removing the old ’O’ ring from the
valveseat. Cleanallpartsthoroughly. Cleantherecessintheblock.
(6) Fitanew’O’ringtothevalveseat. Reassemblethespring,poppet,
and valve seat into the PRV body.
(7) Fit the PRV body into the block and screw in firmly. Do not use
excessive force.
(8) PutthespringintothePRVbody(replacethespringifsuspect)and
screw in the setting screw.
(9) Refit and tighten the plug (temperature sensor).
(10)Return the ink system to the cabinet, and replace the cartridges.
(11) Check the system for leaks when the printer is started up.
Valve
Seat
’O’ Ring
Poppet
Body
Setting
Screw
Temperature
Sensor
Spring
1psi PRV Refurbishment
MG022_1

 Loading...

