149
c Paper Feed Section
chap.4
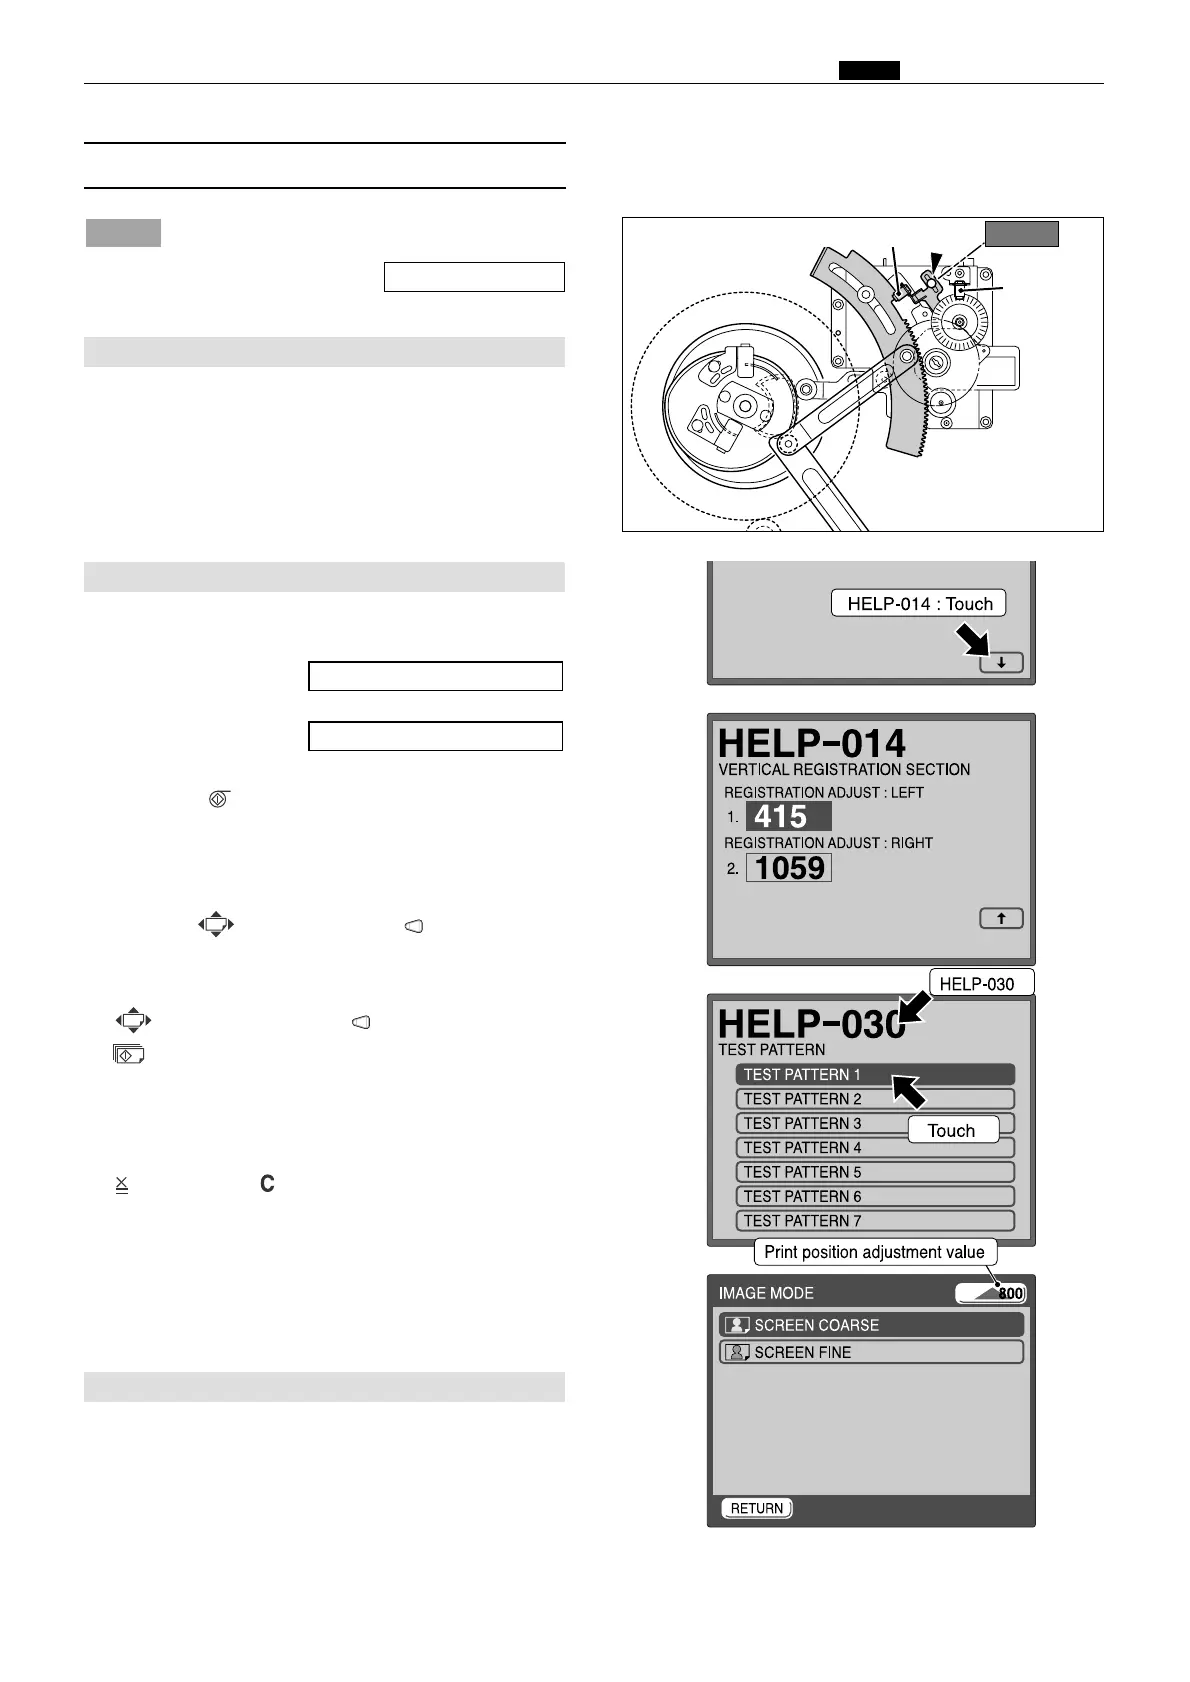
(6) Adjusting the Vertical Reg. Sensors
¡For description of operation.
NOTE :
Adjustment procedure
1. Access HELP - 014, and check the numerical
value.
2. Access HELP - 030.
3. Touch the "TEST PATTERN 1".
4. Press the (MASTER MAKING) key. Print the
test pattern.
5. Touch the "SCREEN COARSE" of the image
mode.
6.
Press the (PRINT POSITION) key to move the
print position.( Bottom limit adjustment )
7. When the numerical value of step 1 ,release the
(PRINT POSITION) key and press the
(PRINT) key.
8.
Compare the printed image( step
7
) with the printed
image( step
4
).
Check the difference of 15mm ,and press the the
key and the (CLEAR) key.
If the moving distance is not the 15mm
¡Repeat step 6 through 7.
HELP - 030 \ see p.241
HELP - 014 \ see p.229
\See page 62
R8S04024
Screw
Vertical reg. center sensor
Vertical reg.
encoder
sensor
Adjustment procedure
1. Repeat step 1 through 4.
Touch the "SCREEN FINE" of the image mode
(step 5),and repeat step 6 through 8.
R8S04025ae
1. Vertical Registration center Sensor
Adjustment procedure
1. To adjust the sensor's position, position the
screws of the sensor bracket's rectangular holes
in the center of those holes, and fix the screws in
that position.
Center
2. Bottom Limit adjustment
3. Top Limit adjustment
 Loading...