Positioning the arm shaft
24 Service Instructions 878-M PREMIUM - 03.0 - 10/2019
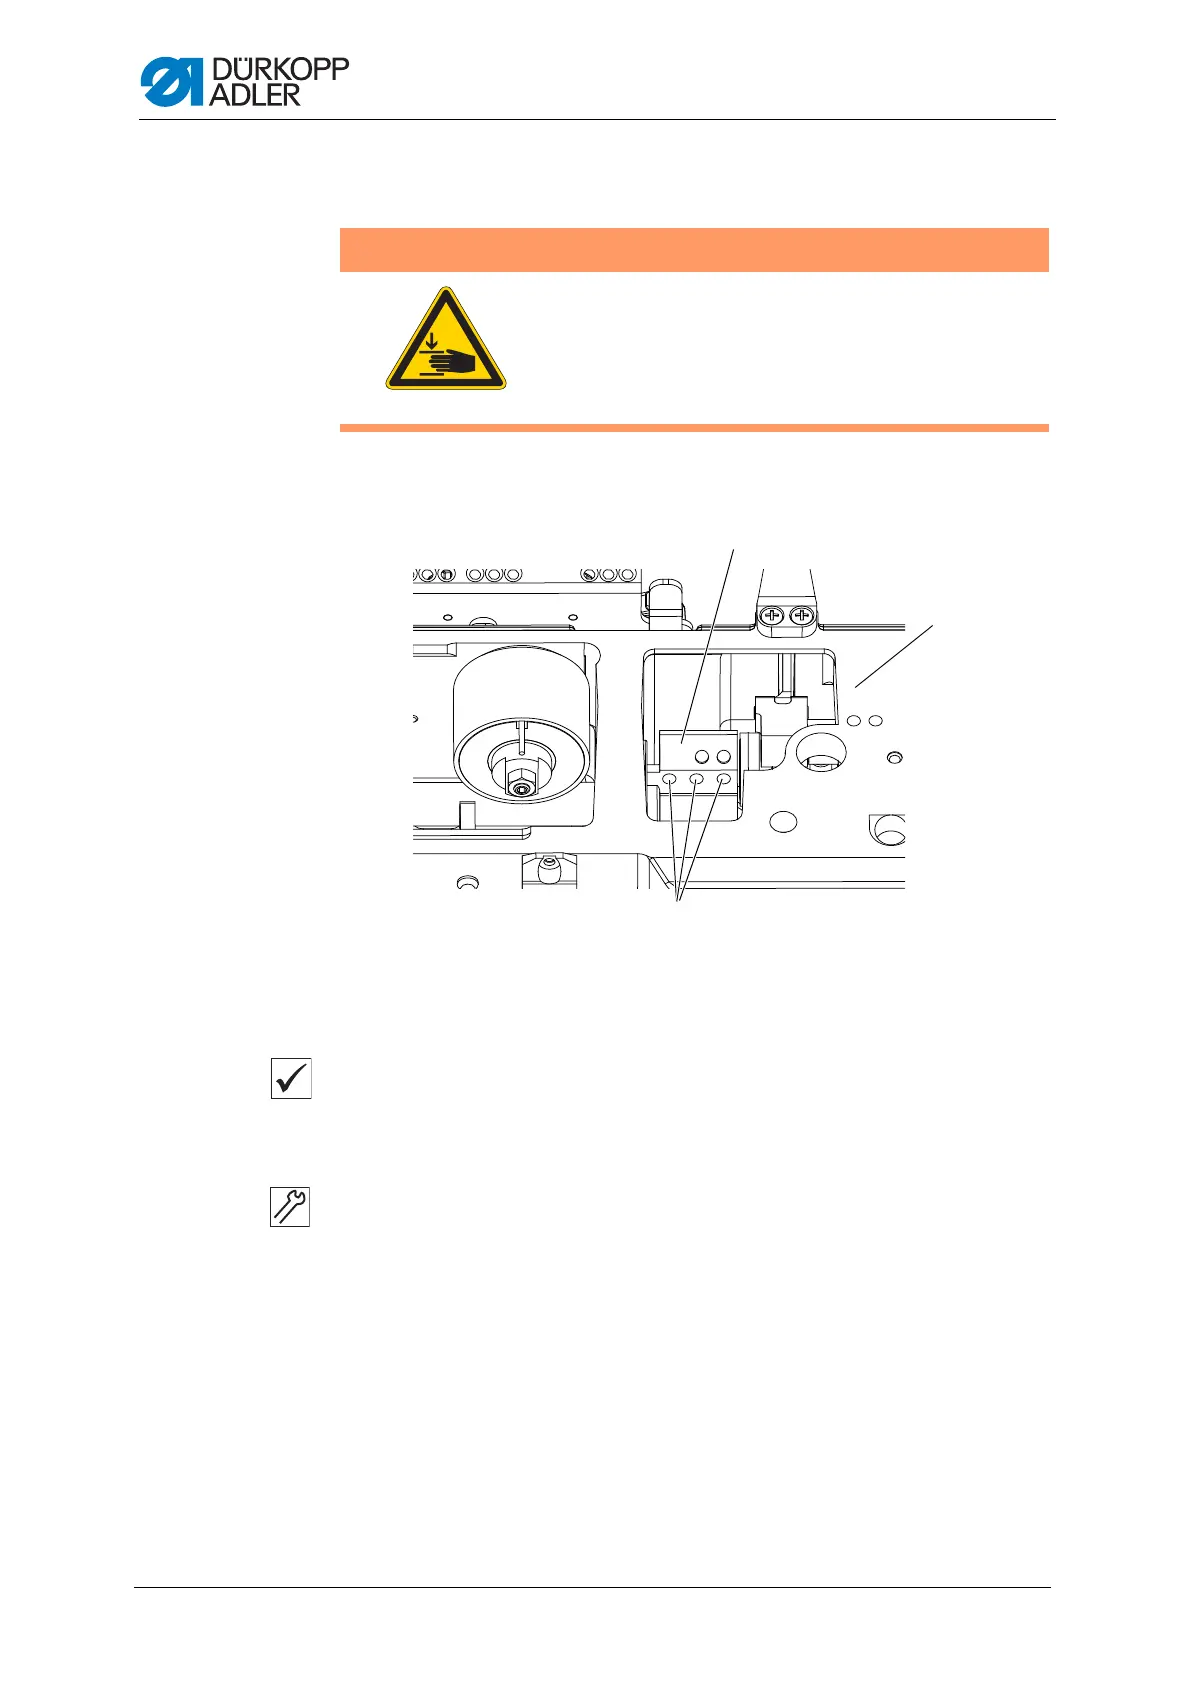
5 Positioning the arm shaft
Fig. 13: Positioning the arm shaft
Proper setting
The three threaded pins (1) on the arm shaft crank (3) are set completely on
the surface. The arm shaft crank (3) is flush with the machine casting (2).
1. Remove the arm cover (
p. 16).
2. Loosen the threaded pins (1) on the arm shaft crank (3).
3. Turn the arm shaft crank (3) so that the threaded pins (1) are completely
set on the surface of the arm shaft.
4. Push the arm shaft to be flush with the arm shaft crank (3) as far as it
will go to the right of the machine casting.
5. Tighten the threaded pins (1) on the arm shaft crank (3).
WARNING
Risk of injury from moving parts!
Crushing possible.
Switch off the sewing machine before you check
and set the position of the arm shaft crank.
(1) - Threaded pins
(2) - Machine casting
(3) - Arm shaft crank

 Loading...


