Setting the sewing foot
Service Instructions 878-M PREMIUM - 03.0 - 10/2019 31
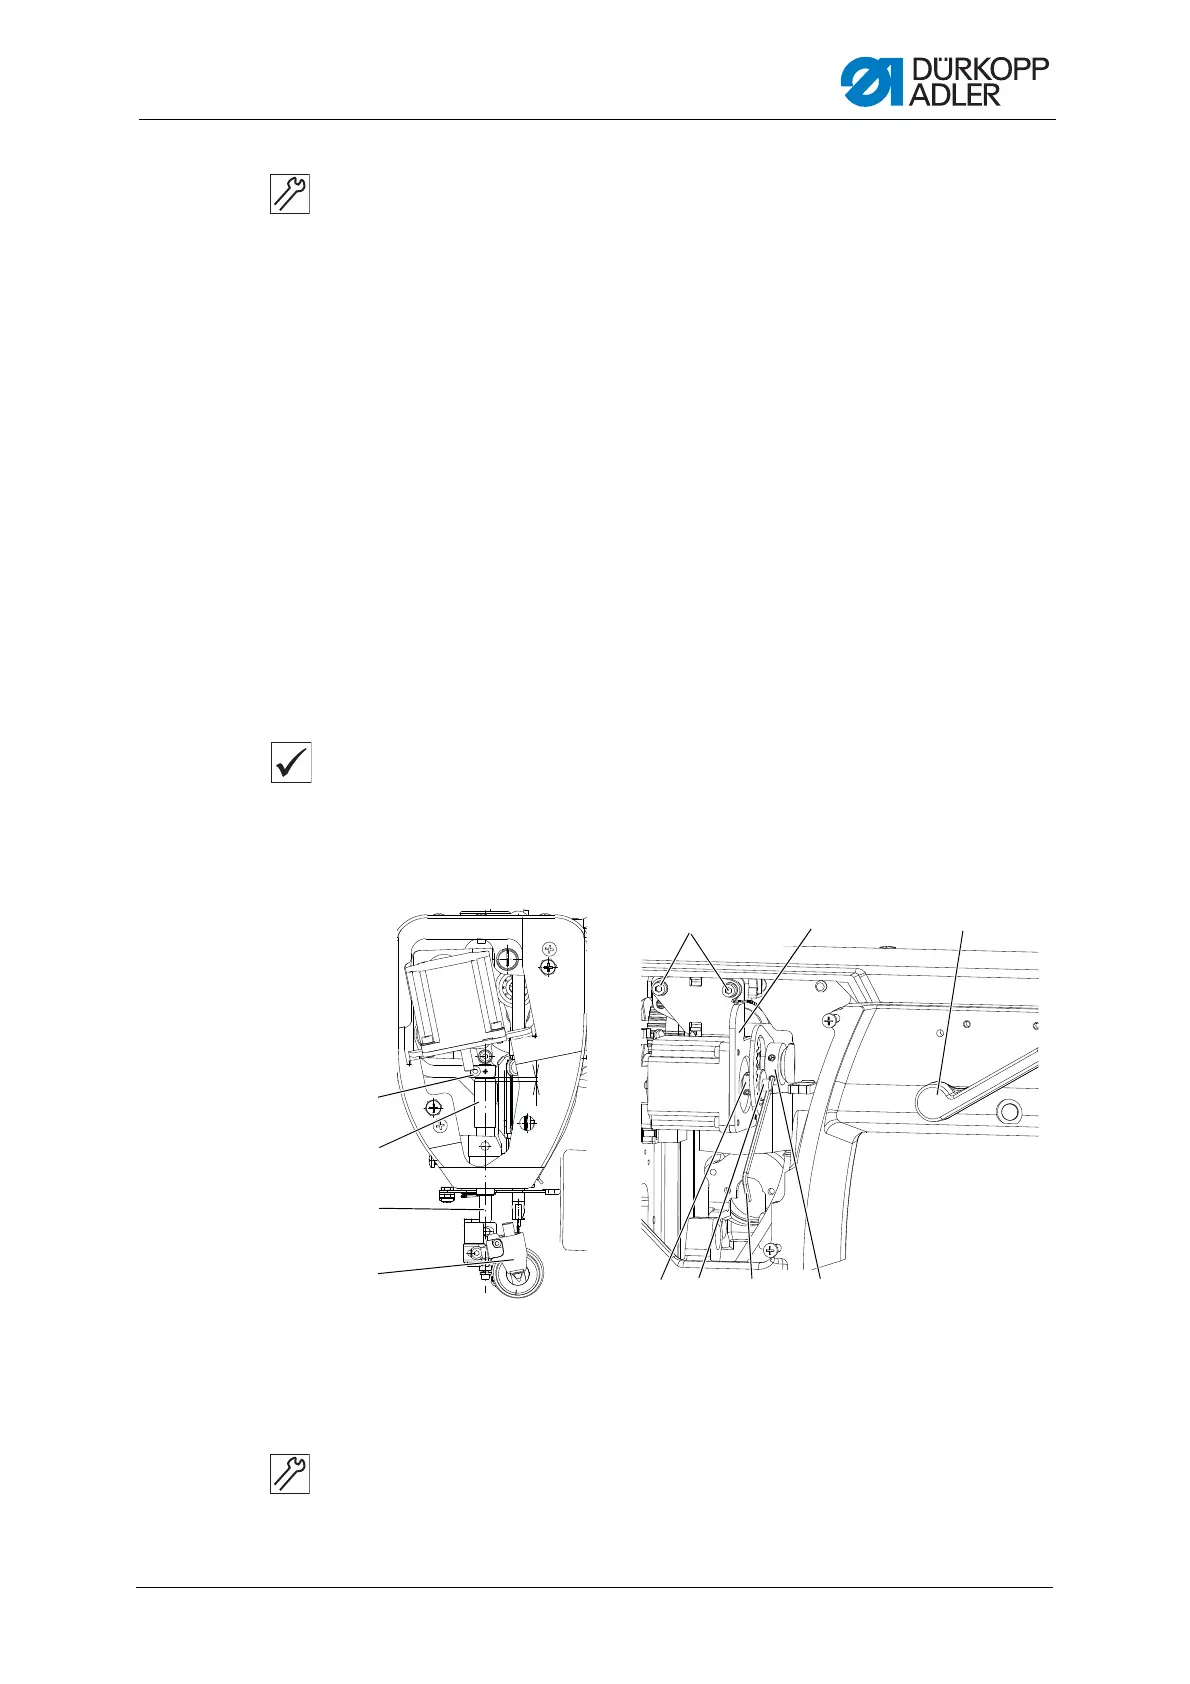
1. Loosen the screw (1).
2. Move the pressure bar vertically until the sewing foot touches down
the feed dog. Insert the cross-point screwdriver (6) which is supplied
along with the sewing machine into the roller foot holder (7) opening,
and turn the pressure bar (8) together with roller foot holder (7) so that
the screwdriver is approximately perpendicular to the longitudinal axis
of the sewing machine.
3. Tighten the screw (1).
4. Loosen the screw (2).
5. Move the sewing foot as prescribed in instruction 2.
6. Tighten the screw (2).
7. Loosen the screw (3).
8. Move the sewing foot as prescribed in instruction 3 by turning the
screw (4).
9. Tighten the screw (4).
Sewing foot stroke
Proper setting
1. The sewing foot stroke by the hand lever (9) is about 5 mm.
2. The sewing foot stroke by the stepper motor is a maximum of 13 mm
and it is adjustable by the respective parameter.
Fig. 20: Setting sewing foot 2
1. Remove the side and rear covers ( p. 15).
2. Move the sewing foot (4) manually up onto the feed dog.
3. Using the screw (1) set the gap (A) = ~1 mm between the gripping
connection of the foot bar (3) and the sleeve (2).
(1) - Screw
(2) - Screw
(3) - Screw
(4) - Screw
(5) - Side position of the sewing foot
(6) - Cross-point screwdriver
(7) - Roller foot holder
(8) - Needle bar

 Loading...


