75
Tr im Tail Length
Thread Break Stitch Count
Locking stitch
(after color change)
Locking stitch
(after thread trimming)
Tr im Tail Length
Thread Break Stitch Count
Locking stitch
(after color change)
Locking stitch
(after thread trimming)
Tr im Tail Length
Thread Break Stitch Count
Locking stitch
(after color change)
Locking stitch
(after thread trimming)
Tr im Tail Length
Thread Break Stitch Count
Locking stitch
(after color change)
Locking stitch
(after thread trimming)
q
w
q
w
q
w
q
w
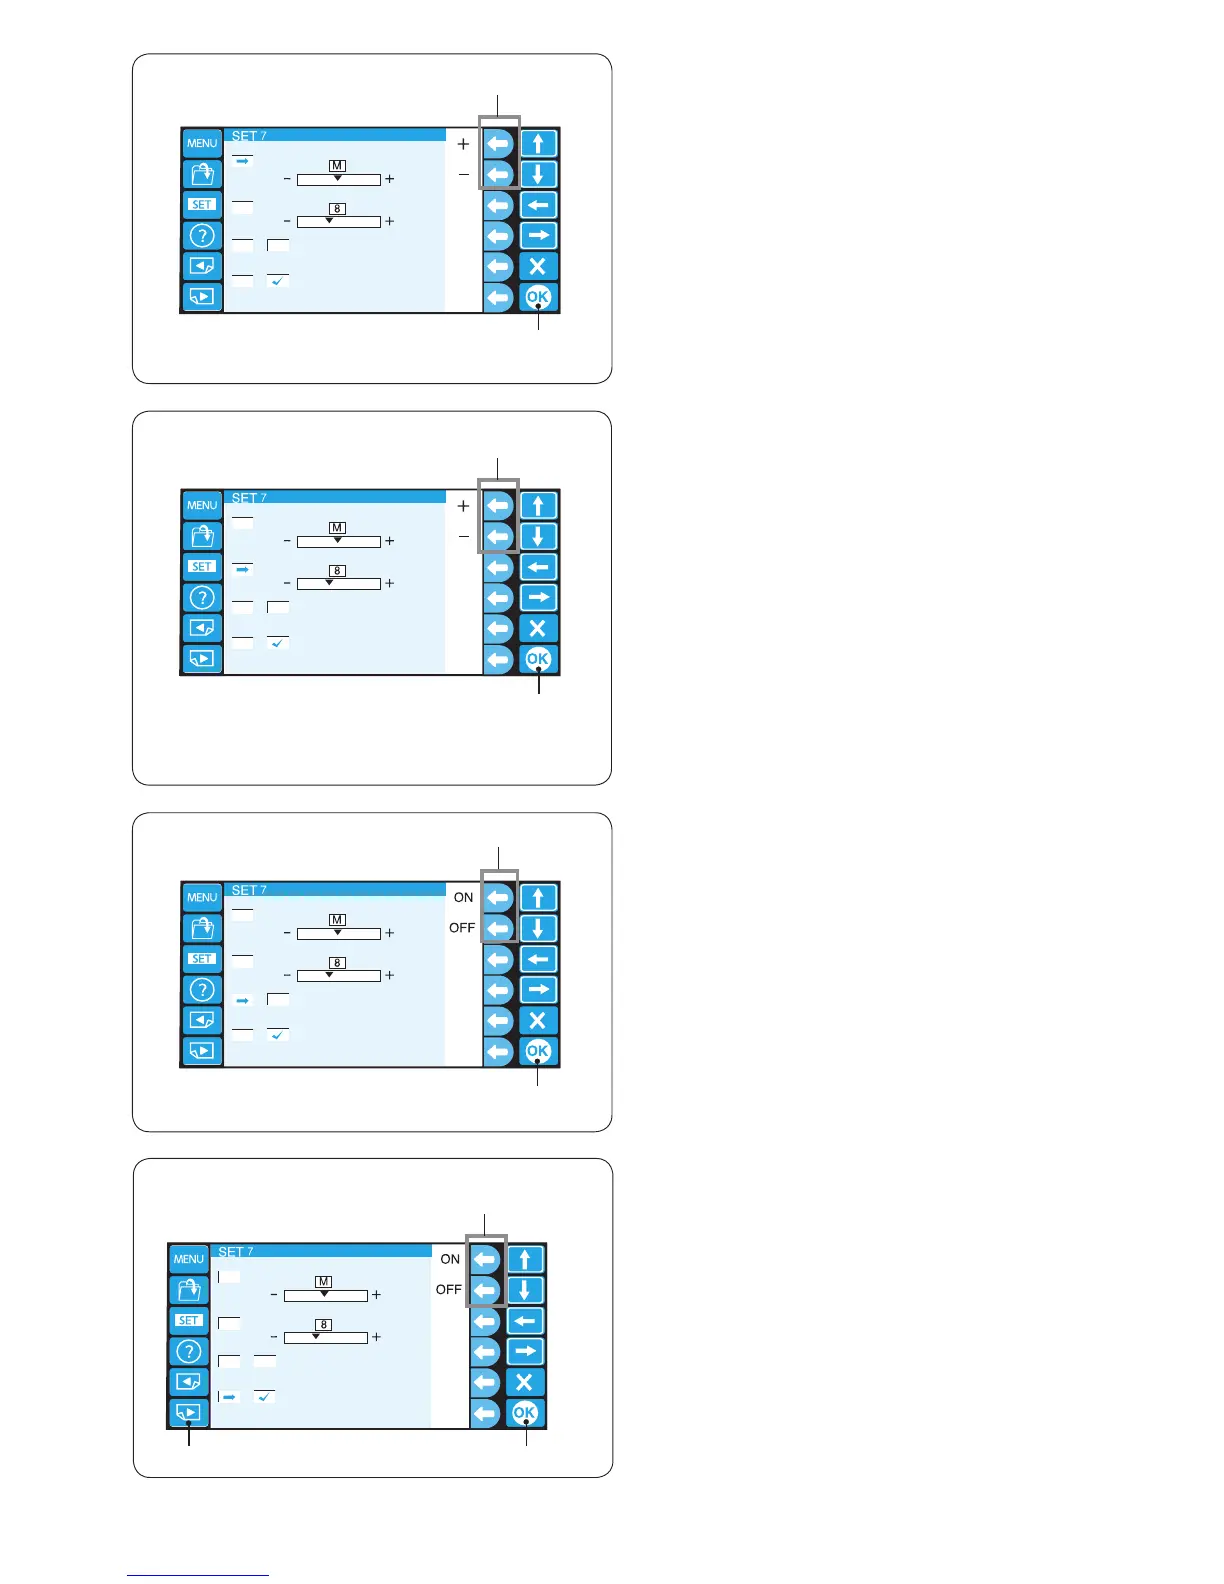
20. Setting the trim tail length
Some times you need to adjust the tail length of the
thread being trimmed depending on the thickness and
type of the thread.
Press the function key next to “+” or “–” to adjust the trim
length.
q Function keys (+, –)
You can select one of the following options.
S: Short
M: Medium
L: Long
Press the OK key.
w OK key
21. Setting the thread breakage sensor
You can adjust the sensitivity of the thread brakage
sensor by setting stitch count to judge thread breakage.
Press the function key next to “+” or “–” to adjust the
sensitivity.
q Function keys (+, –)
The adjustable range is from 3 to 16 stitches.
The higher the number, the lower the sensitivity.
Reduce the sensitivity to avoid false thread breakage due
to short stitches.
Press the OK key.
w OK key
22. Locking stitch ON/OFF (after color change)
The threads may ravel if the stitch data does not contain
locking stitches at the beginning of each color section.
To avoid raveling, insert locking stitches at the beginning
by pressing the function key next to “ON”.
Press the function key next to “OFF” to disable this
function.
q Function keys (ON, OFF)
Press the OK key.
w OK key
23. Locking stitch ON/OFF (after thread trimming)
If you turn ON the jump thread trimming (refer to the
previous page), insert locking stitches after the jump to
avoid threads from raveling.
Press the function key next to “ON” or “OFF” to turn on or
off the function.
q Function keys (ON, OFF)
Press the OK key to register the new setting.
w OK key
To go to the next page, press the next page key.
e Next page key
e