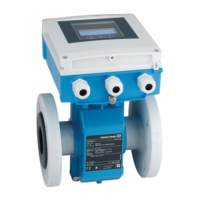
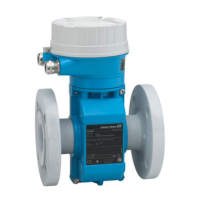
Installation Proline Promag W 400 EtherNet/IP
24 Endress+Hauser
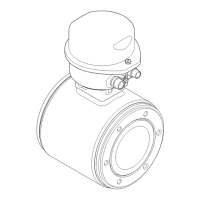
Buried applications
A0017298
6.2 Mounting the measuring device
6.2.1 Required tools
For transmitter
• Torque wrench
• For wall mounting:
Open-ended wrench for hexagonal screw max. M5
• For pipe mounting:
– Open-ended wrench AF 8
– Phillips head screwdriver PH 2
• For turning the transmitter housing (compact version):
– Phillips head screwdriver PH 2
– Torx screwdriver TX 20
– Open-ended wrench AF 7
For sensor
For flanges and other process connections:
• Screws, nuts, seals etc. are not included in the scope of supply and must be provided by
the customer.
• Appropriate mounting tools
6.2.2 Preparing the measuring device
1. Remove all remaining transport packaging.
2. Remove any protective covers or protective caps present from the sensor.
3. Remove stick-on label on the electronics compartment cover.
6.2.3 Mounting the sensor
L
WARNING
Danger due to improper process sealing!
‣
Ensure that the inside diameters of the gaskets are greater than or equal to that of the
process connections and piping.
‣
Ensure that the gaskets are clean and undamaged.
‣
Install the gaskets correctly.
1. Ensure that the direction of the arrow on the sensor matches the flow direction of
the medium.

 Loading...