SC-F2000 Revision C
DISASSEMBLY & ASSEMBLY Disassembly and Assembly Procedure 125
Confidential
3.4.5.6 CR MOTOR ASSY
1. Remove the PRINTER COVER. (p72)
2. Remove the RIGHT HOUSING PLATE. (p74)
3. Remove the RIGHT COVER ASSY. (p88)
4. Remove the LEFT HOUSING PLATE. (p73)
5. Remove the LEFT COVER ASSY. (p86)
6. Unlock the CR UNIT. (p69)
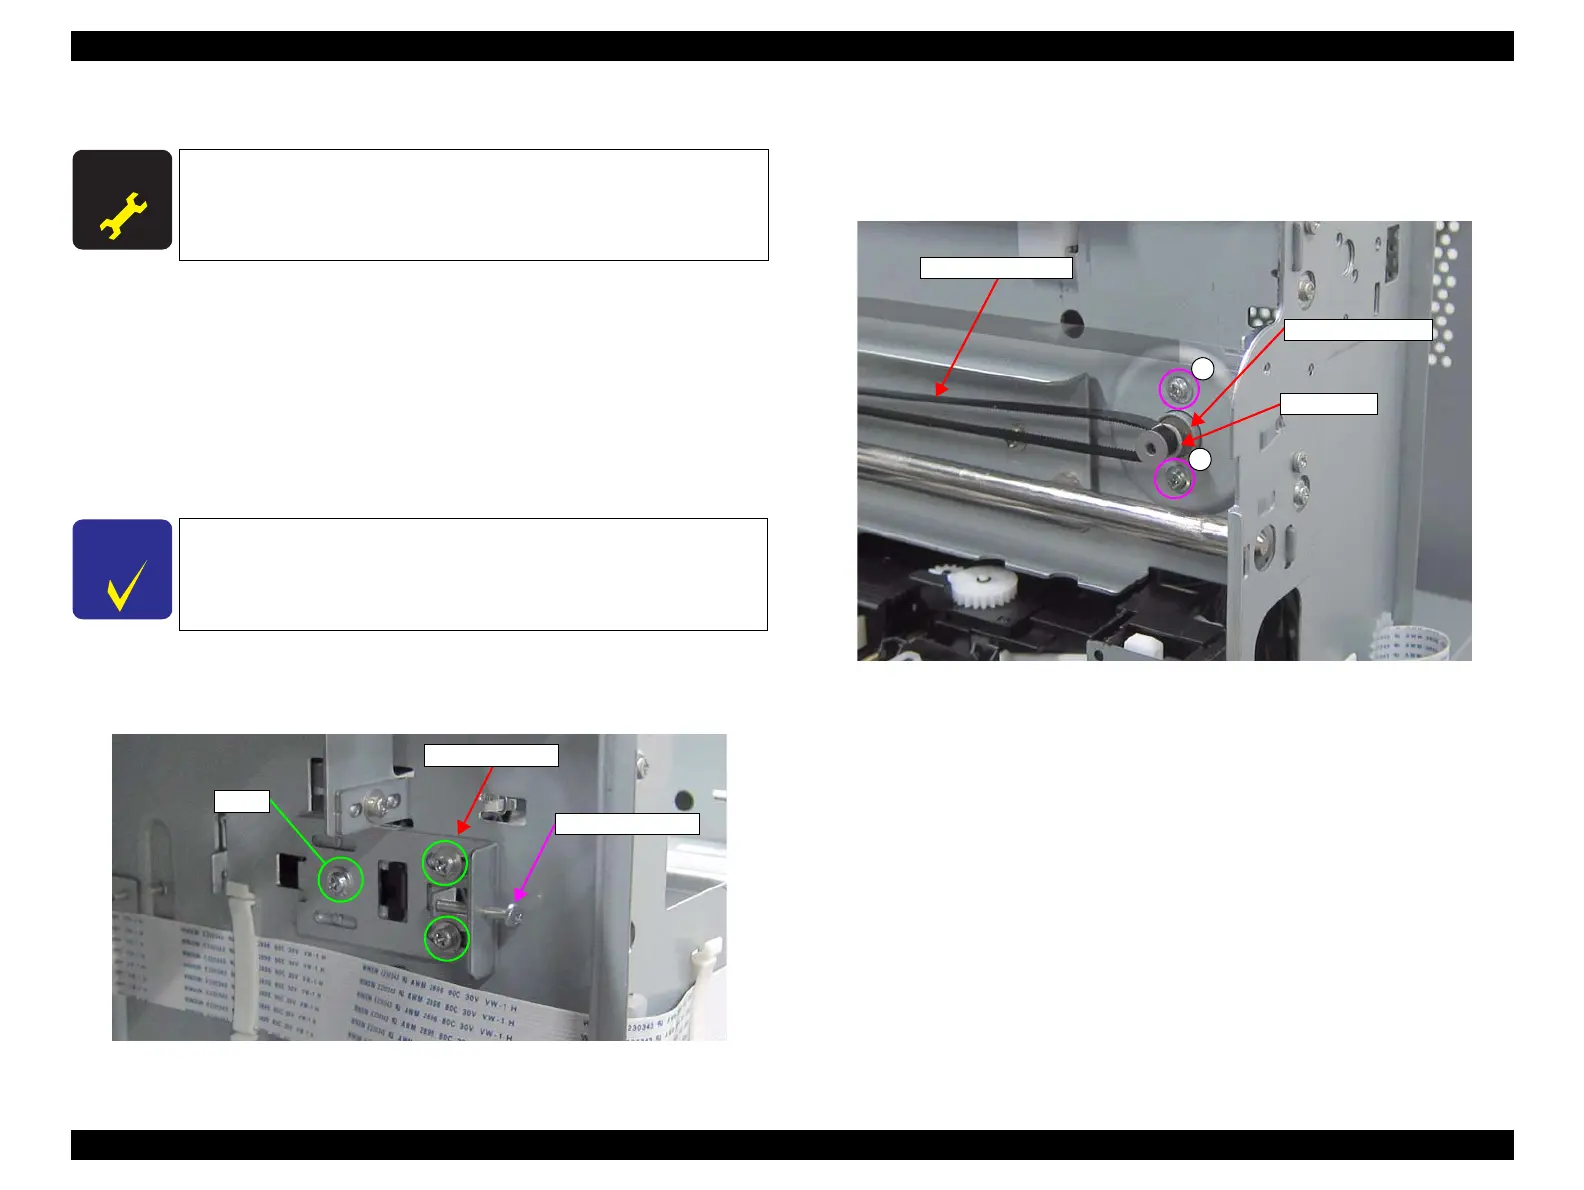
7. Loosen the Belt Tension Screw and the three screws, and loosen the tension of the
CR TIMING BELT.
Figure 3-88. Loosing the belt tension
8. Remove the two screws that secure the CR MOTOR ASSY.
A) Silver M3x5 machine screw: 2 pcs
9. Remove the CR TIMING BELT from the pinion gear of the CR MOTOR ASSY.
Figure 3-89. Removing the CR MOTOR ASSY (1)
A D J U S T M E N T
R E Q U I R E D
When replacing/removing this part, refer to “4.1.2 Adjustment
Items and the Order by Repaired Part” (p194) and make sure to
perform the specified operations including required adjustment.
Before loosening the tension at the next step, mark the position of
the CR Pulley Holder to make the required adjustment easier.
CR Pulley Holder
Belt Tension Screw
Screw
A
A
Pinion gear
CR TIMING BELT
CR MOTOR ASSY
 Loading...


