SC-F2000 Revision C
DISASSEMBLY & ASSEMBLY Disassembly and Assembly Procedure 169
Confidential
3.4.6.3 PG SWITCH LEVER ASSY
1. Remove the FIXING LEVER. (p167)
2. Remove the PLATEN. (p71)
3. Remove the PARALLEL ADJUSTMENT PLATE. (p168)
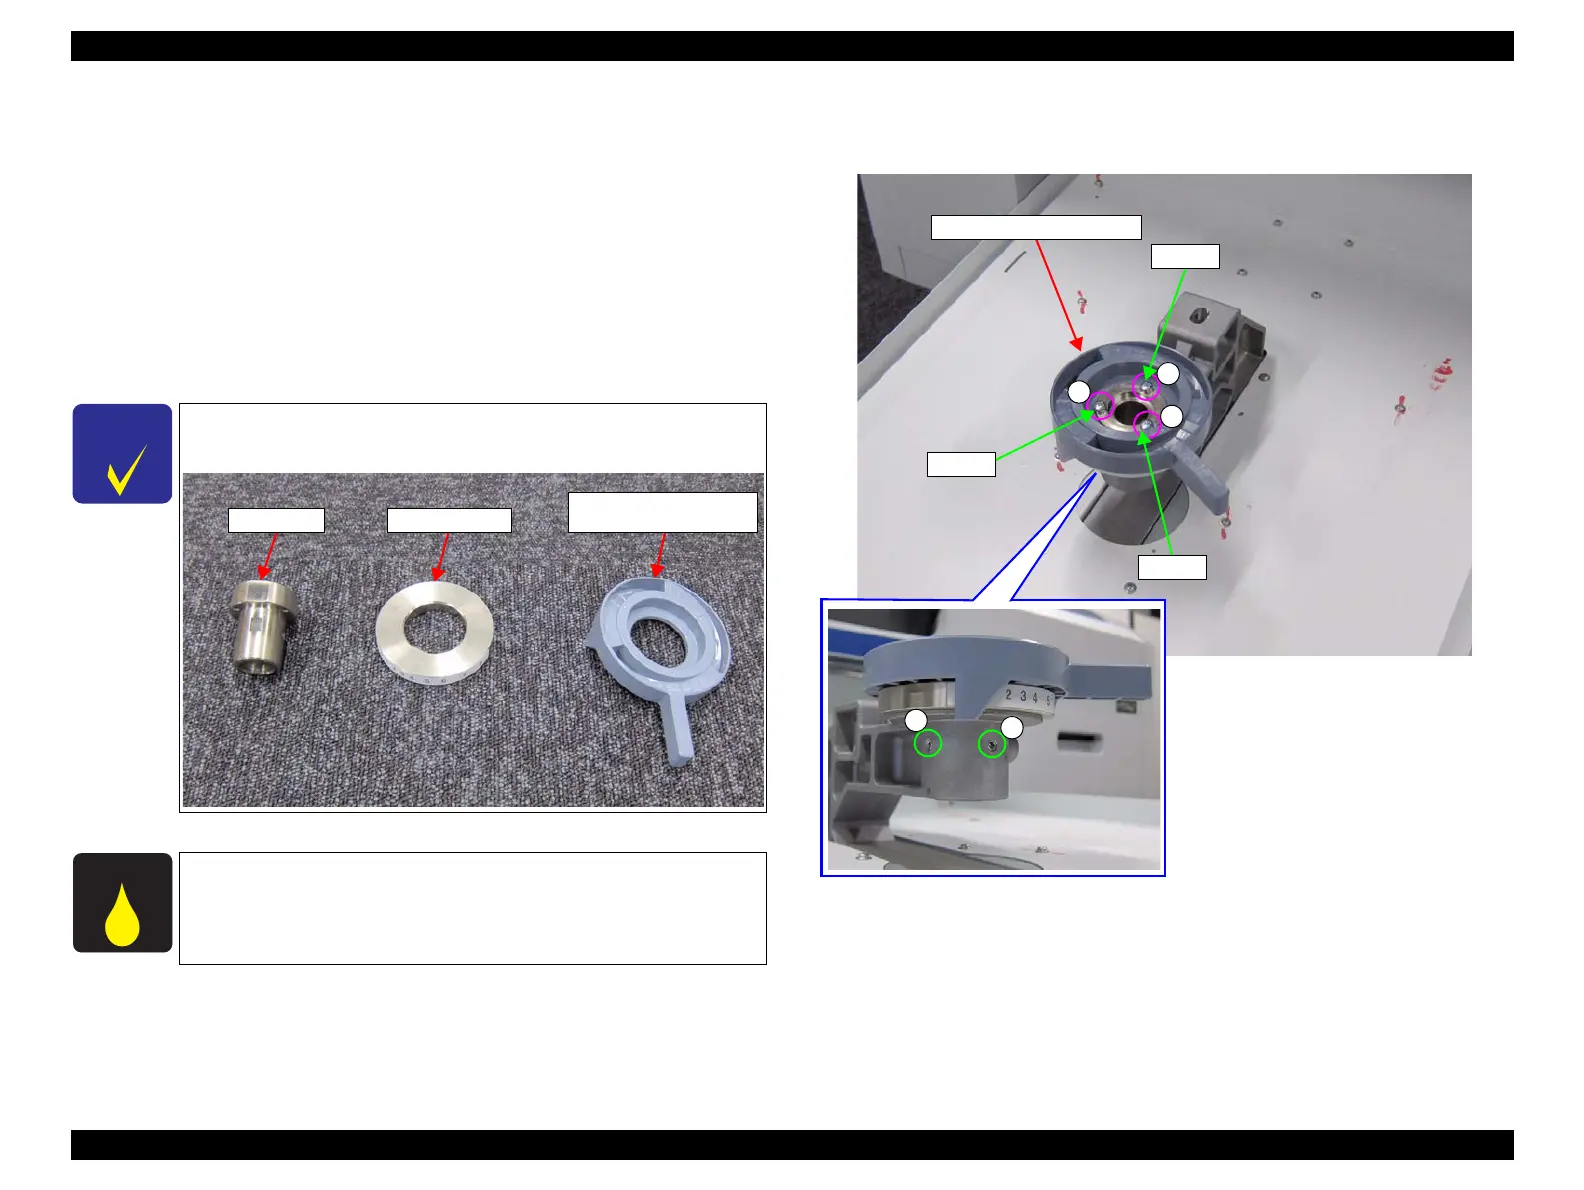
4. Remove the three screws and three washers.
A) Silver M4x6 Bind machine screw 3 pcs
5. Loosen the two screws, and remove the PG SWITCH LEVER ASSY.
B) Silver M5x5 Screw with hexagonal slots: 2 pcs
Figure 3-132. Removing the PG SWITCH LEVER ASSY
The PG SWITCH LEVER ASSY consists of the following three
parts.
When replaced with a new part, make sure to lubricate the new one
referring to “5.6 Lubrication” (p293).
Fasten Shaft
PG Assy Flange
HEIGHT ADJUSTMENT
LEVER
PG SWITCH LEVER ASSY
A
A
A
Washer
Washer
Washer
 Loading...


