SC-F2000 Revision C
ADJUSTMENT Overview 198
Confidential
[Blue]: Button or menu name on the program screen / [Black]: Button or menu name on the operation panel of the printer
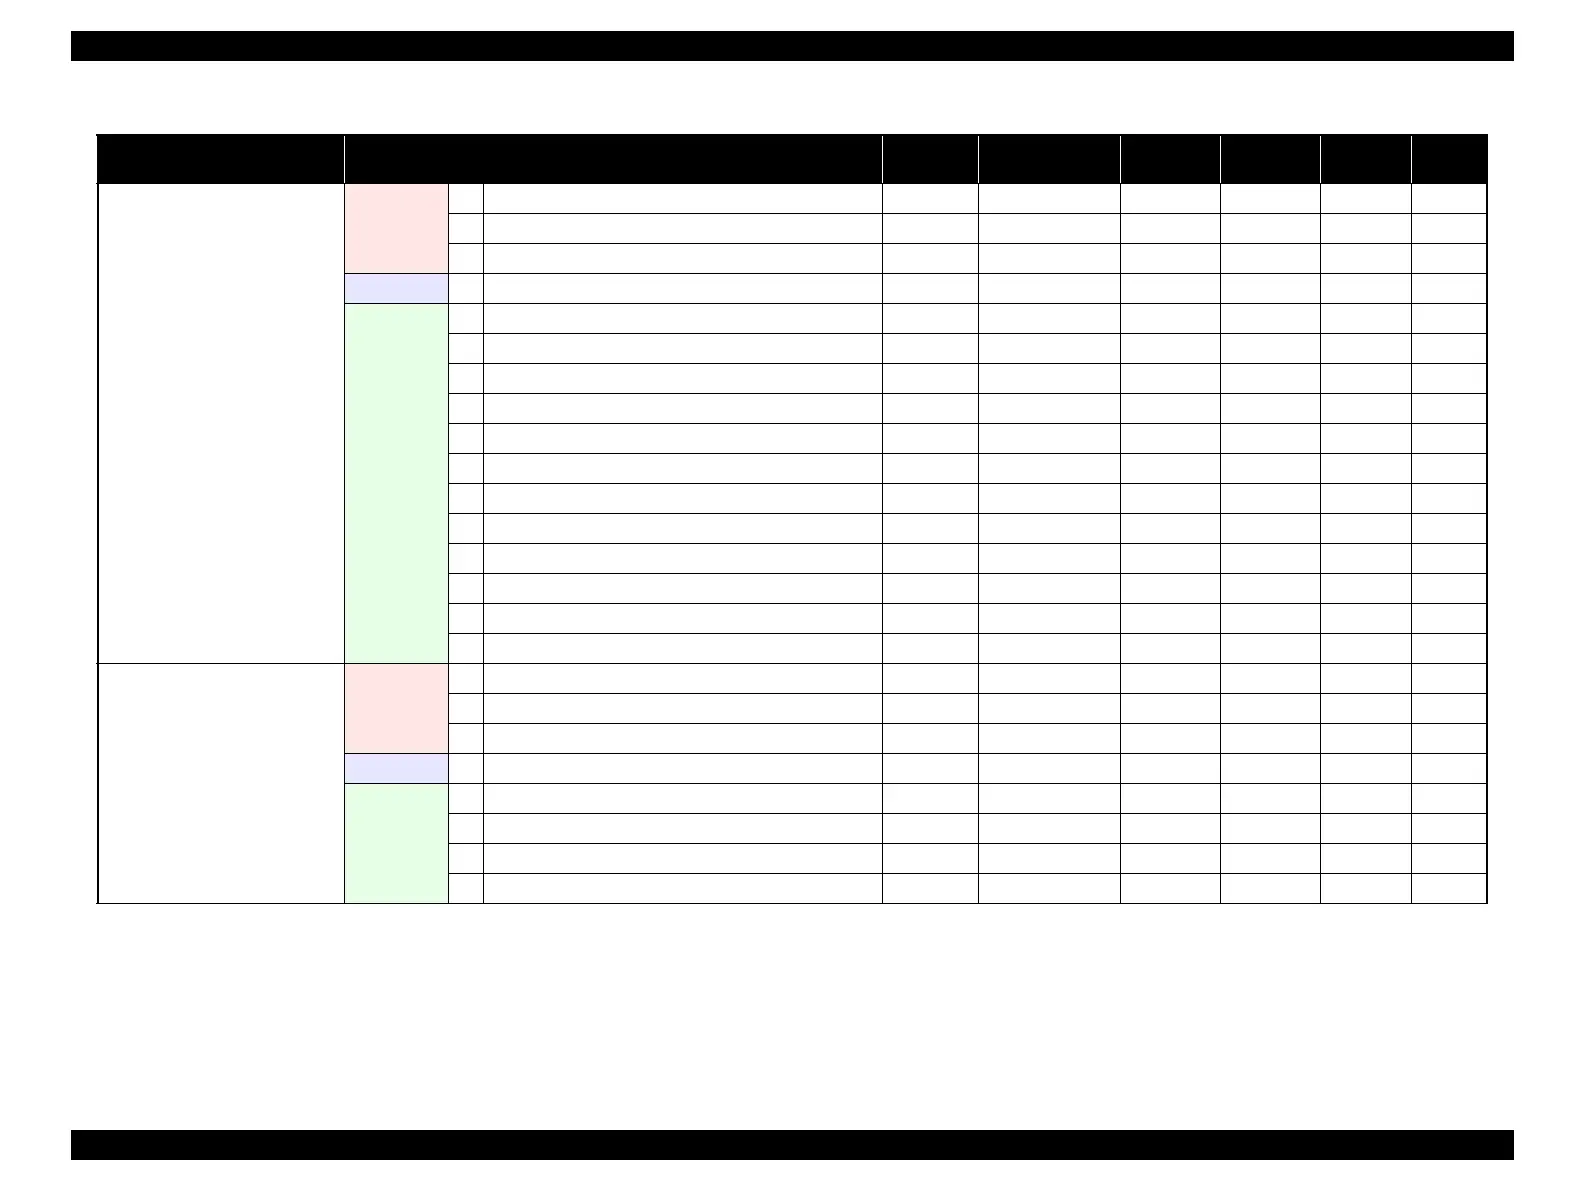
CR Unit
Before
replacement
1 PG Check
√
Thickness gauge
√√
p. 246
2 Turn the power on in Serviceman mode.
---
√√
3 Tube inner pressure reduction
√√√
p. 234
Replacement 4 Replace with a new one.
---
√√
p. 138
After
replacement
5 Turn the power on in normal mode. ---
√√
6 CR Belt tension adjustment
√
Tensimeter U-507
√√
p. 224
7 CR scale check
√√√
p. 226
8 PG Check/PG Adjustment
√
Thickness gauge
√√
p. 246
9CL3
√√√
p. 238
10 Nozzle Check & Cleaning
√
PGPP
√√
p. 237
11 Head inclination adjustment
√
PGPP
√√
p. 239
12 Head slant adjustment
√
PGPP
√√
p. 243
13 PG Check/PG Adjustment
√
Thickness gauge
√√
p. 246
14 Manual Uni-d adjustment
√
PGPP
√√
p. 227
15 Manual Bi-d adjustment
√
PGPP
√√
p. 229
16 1st dot positioning adjustment
√
PGPP
√√
p. 231
TF Motor Assy
Before
replacement
1 Turn the power on in Serviceman mode.
---
√
2 Counter Reset
√√
p. 221
3 Turn the power off.
---
√
Replacement 4 Replace with a new one.
---
√√
p. 185
After
replacement
5 Turn the power on in normal mode.
---
√√
6 TF Belt Tension Check √ Tensimeter U-507
√√
p. 253
7 TF Timing Belt tension adjustment
√
Tensimeter U-507
√
√ p. 255
8 TF Motor measurement
√√√
p. 282
Table 4-1. Adjustment Items and the Order by Repaired Part
Replaced or Repaired
(Reattached) Part/Unit
Required Operations
Service
Program
Jig Media Replaced Reattached Page

 Loading...


