Epson Stylus NX510/515/SX510W/515W/TX550W/NX415/SX410/415/TX410/419/NX215/SX210/215/TX210/213/219/ME OFFICE 510 Revision A
DISASSEMBLY/ASSEMBLY Removing the Housing 104
Confidential
Tighten the screws in the order given in Figure 4-13.
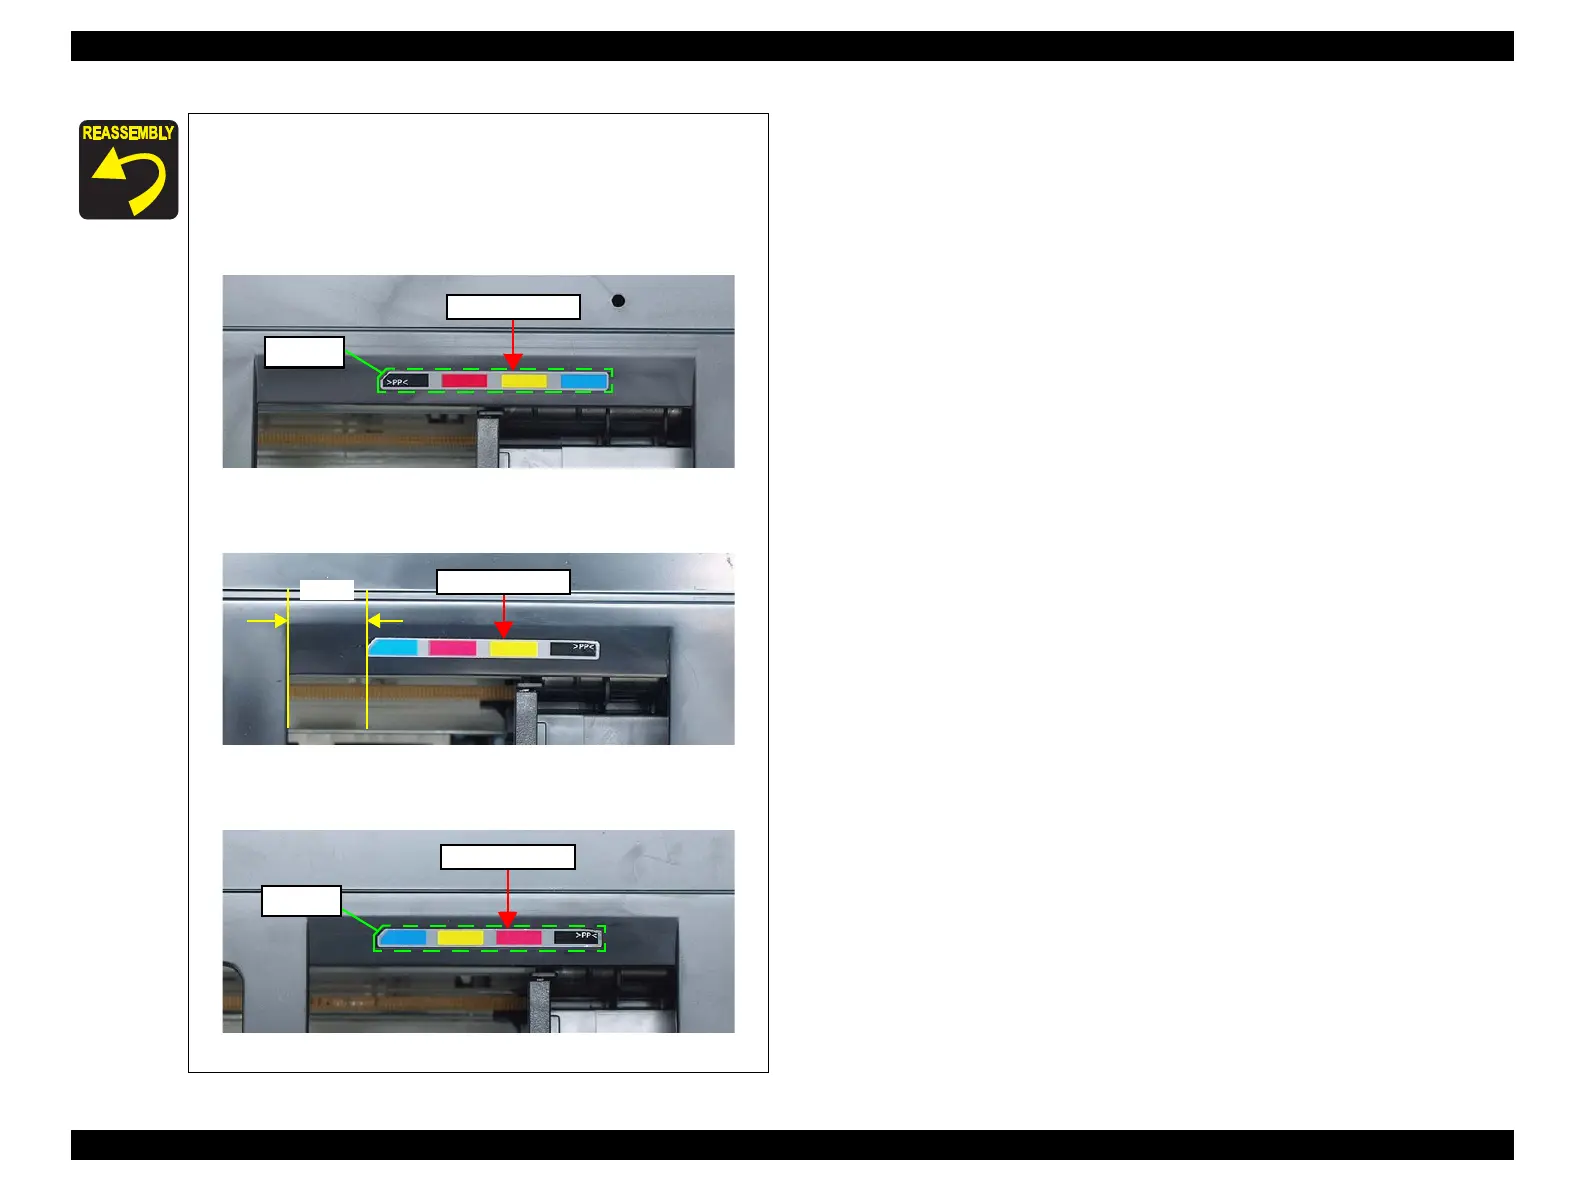
The Ink Position Label is not included in the Upper Housing
as an ASP. When replacing the Upper Housing, attach the
label following the instructions below.
• NX510 series:
Attach it while aligning it with the marking shown below.
Figure 4-15. Attaching Ink Position Label (NX510 series)
• SX410 series:
Attach it following the standard below.
Figure 4-16. Attaching Ink Position Label (SX410 series)
• SX210 series:
Attach it while aligning it with the marking shown below.
Figure 4-17. Attaching Ink Position Label (SX210 series)
Ink Position Label
Marking
Ink Position Label
Marking

 Loading...


