Epson Stylus NX510/515/SX510W/515W/TX550W/NX415/SX410/415/TX410/419/NX215/SX210/215/TX210/213/219/ME OFFICE 510 Revision A
DISASSEMBLY/ASSEMBLY Disassembling the Printer Mechanism 139
Confidential
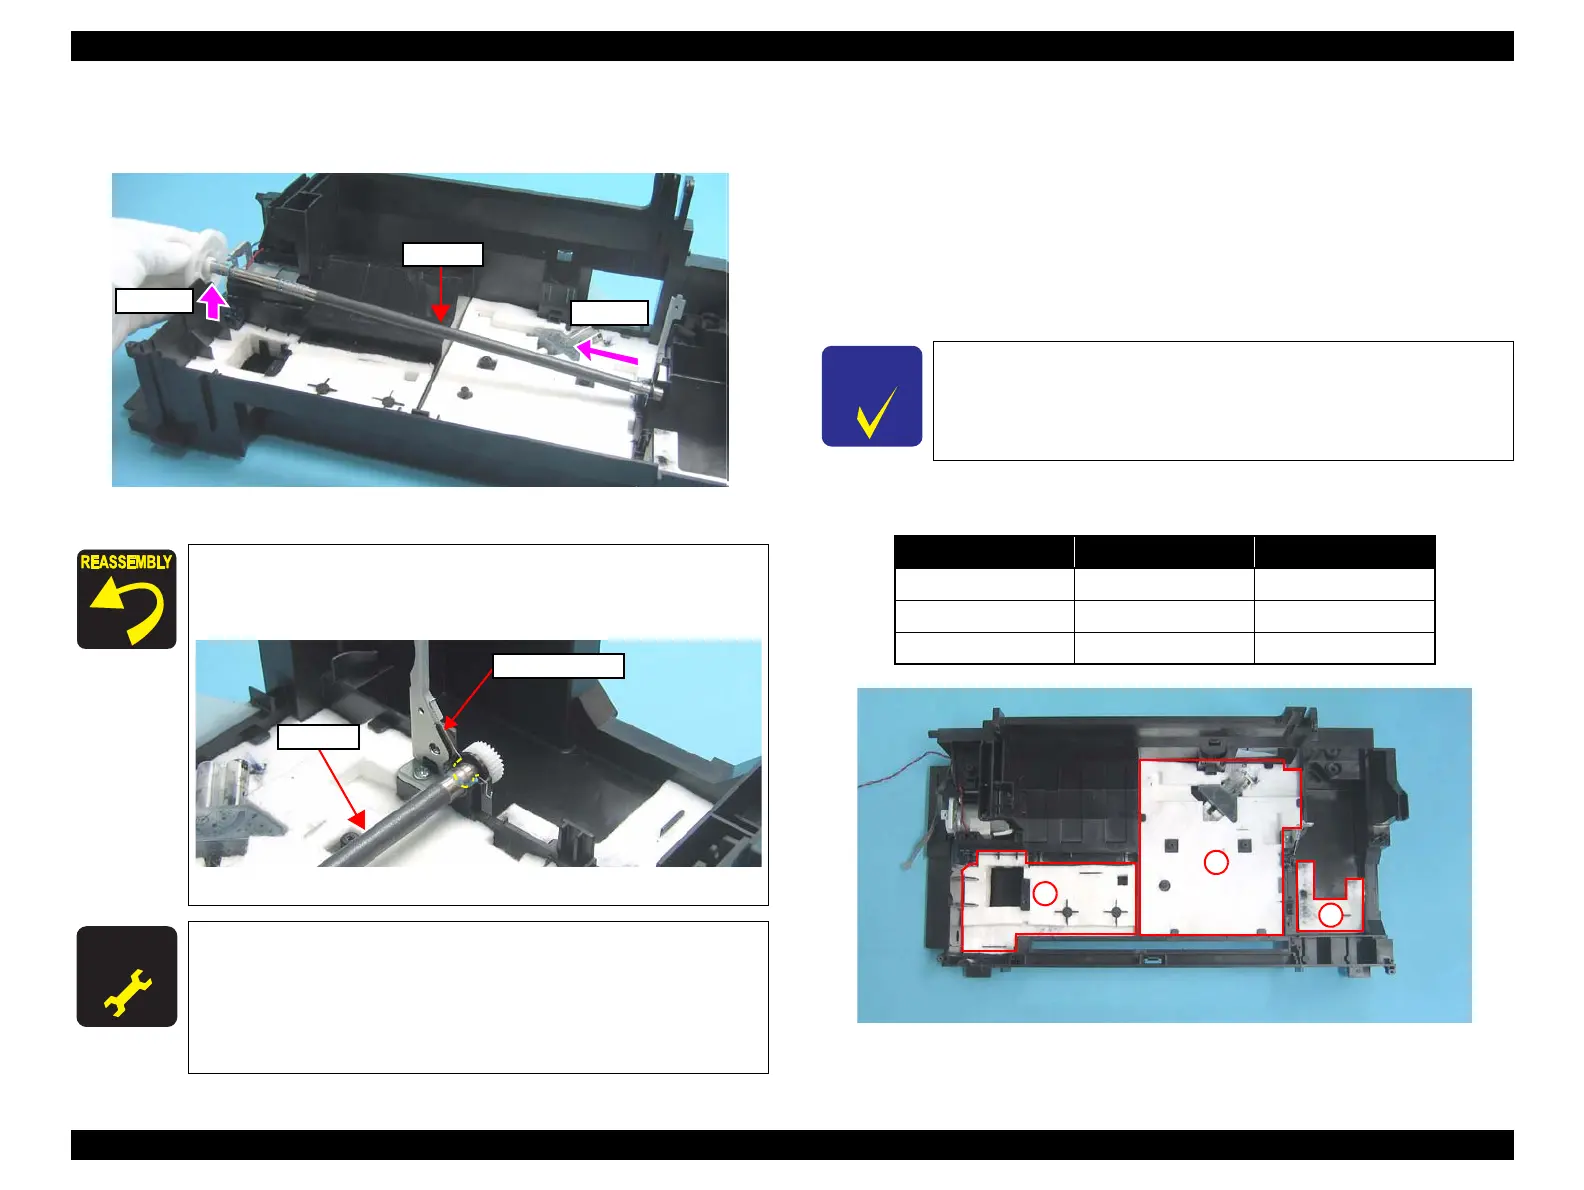
2. Release the PF Roller from the cutout of the Base Frame (Step 2-1), and
remove the PF Roller (Step 2-2)
Figure 4-107. Removing the PF Roller (2)
4.5.20 Waste Ink Pads
Parts/Components need to be removed in advance
Document Cover/ASF Cover/Scanner Unit/Panel Unit/Upper Housing/Card Slot
Cover/Lower Housing/Main Board Unit/Left Frame/Front Frame/Right Frame/CR
Motor/CR Scale/Hopper/Main Frame Assy/ASF Unit/Ink System Unit/Star Wheel
Holder Assy/EJ Roller/Front Paper Guide/PF Encoder Sensor/PF Scale/PF Roller
Removal procedure
1. Remove the Waste Ink Pads shown below from the A, B, and C sections of the
Base Frame.
Figure 4-109. Removing the Waste Ink Pads
NX510 series only:
Install the PF Roller after attaching the Grounding Spring as
shown in the figure below.
Figure 4-108. Installing the PF Roller
A D J U S T M E N T
R E Q U I R E D
Whenever the PF Roller, is removed/replaced, the required
adjustments must be carried out.
• Chapter 5 “ ADJUSTMENT” (p.161)
After replacing the Front Paper Guide, be sure to perform the
required lubrication.
• Chapter 6 “ MAINTENANCE” (p.175)
Step 2-1
Step 2-2
PF Roller
PF Roller
Grounding Spring
In this section, some disassembling procedures differ between
models. Skip the model-specified steps if not applied to your
model.
Waste Ink Pads NX510 series SX410/SX210 series
Section A 2 pieces 2 pieces
Section B 3 pieces 2 pieces
Section C 1 piece 1 piece

 Loading...


