Epson Stylus NX510/515/SX510W/515W/TX550W/NX415/SX410/415/TX410/419/NX215/SX210/215/TX210/213/219/ME OFFICE 510 Revision A
DISASSEMBLY/ASSEMBLY Removing the Housing 100
Confidential
4.3.4 Scanner Unit/Hinge
Parts/Components need to be removed in advance
Document Cover/ASF Cover
Removal procedure
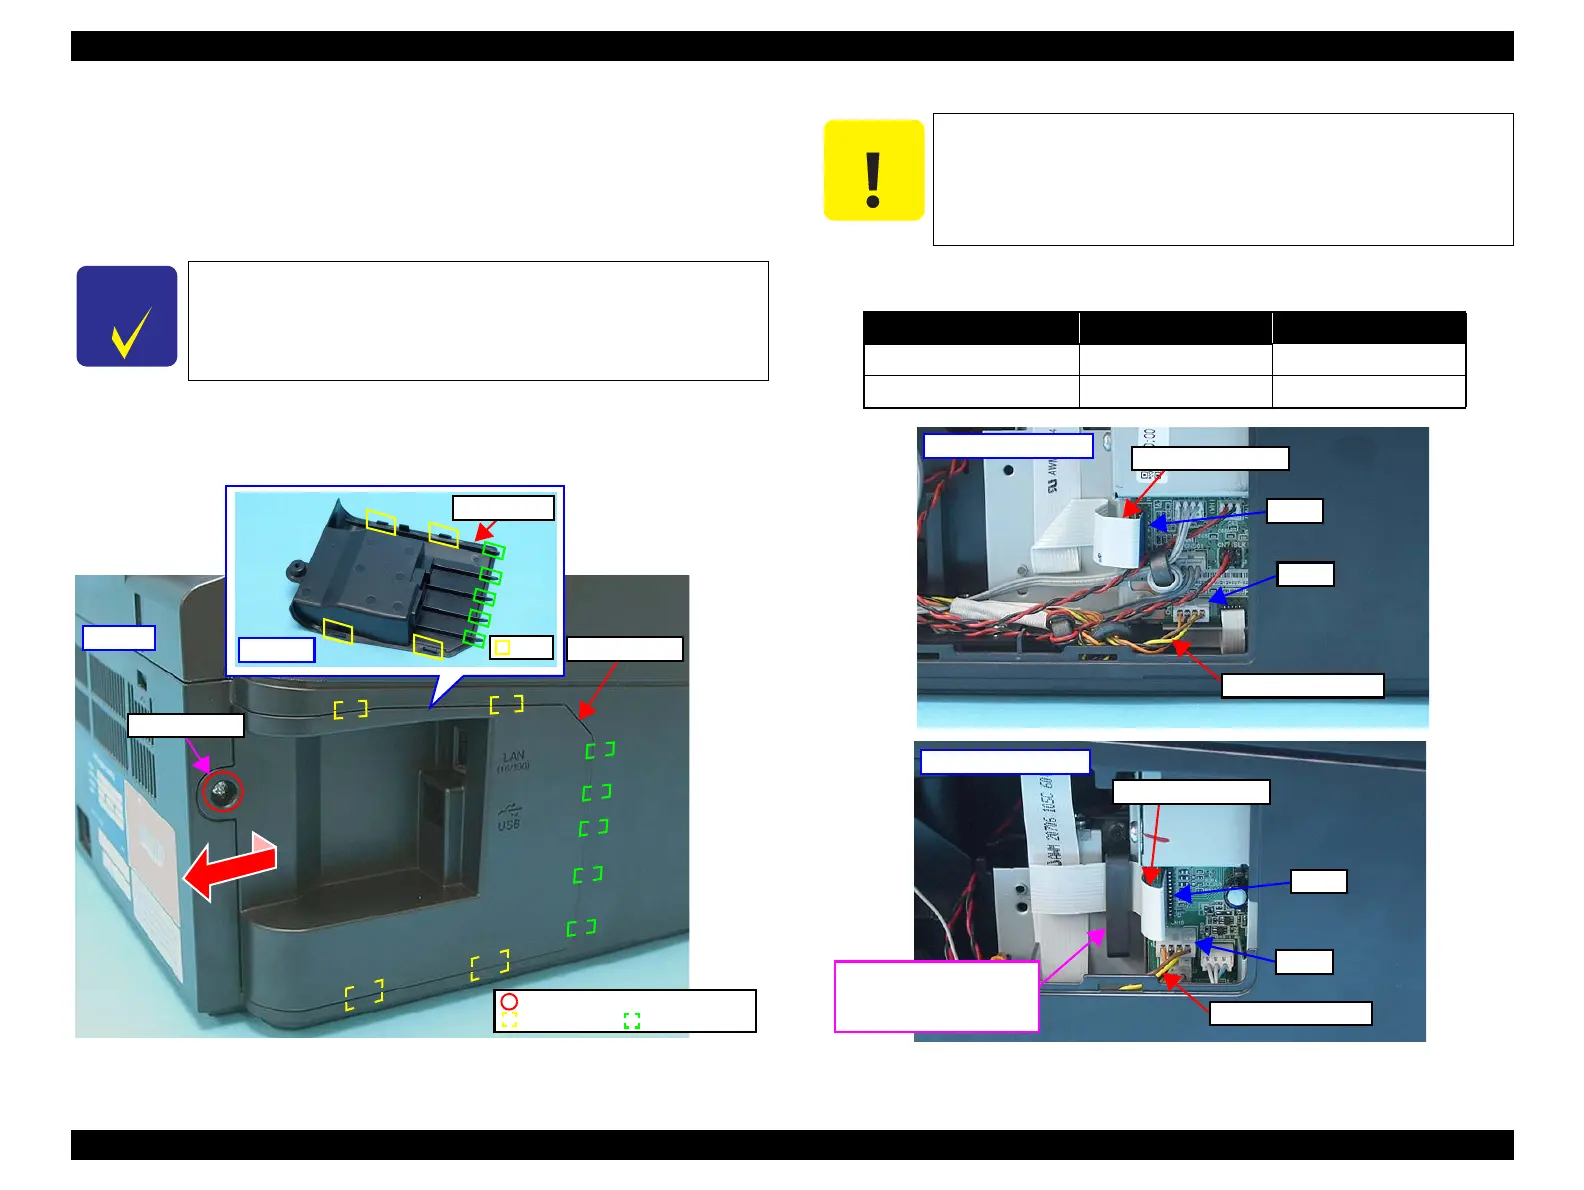
1. Remove the screw (x1) that secures the USB Cover.
2. Pull the USB Cover at its screwing part, and remove it by sliding it to the left
(in the direction of the arrow).
Figure 4-6. Removing the USB Cover
3. Disconnect the Scanner Carriage FFC and the Scanner Motor Cable from the
connectors on the Main Board Unit. The connector numbers are as follows:
Figure 4-7. Removing the Scanner Unit (1)
In this section, some disassembling procedures differ between
models. Skip the model-specified steps if not applied to your
model.
USB Cover
C.B.S. 3x10, F/Zn-3C (6±1kgfcm)
Tab and Hole
Rib
Be careful of the sharp edges shown in Figure 4-8 when
assembling or reassembling.
Cable/FFC
NX510 series SX410/SX210 series
Scanner Motor Cable CN8 CN10
Scanner Carriage FFC CN17 CN21
CN8
CN17
NX510 series
Scanner Motor Cable
Scanner Carriage FFC
SX410/SX210 series
Scanner Carriage FFC
CN21
CN10
Scanner Motor Cable
This ferrite core is only for
SX410 series, no ferrite core
for SX210 series.

 Loading...


