Epson Stylus NX510/515/SX510W/515W/TX550W/NX415/SX410/415/TX410/419/NX215/SX210/215/TX210/213/219/ME OFFICE 510 Revision A
DISASSEMBLY/ASSEMBLY Differences in Disassembling/Reassembling SX210 series 160
Confidential
4.8.4 Removing the Printer Mechanism (Lower Housing)
(SX210 series)
Parts/Components need to be removed in advance
Document Cover/ASF Cover/Scanner Unit/Panel Unit/Upper Housing/Card Slot
Cover
Removal procedure
1. Release the hook that secures the Rear Cover and remove the Rear Cover.
(See
Figure 4-48.)
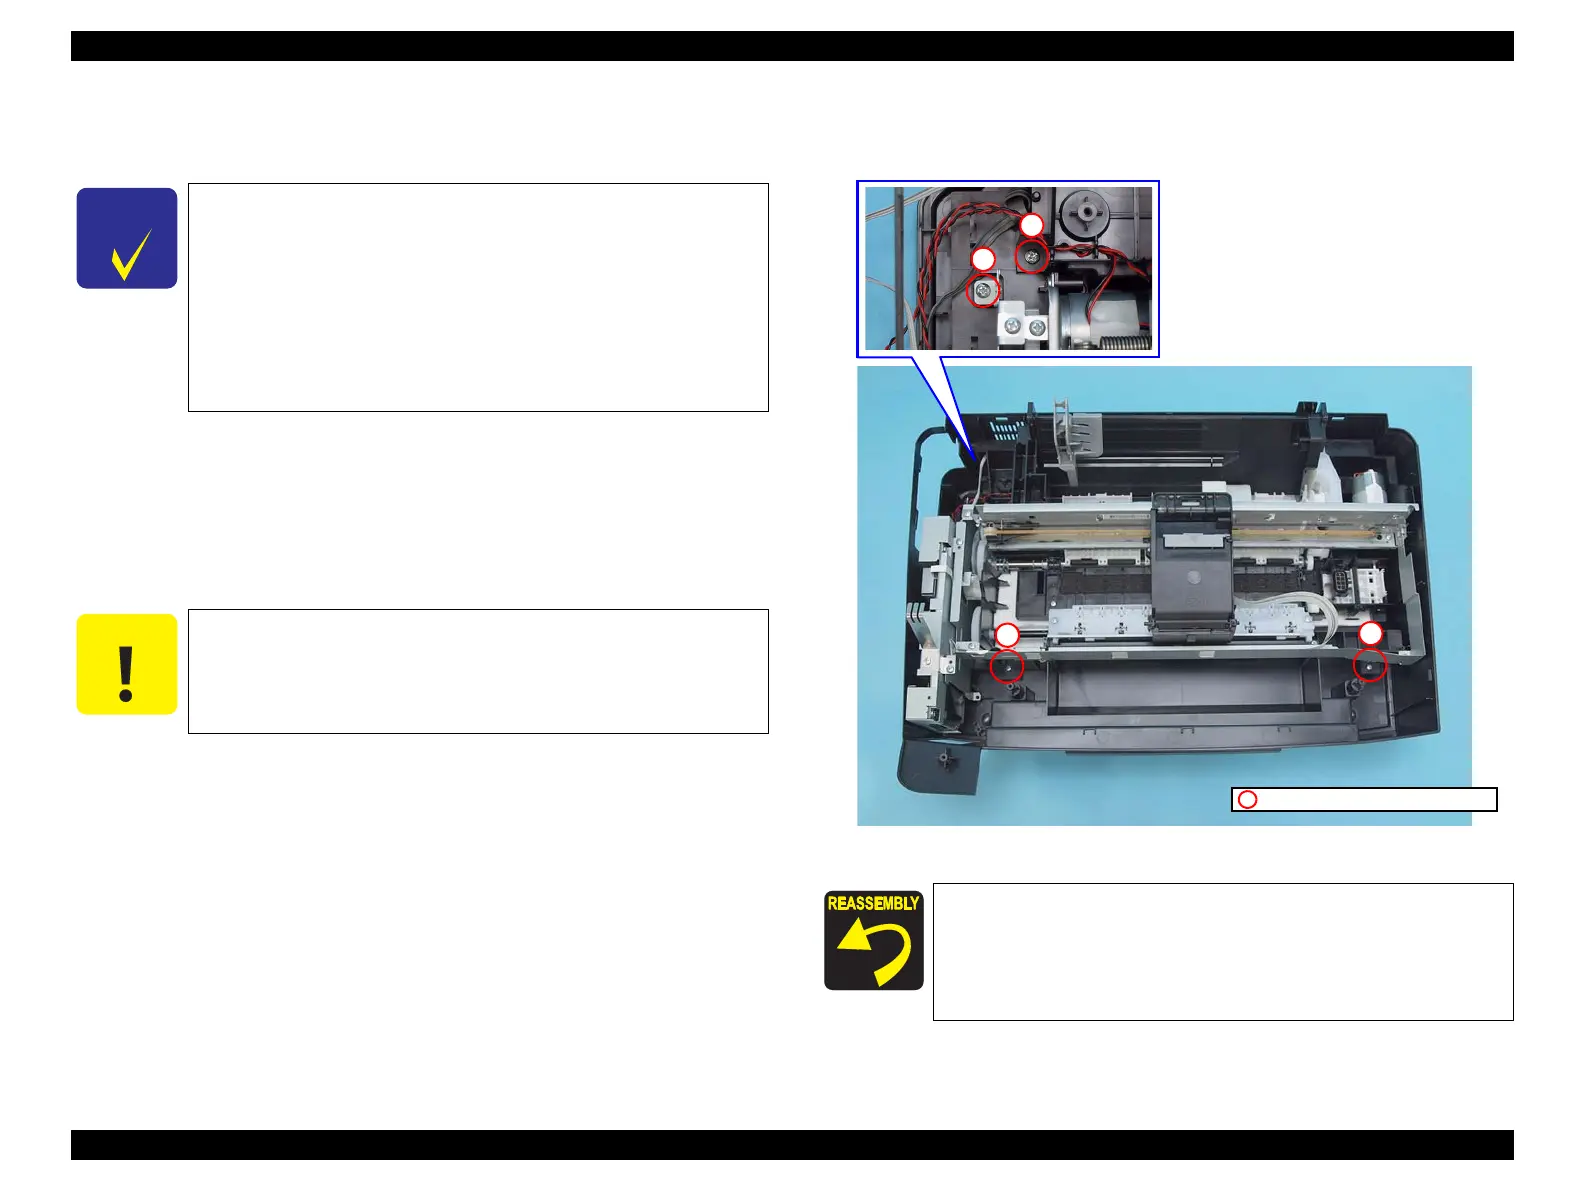
2. Remove the screws (x4) that secure the Printer Mechanism, and remove the
Printer Mechanism.
Figure 4-156. Removing the Printer Mechanism
See the following because the disassembling/reassembling
procedures of the Printer Mechanism for NX510/SX410 series
differ from those of SX210 series.
NX510 series:
“ 4.5.4 Removing the Printer Mechanism (Lower Housing) ”
(p117)
SX410 series:
“ 4.7.4 Removing the Printer Mechanism (Lower Housing)
(SX410 series) ” (p152)
When lifting the Printer Mechanism, be sure to hold the positions
specified in the figure below to prevent the Main Frame from
being deformed. (See
Figure 4-49.)
Tighten the screws in the order given in Figure 4-156.
C.B.P. 3x10, F/Zn-3C (6±1kgfcm)
2
1

 Loading...


