Epson Stylus NX510/515/SX510W/515W/TX550W/NX415/SX410/415/TX410/419/NX215/SX210/215/TX210/213/219/ME OFFICE 510 Revision A
DISASSEMBLY/ASSEMBLY Disassembling the Printer Mechanism 134
Confidential
4.5.17 Ink System Unit
Parts/Components need to be removed in advance
Document Cover/ASF Cover/Scanner Unit/Panel Unit/Upper Housing/Card Slot
Cover/
Lower Housing
/Main Board Unit/Left Frame/Front Frame/Right Frame/CR
Motor/CR Scale/Hopper/Main Frame Assy/ASF Unit
Removal procedure
1. For NX510 series:
Detach the Waste Ink Tubes (x2) together with the Tube Stopper from the
Waste Ink Cover.
For SX410/SX210 series:
Detach the Waste Ink Tube (x1) together with the Tube Stopper from the
Waste Ink Cover.
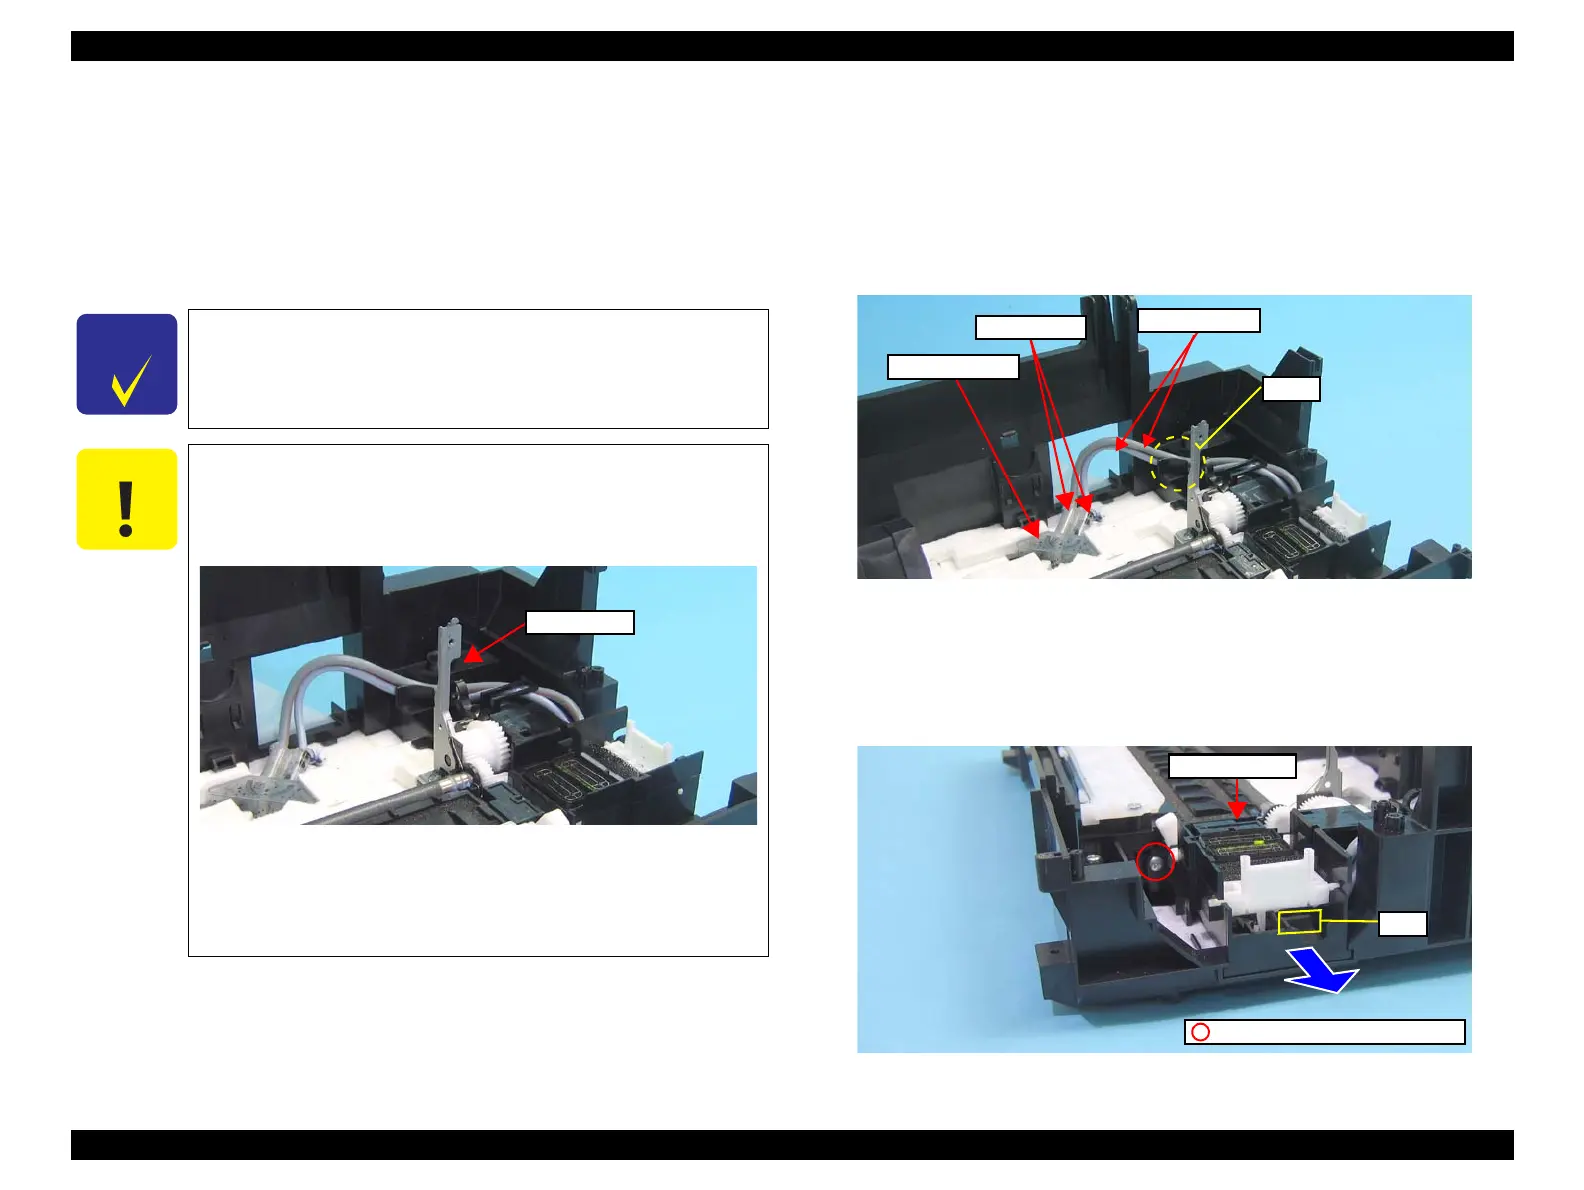
2. Detach the Waste Ink Tube (x2) from the groove of the Base Frame.
Figure 4-93. Detaching Waste Ink Tube
3. Remove the screw (x1) that secures the Ink System Unit.
4. Slide the Ink System Unit in the direction of the arrow while releasing the
hook with a flathead precision screwdriver or a similar tool, and remove the
Ink System Unit.
Figure 4-94. Removing the Ink System Unit
In this section, some disassembling procedures differ between
models. Skip the model-specified steps if not applied to your
model.
When disassembling/assembling the Ink System Unit, pay
attention to the following instructions.
Be cautious not to get injured with the sharp edges of the
Frame Support.
Figure 4-92. Sharp Edges of Frame Support
Do not touch or damage the Sealing Rubber or the Head
Cleaner.
Mark the connecting point before removing the Ink Tube.
Waste Ink Cover
Tube Stopper
Groove
Waste Ink Tubes
C.B.P. 3x6, F/Zn-3C (3.5±0.5kgfcm)
Ink System Unit
Hook

 Loading...


