Epson Stylus NX510/515/SX510W/515W/TX550W/NX415/SX410/415/TX410/419/NX215/SX210/215/TX210/213/219/ME OFFICE 510 Revision A
DISASSEMBLY/ASSEMBLY Removing the Housing 101
Confidential
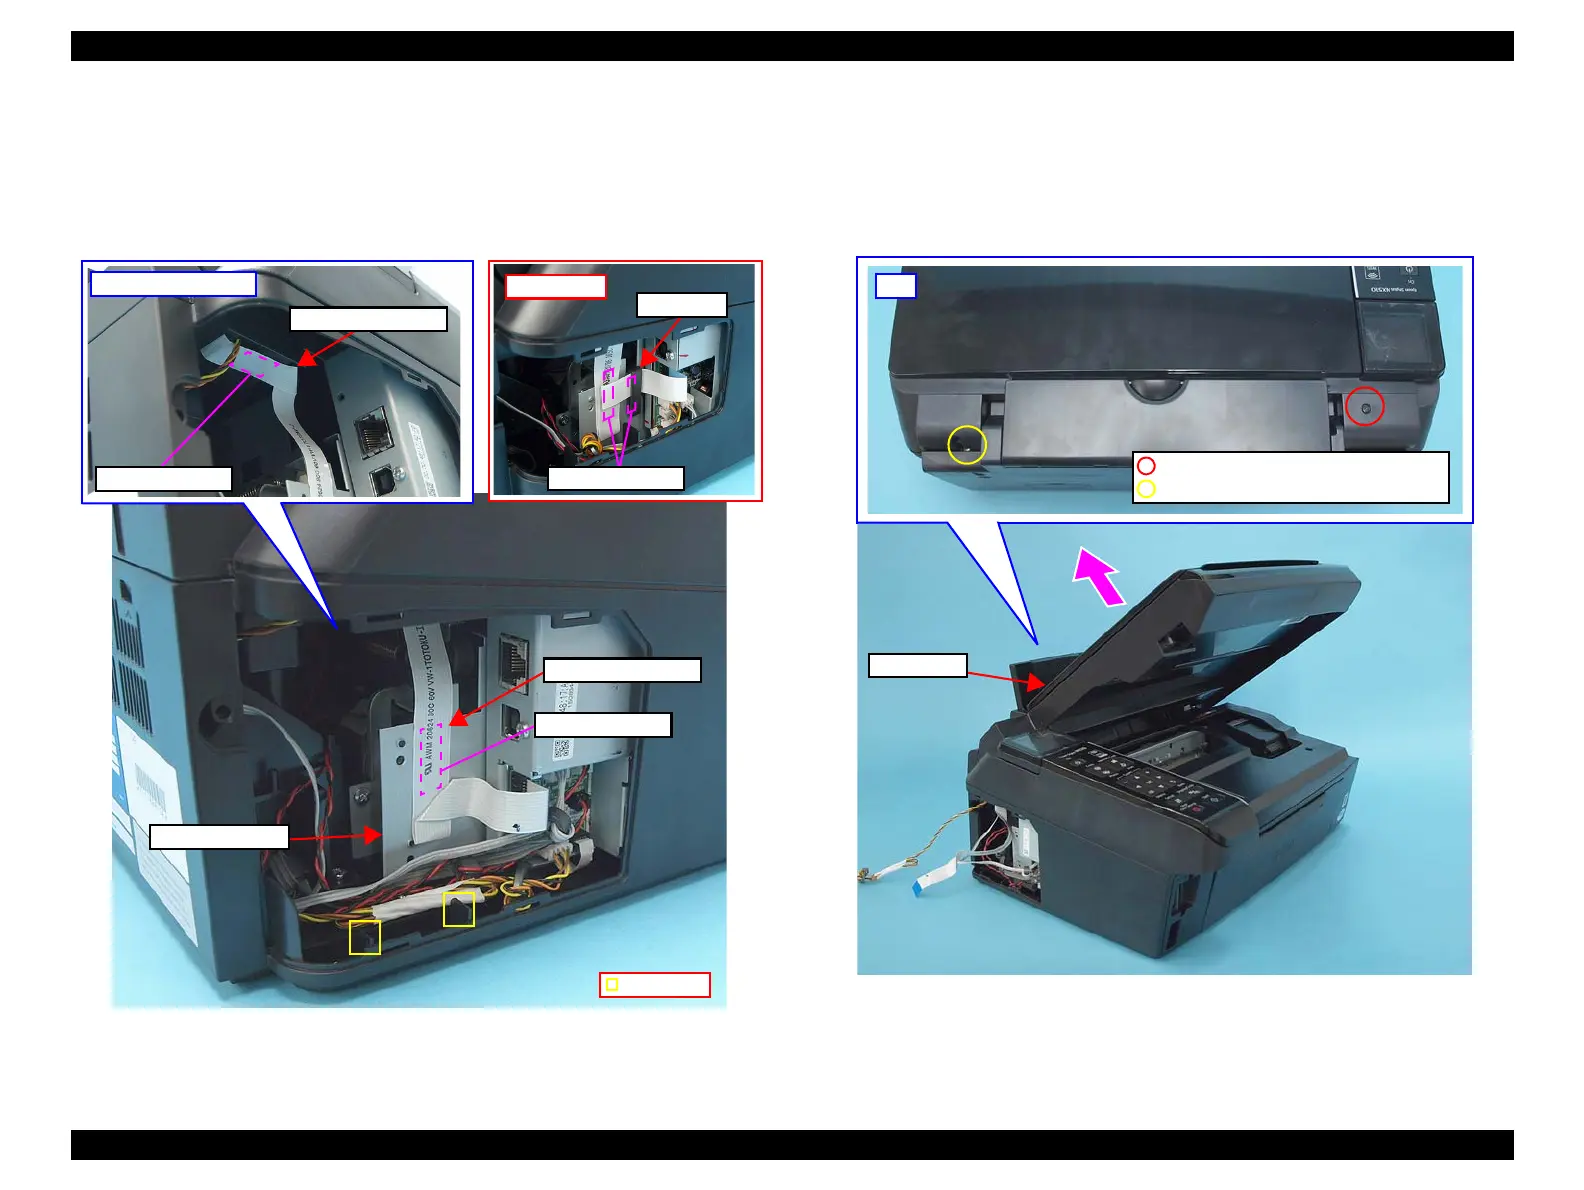
4. Peel off the double-sided tape (x1) that secures the Scanner Carriage FFC to
the Main Board Frame.
(For SX410 series, remove the Scanner Carriage FFC with the core.)
5. Peel off the double-sided tape (x1) that secures the Scanner Carriage FFC to
the Upper Housing.
Figure 4-8. Removing the Scanner Unit (2)
6. Remove the screws (x2) that secure the Scanner Unit.
7. Open the Scanner Unit.
8. Pull out the Scanner Unit in the direction of the arrow, taking care not to let
the Scanner Motor Cable and Scanner Carriage FFC get caught by the Upper
Housing.
Figure 4-9. Removing the Scanner Unit (3)
Double-sided tape
Scanner Carriage FFC
Upper Housing’s inside
Scanner Carriage FFC
Sharp Edge
Double-sided tape
SX410 series
Ferrite Core
Double-sided tape
Top
C.B.P. 3x10, F/Zb-3C (Black) (6±1kgfcm)
C.B.P. 3x10, F/Zn-3C (Silver) (6±1kgfcm)

 Loading...


