Epson Stylus NX510/515/SX510W/515W/TX550W/NX415/SX410/415/TX410/419/NX215/SX210/215/TX210/213/219/ME OFFICE 510 Revision A
DISASSEMBLY/ASSEMBLY Disassembling the Printer Mechanism 140
Confidential
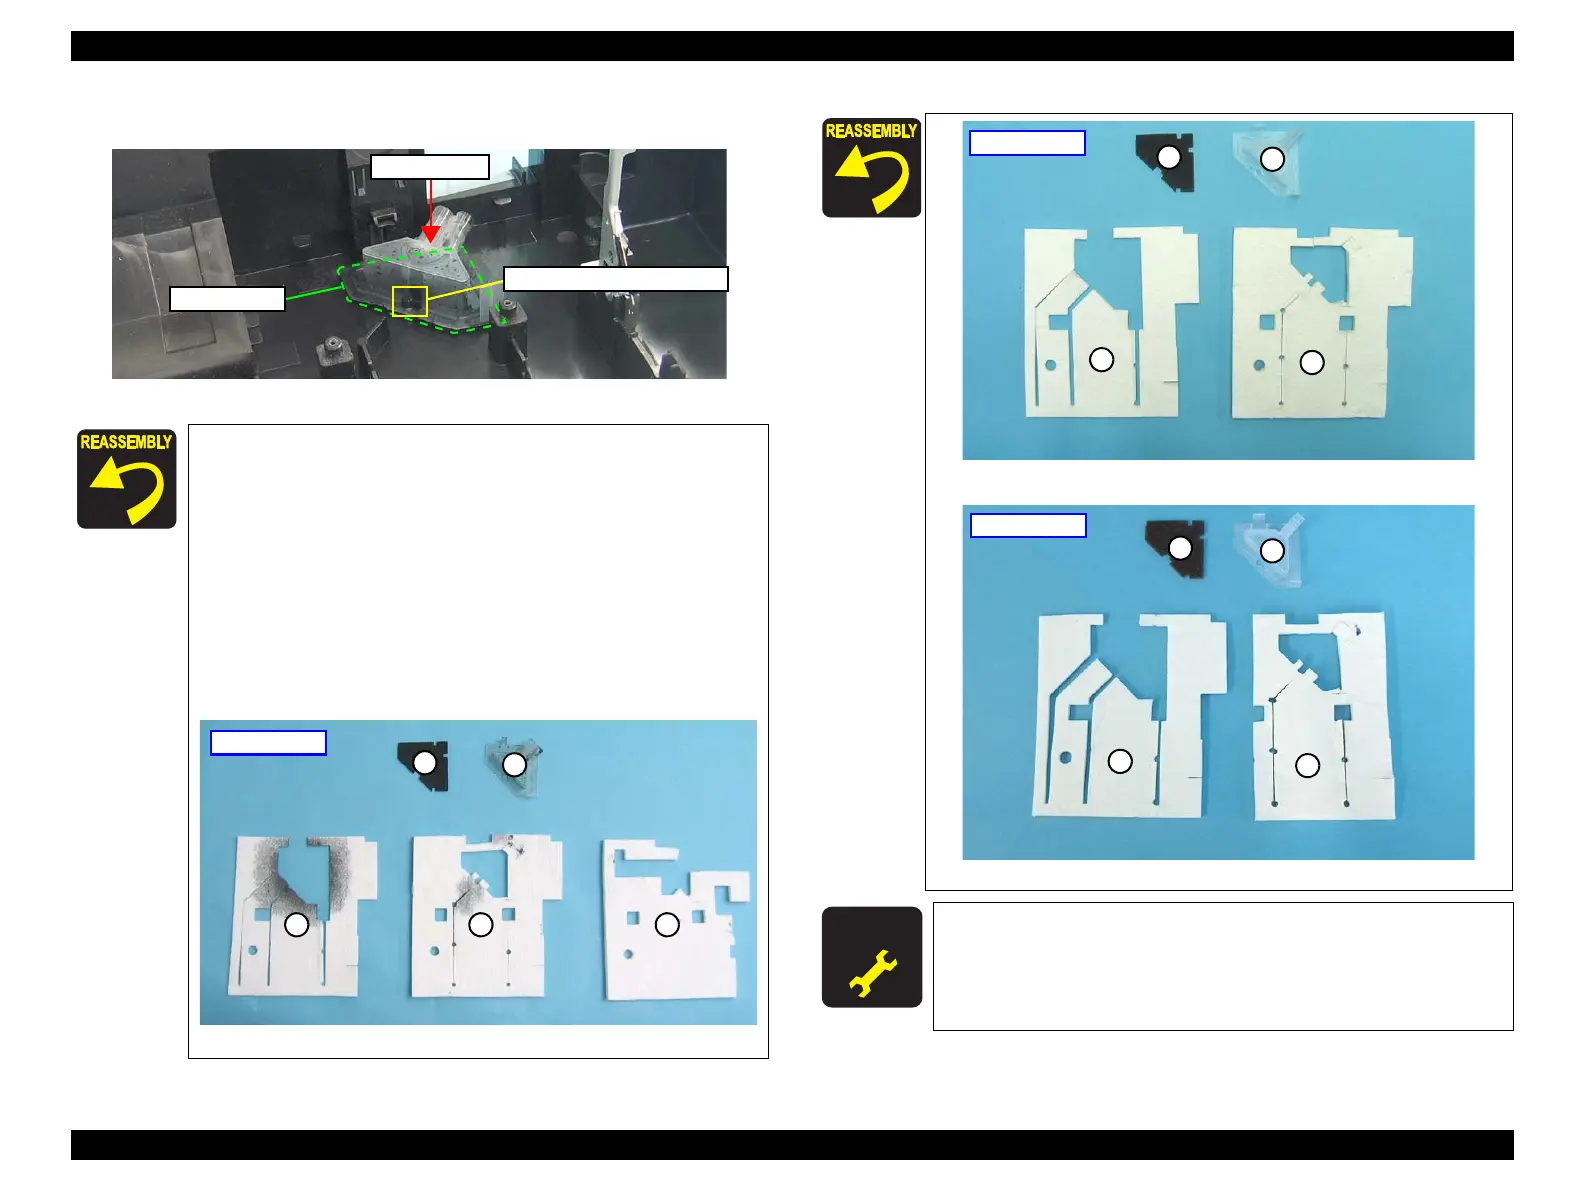
2. Remove the Waste Ink Cover and the Diffusion Sheet.
Figure 4-110. Removing the Waste Ink Cover and Diffusion Sheet
When installing the Waste Ink Cover, be sure to align the
dowel (x1) of the Base Frame with the positioning hole (x1) of
the Waste Ink Cover as shown in
Figure 4-110. Make sure to
confirm the cover is properly secured on the Diffusion Sheet
without any gap.
When installing the Diffusion Sheet, Waste Ink Cover, and the
Waste Ink Pads on section B, attach them in the order given in
the figure below.
• NX510 series: see Figure 4-111.
• SX410 series: see Figure 4-112.
• SX210 series: see Figure 4-113.
Figure 4-111. Installing the Waste Ink Pads (NX510 series)
Waste Ink Cover
Diffusion Sheet
Dowel and Positioning Hole
Figure 4-112. Installing the Waste Ink Pads (SX410 series)
Figure 4-113. Installing the Waste Ink Pads (SX210 series)
A D J U S T M E N T
R E Q U I R E D
Whenever the Waste Ink Pads is removed/replaced, the required
adjustments must be carried out.
• Chapter 5 “ ADJUSTMENT” (p.161)

 Loading...


