Epson Stylus NX510/515/SX510W/515W/TX550W/NX415/SX410/415/TX410/419/NX215/SX210/215/TX210/213/219/ME OFFICE 510 Revision A
DISASSEMBLY/ASSEMBLY Removing the Circuit Boards 110
Confidential
9. Remove each switch button from the Panel Cover.
Figure 4-29. Removing the Switch button
No. Button No. Button
1 Power SW button 10 OK SW button
2 Copy mode SW button 11 Right SW button
3 Memory Card mode SW button 12 Menu SW button
4 Photo mode SW button 13 Down SW button
5 Scan mode SW button 14 Back SW button
6 - SW button 15 Setup SW button
7 Up SW button 16 Display SW button
8 + SW button 17 Stop SW button
9 Left SW button 18 Start SW button
1
2
3
4
5
6
7
8
9
10
11
12
13
14
15
16 18
17
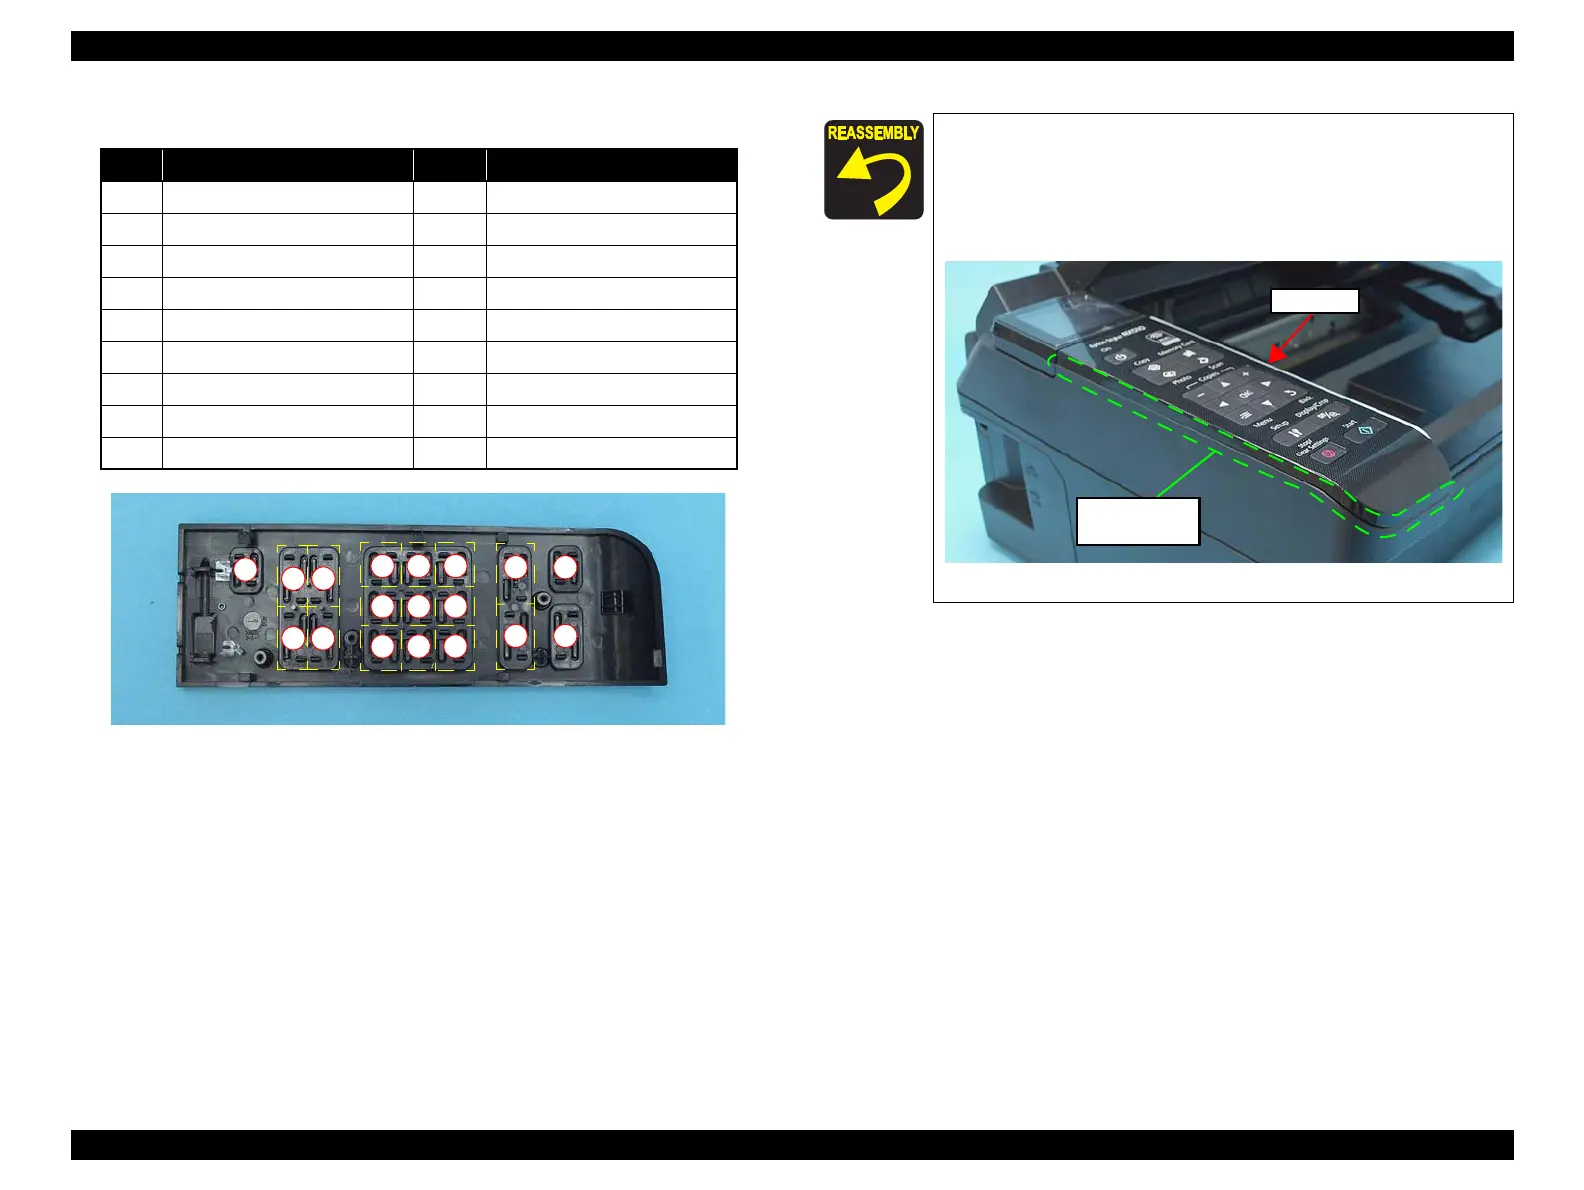
When installing the Panel Board, align the positioning holes
of the Panel Board with their positioning pins of the Panel
Housing as shown in
Figure 4-28.
When installing the Panel Unit, attach it without any gap with
the Upper Housing.
Figure 4-30. Installing the Panel Unit
Panel Unit
Attach it without
any gap.

 Loading...


