EPSON Stylus Photo R1900/R2880/R2000/R2000s/SC-P400 Series Revision I
Adjustment Adjustment 159
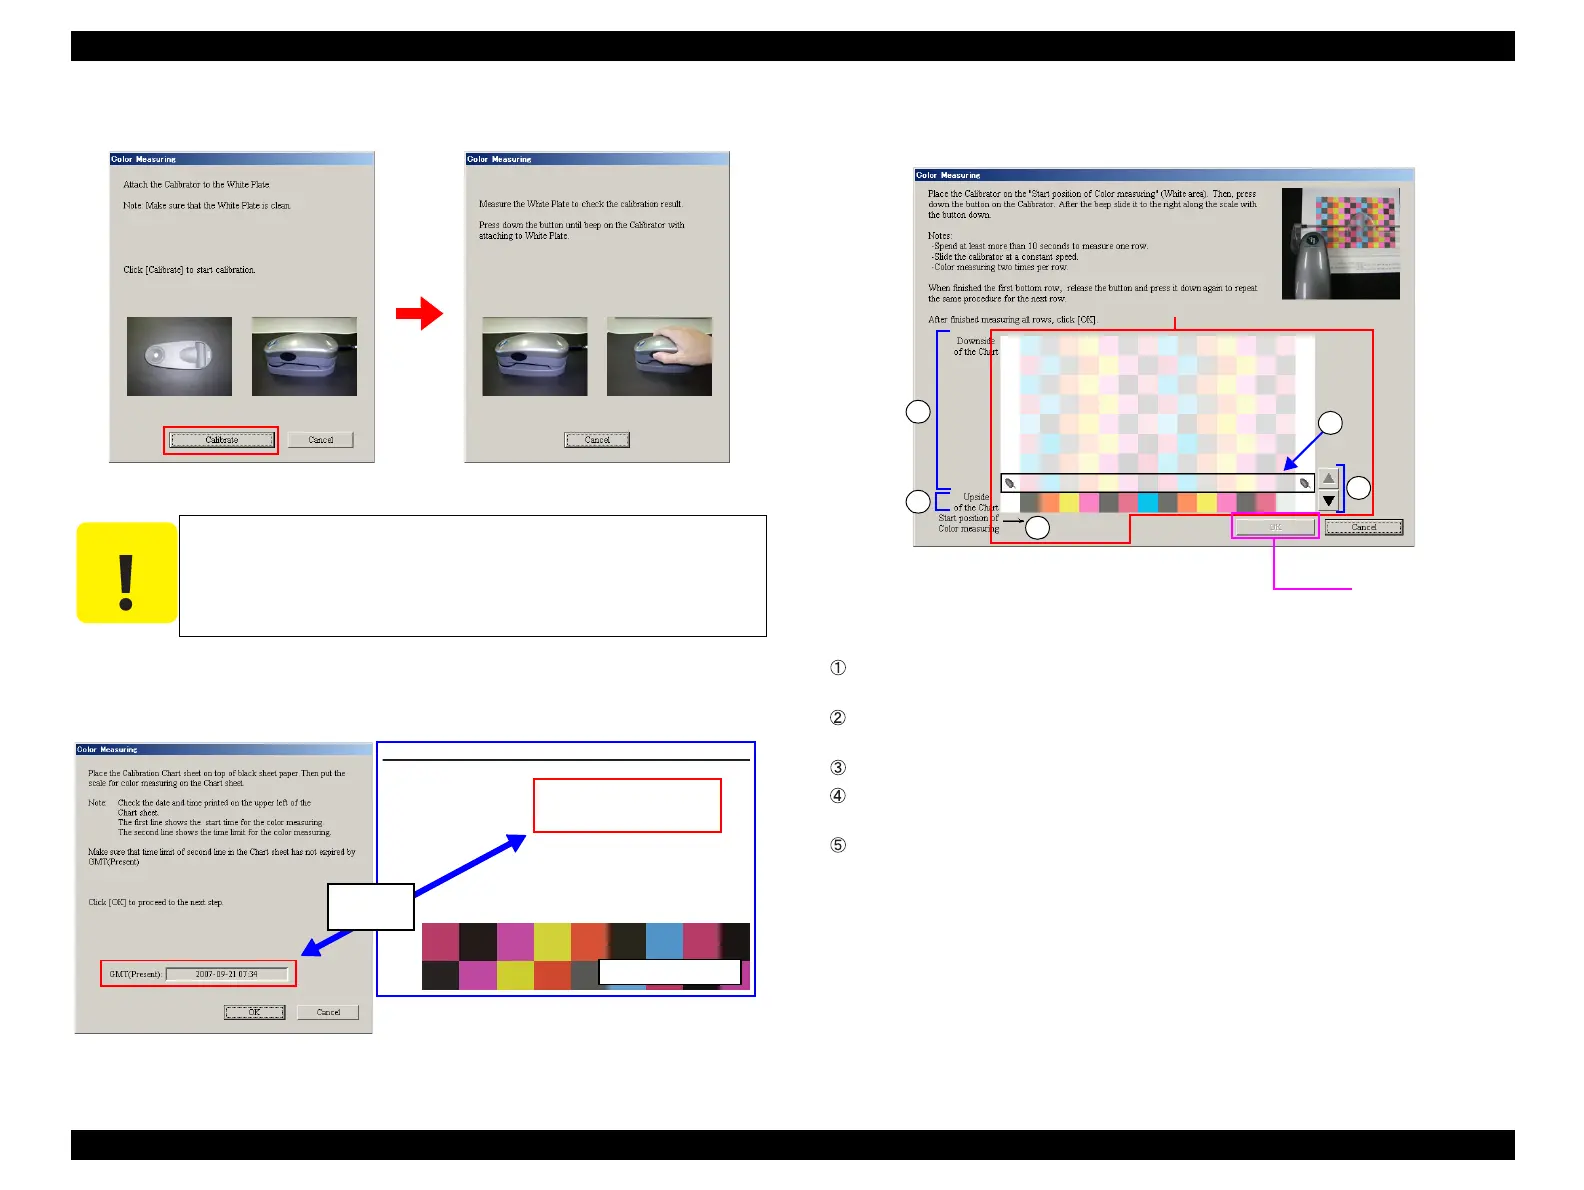
8. Place the Calibrator on the calibration plate, and click [Calibrate]
Figure 5-27. Preparing the Calibrator
9. After confirming that you are within the color measurement time limit, place the
Calibration Chart sheet on a black paper, put the scanning ruler on the Chart sheet,
then click [OK].
Figure 5-28. Preparing the Calibration Chart
10. Follow the on-screen messages to measure the Chart. After the color measurement
is finished, click [OK].
Figure 5-29. Starting the Color Measurement
The white reference tile on the calibration plate should be clean.
Clean off any dirt with alcohol or other organic solvent.
The calibration plate and the Calibrator are used as a pair. Do
not use a calibration plate supplied with an another Calibrator.
2007-09-21 16:07 ( GMT 2007-09-21 07:07)
USBID:3030334852
Printer:EPSON PX
2007-09-28 16:02 ( GMT 2007-09-28 07:02)
Color measurement
“completed” rows
Patches in the completed rows are displayed in colors created
according to the measurement result.
Color measurement
“not completed” rows
Rows that have not been measured are displayed in pale color.
Arrow Indicates the start position of color measuring.
Cursor Automatically moves up when color measurement of a row is
completed.
Scroll buttons Scroll the cursor up or down. (These buttons are available for
already measured rows or the row currently being measured.)
This button is
enabled after color
measurement is
completed.
Color Patch grid
2
1
3
5
4

 Loading...


